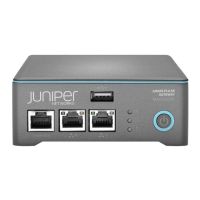
To install a hard drive in a Junos Pulse Gateway:
1. Press the lever release button on the front of the hard drive carrier, and extend the
lever to its fully open position.
2. Slide the hard drive carrier assembly into the slot until it stops. Do not push the drive
into the slot any farther.
3. Close the lever until it locks and is flush with the front of the carrier.
This action pushes the hard drive carrier assembly into the slot and engages the
connector on the hard drive with the connector on the chassis backplane.
Related
Documentation
Removing the Hard Drive on page 92•
• Monitoring the Junos Pulse Gateway Components Using LEDs on page 99
Installing the Integrated Access Service Modules Overview
To install the MAG-SM160, MAG-SM360, MAG-SM161 and MAG-SM361 service modules
in the Junos Pulse Gateway MAG6610 and MAG6611:
1. Remove the blank faceplate. See “Removing the Faceplate” on page 41.
2. Pull the ejector lever outward until it is fully open.
3. Attach an electrostatic discharge (ESD) grounding strap to your bare wrist, and connect
the strap to the grounding point on the back of the device.
4. Remove the service module from the electrostatic bag.
5. Grasp the faceplate and align the notches in the connector at the rear of the service
module with the notches in the in the Junos Pulse Gateway.
6. Slide the service module in until it lodges firmly in the device.
7. Close the release lever until it locks and is flush with the front of the chassis.
NOTE: The MAG-SM160, MAG-SM360, MAG-SM161 and MAG-SM361 service
modules are paired with hard drives. When moving a service module from
one slot in the chassis to another, you must move the corresponding hard
drive from the old slot to the new slot as well.
Before using the MAG-SM160 and MAG-SM360 service modules, you must configure
basic network and machine information through the serial console to make the service
module accessible to the network. For more information, see “Configuring the MAG2600,
MAG-SM160 and MAG-SM360 Service Module” on page 83.
Related
Documentation
Removing the Faceplate on page 41•
• Removing an Integrated Access Service Module on page 93
• Installing the MAG-SM160 Kit on page 41
49Copyright © 2014, Juniper Networks, Inc.
Chapter 8: Installing Junos Pulse Gateway Components

 Loading...