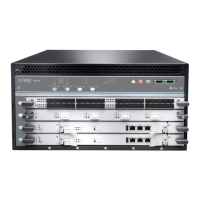
Table 63: Rack Requirements and Specifications for an MX240 Router
GuidelinesRack Requirement
Use a four-post rack or a two-post rack. You can mount the router on any four-post
or two-post rack that provides bracket holes or hole patterns spaced at 1 U
(1.75-in./4.44-cm) increments and that meets the size and strength requirements
specified in this table.
A U is the standard rack unit defined Cabinets, Racks, Panels, and Associated Equipment
(document number EIA-310-D) published by the Electronic Components Industry
Association (ECIA) (http://www.ecianow.org).
Rack type and mounting bracket hole
spacing
•
Ensure that the rack is a 19-in. rack as defined in Cabinets, Racks, Panels, and
Associated Equipment (document number EIA-310–D) published bythe Electronics
Industry Association (http://www.eia.org).
•
Ensure that the rack is one of the following standard lengths:
•
23.62 in. (600 mm)
•
30.0 in. (762 mm)
•
21.5 in. (800 mm)
•
The rack rails must be spaced widely enough to accommodate the router chassis's
external dimensions: 8.71 in. (221 mm) high, 24.5 in. (622 mm) deep, and
17.45 in. (443 mm) wide. The spacing of rails and adjacent racks must also allow
for the clearances around the router and rack that are specified in “MX240 Router
Clearance Requirements for Airflow and Hardware Maintenance” on page 114.
•
The chassis height of 8.71 in. (22.1 cm) is approximately 5 U. A U is the standard rack
unit defined in Cabinets, Racks, Panels, and Associated Equipment (document number
EIA-310-D) published by the Electronics Industry Association. You can stack several
MX240 Router units in a rack that has sufficient usable vertical space.
•
The rack must be strong enough to support the weight of the fully configured router,
up to 128 lb (58.1 kg). If you stack multiple fully configured routers in one rack, it
must be capable of supporting the combined weight of the routers.
•
Ensure that the spacing of rails and adjacent racks allows for the proper clearance
around the switch and rack as specified in “MX240 Router Clearance Requirements
for Airflow and Hardware Maintenance” on page 114.
Rack size and strength
•
Secure the rack to the building structure.
•
If earthquakes are a possibility in your geographical area, secure the rack to the
floor.
•
Secure the rack to the ceiling brackets as well as wall or floor brackets for maximum
stability.
Rack connection to the building
structure
113Copyright © 2017, Juniper Networks, Inc.
Chapter 9: Preparation Overview

 Loading...