3. Plug the terminal block into the relay contact, and use a 2.5-mm flat-blade screwdriver
to tighten the screws on the face of the block.
4. Attach the other end of the wires to the external device.
To attach a reporting device for the other kind of alarm, repeat the procedure.
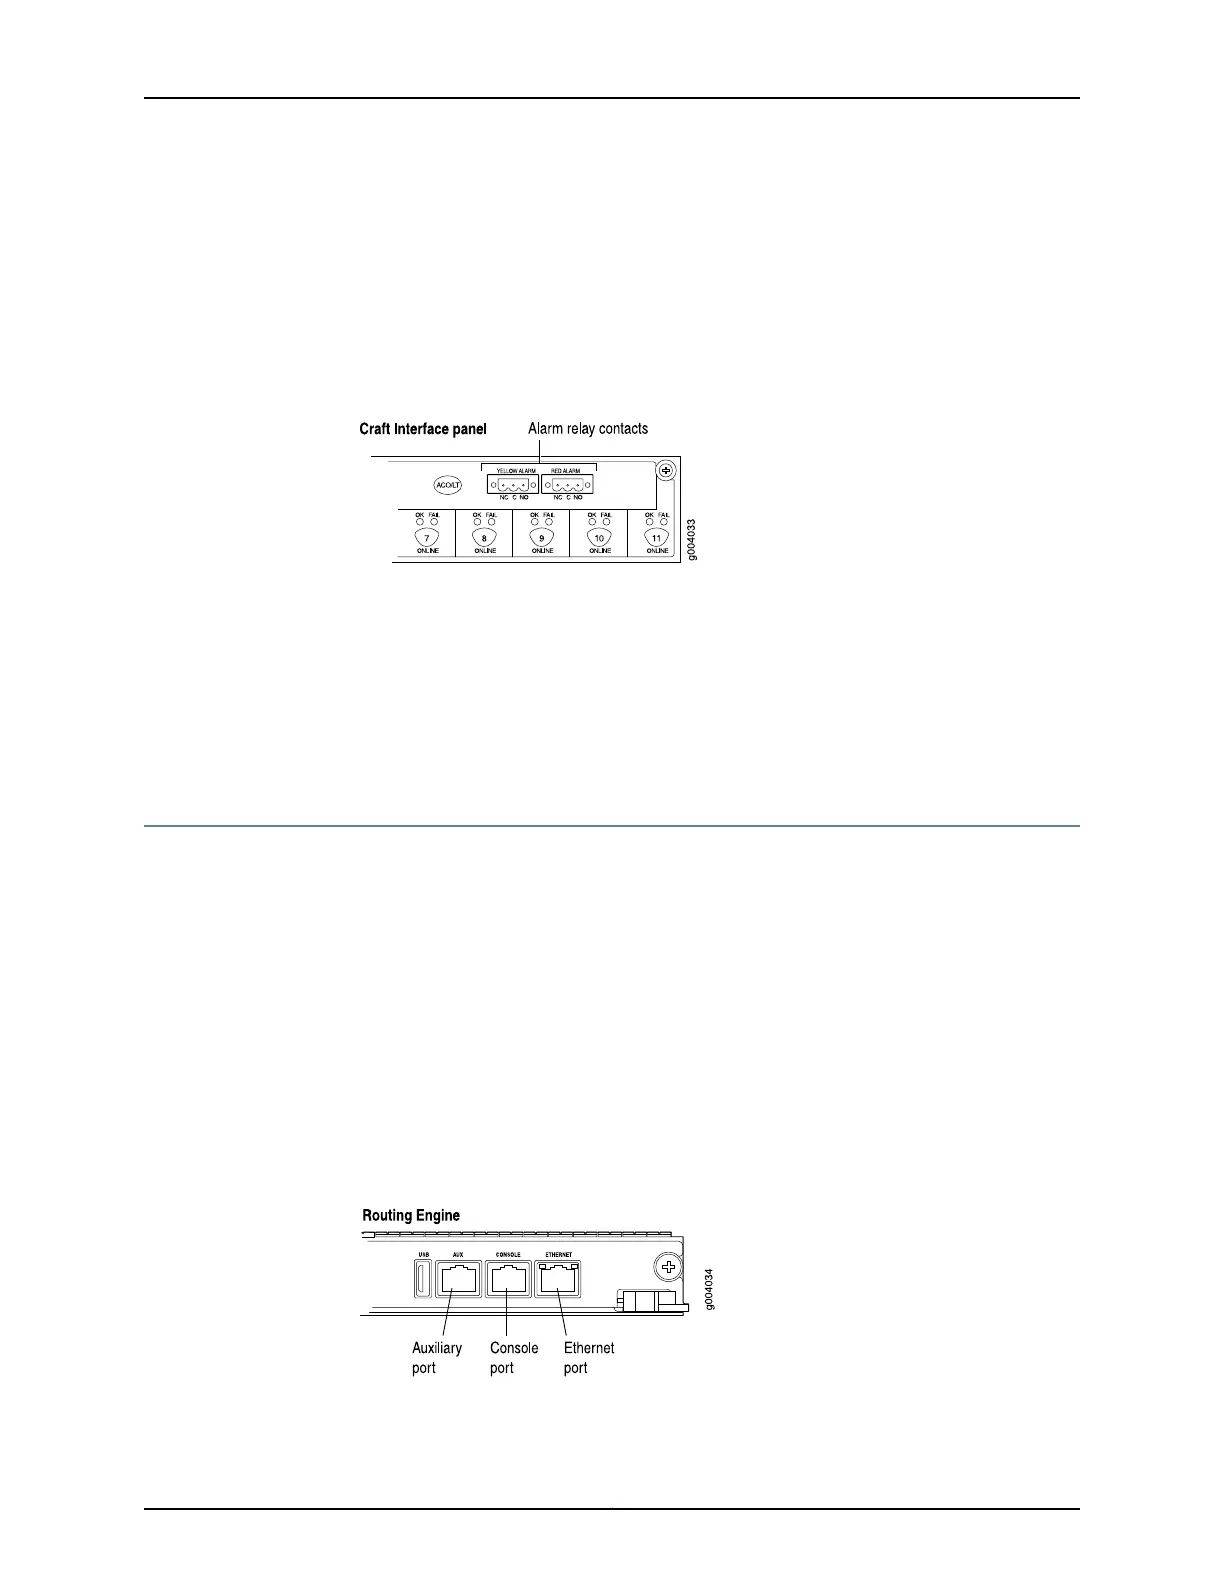
Figure 80: Alarm Relay Contacts
Related
Documentation
Tools and Parts Required for MX240 Router Connections on page 211•
• Connecting DPC, MPC, MIC, or PIC Cables to the MX240 Router on page 217
• Connecting the Alarm Relay Wires to the MX240 Craft Interface on page 267
• Routing Engine Interface Cable and Wire Specifications for MX Series Routers on
page 122
Connecting the MX240 Router to a Network for Out-of-Band Management
To connect the Routing Engine to a network for out-of-band management, connect an
Ethernet cable with RJ-45 connectors to the ETHERNET port on the Routing Engine. One
Ethernet cable is provided with the router. To connect to the ETHERNET port on the
Routing Engine:
1. Turn off the power to the management device.
2. Plug one end of the Ethernet cable (Figure 77 on page 212 shows the connector) into
the ETHERNET port on the Routing Engine. Figure 76 on page 212 shows the port.
3. Plug the other end of the cable into the network device.
Figure 81: Ethernet Port
Copyright © 2017, Juniper Networks, Inc.214
MX240 3D Universal Edge Router Hardware Guide