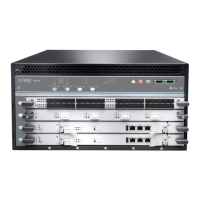
5. Lift the router on to the rack. Because of the weight of the router, we recommend that
you use a mechanical lift.
•
Installing the MX240 Router By Using a Mechanical Lift on page 177
•
Installing the MX240 Chassis in the Rack Manually on page 189
6. Connect cables to the network and external devices as described in “Connecting the
MX240 Router to Management and Alarm Devices” on page 211.
7. Connect the groundingcable as described in “Grounding theMX240Router” on page198.
8. Connect the AC power cord or DC power cables:
•
Powering On an AC-Powered MX240 Router on page 200
•
Powering On a DC-Powered MX240 Router with Normal Capacity Power Supplies
on page 204
9. Power on the router:
10. Perform the initial system configuration as described in “Initially Configuring the MX240
Router” on page 219.
Related
Documentation
Definition of Safety Warning Levels•
• MX240 Router Physical Specifications on page 109
Tools Required to Install the MX240 Router with a Mechanical Lift
To install the router, you need the following tools:
•
Mechanical lift
•
Phillips (+) screwdriver, number 2
•
7/16-in. (11 mm) nut driver
•
ESD grounding wrist strap
Related
Documentation
Removing Components from the MX240 Router BeforeInstalling it with a Lift on page 172•
• Installing the MX240 Router By Using a Mechanical Lift on page 177
• Reinstalling Components in the MX240 Router After Installing it with a Lift on page 179
Removing Components from the MX240 Router Before Installing it with a Lift
To make the router light enough to install, you first remove most components from the
chassis. The procedures in this section for removing components from the chassis are
for initial installation only, and assume that you have not connected power cables to the
Copyright © 2017, Juniper Networks, Inc.172
MX240 3D Universal Edge Router Hardware Guide

 Loading...