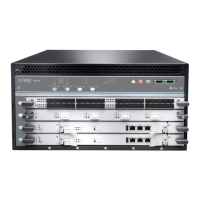
Figure 101: Installing an AS MLC
OK
MASTER
FAN
ONLINE
OFFLINE
0
0
1
0
2
2
1
0
1
1
PEM
FAIL
FAIL
FAIL
FAIL
ESD
OK
OK
OK
ACO/LT
YELLOW ALARM
RED ALARM
NC
NO
C
NC
NO
C
MX240
REO
RE1
0
1
2
3
SCB
SCB
g007338
Related
Documentation
Preventing Electrostatic Discharge Damage to an MX240 Router on page 444•
• Replacing an MX240 AS MLC on page 325
• Installing an MX240 AS MSC on page 251
• Installing an MX240 AS MXC on page 252
Installing an MX240 AS MSC
To install an AS MSC (see Figure 102 on page 252):
1. Attach an ESD grounding strap to your bare wrist and connect the strap to one of the
ESD points on the chassis.
2. Align the notches in the connector at the rear of the AS MSC with the notches in the
AS MSC slot (slot 0—the top slot in the AS MLC ), and then slide the AS MSC in until
it lodges firmly in the AS MLC.
CAUTION: Slide the AS MSC straight into the slot to avoid damaging the
components on the bottom of the AS MSC.
3. Use one of the following methods to bring the AS MSC online:
•
Press the AS MSC offline/online button until the LED light turns green.
•
Issue the following CLI command:
user@host> request chassis pic fpc-slot fpc-slot pic-slot pic-slot online
For more information about the command, see the CLI Explorer.
The normal functioning status LED confirms that the AS MSC is online. You can also
verify correct AS MSC functioning by issuing the show chassis fpc pic-status.
251Copyright © 2017, Juniper Networks, Inc.
Chapter 21: Installing Components

 Loading...