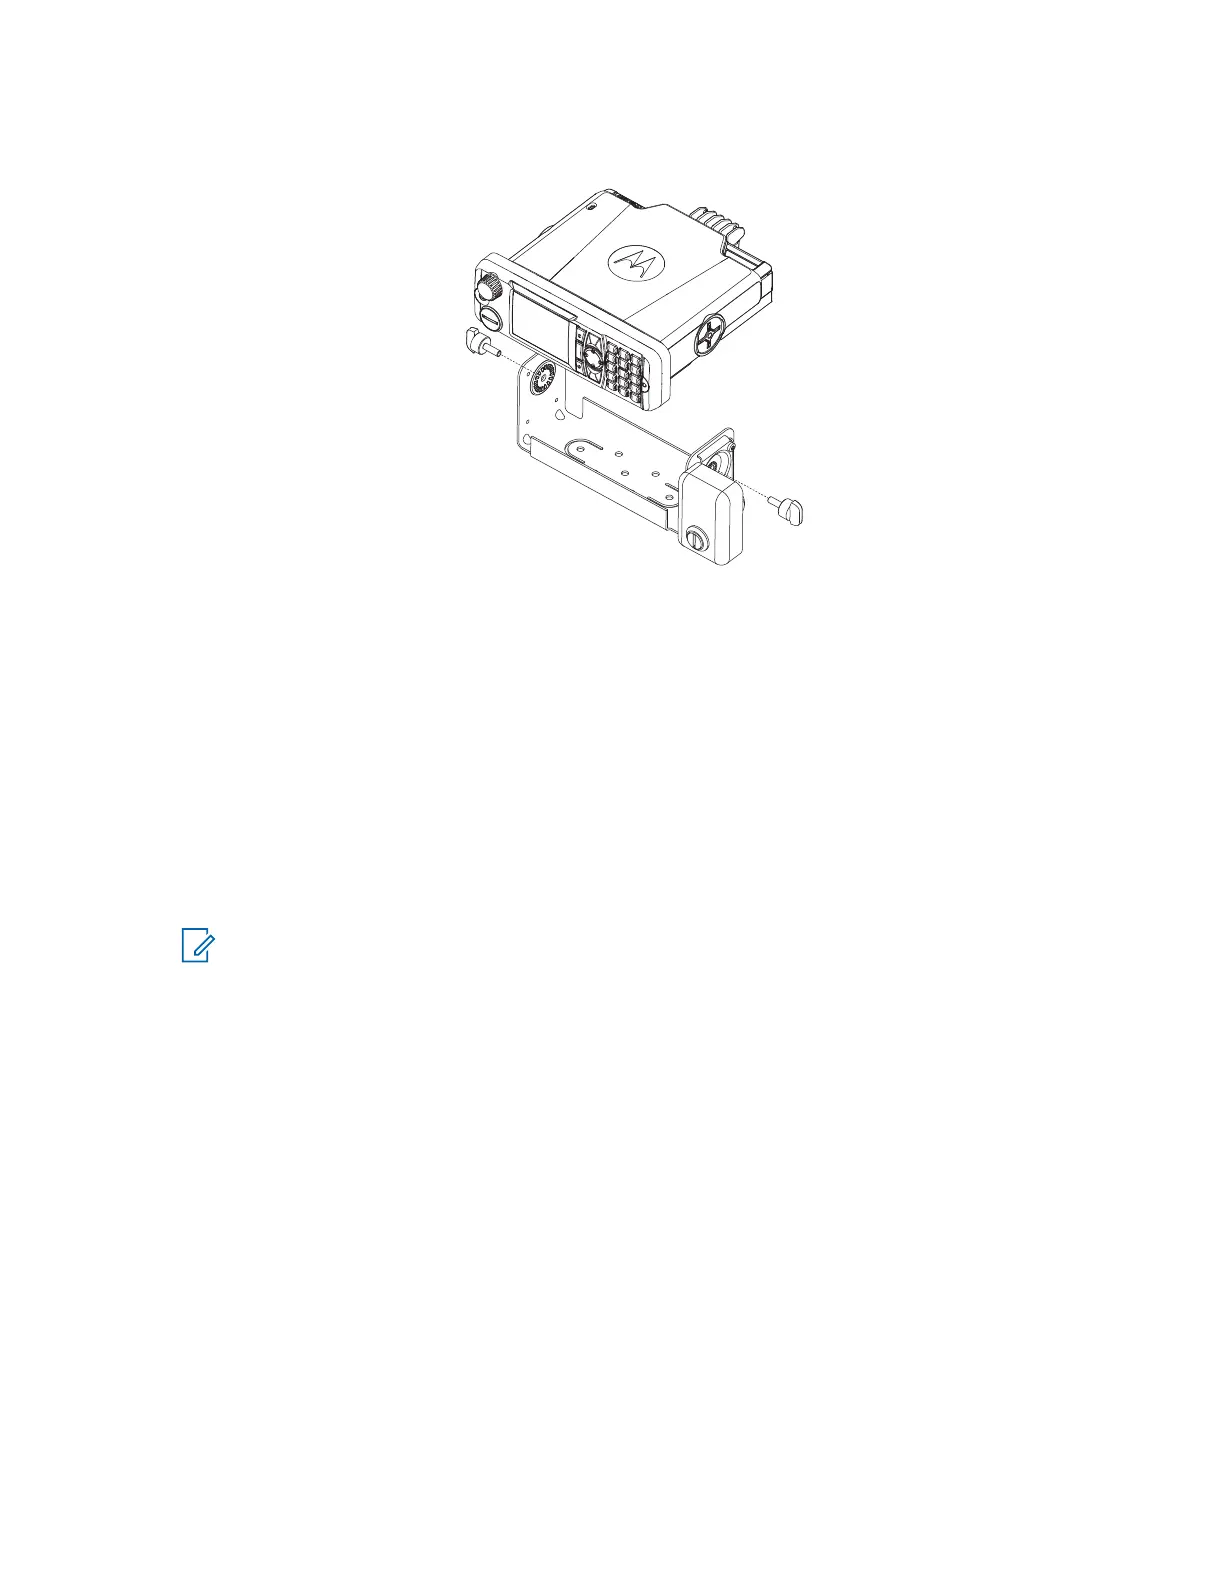
Figure 54: Terminal into Key Locked Mount Trunnion (RLN4779_)
3. Select the transmission hump, or open underneath portion of the dash to mount your terminal.
When mounting the trunnion on the transmission hump, be careful that the transmission housing is not
affected.
4. To mark the hole positions on the mounting surface, use the trunnion mounting bracket as a template.
Use the innermost three holes for a curved mounting surface, such as the transmission hump, and the
three outermost holes for a flat surface such as under the dash.
5. To drill a hole at each location, center-punch the spots you marked and use a 4 mm (5/32 in.) bit for
drilling.
6. To secure the trunnion mounting bracket to the mounting surface, use the three self-tapping screws
provided.
7. Slide the terminal into the trunnion. Secure the terminal with the two wing screws provided.
NOTE: The keypad labeling of the control head varies according to the specific customer or
country requirements.
8. Ground your radio housing to the nearest vehicle chassis ground point. To ground your radio housing,
perform one of the following:
● Remove the paint from the part of the trunnion that touches your radio and vehicle chassis.
● Connect a short cable with ring lugs on both ends to the chassis under the wing screw.
MN009998A01-AA
Chapter 3: Radio Installation
88