→
The Master channel strip switches to the Cue channel strip. Here you can adjust the Cue
channel’s level and panoramic position, along with the destination you want to send the
Cue channel to. As destination, choose for example another output pair into which you
will have plugged your headphones. These settings are described in section ↑8.1.4, Con-
figuring the Master and Cue Outputs of MASCHINE.
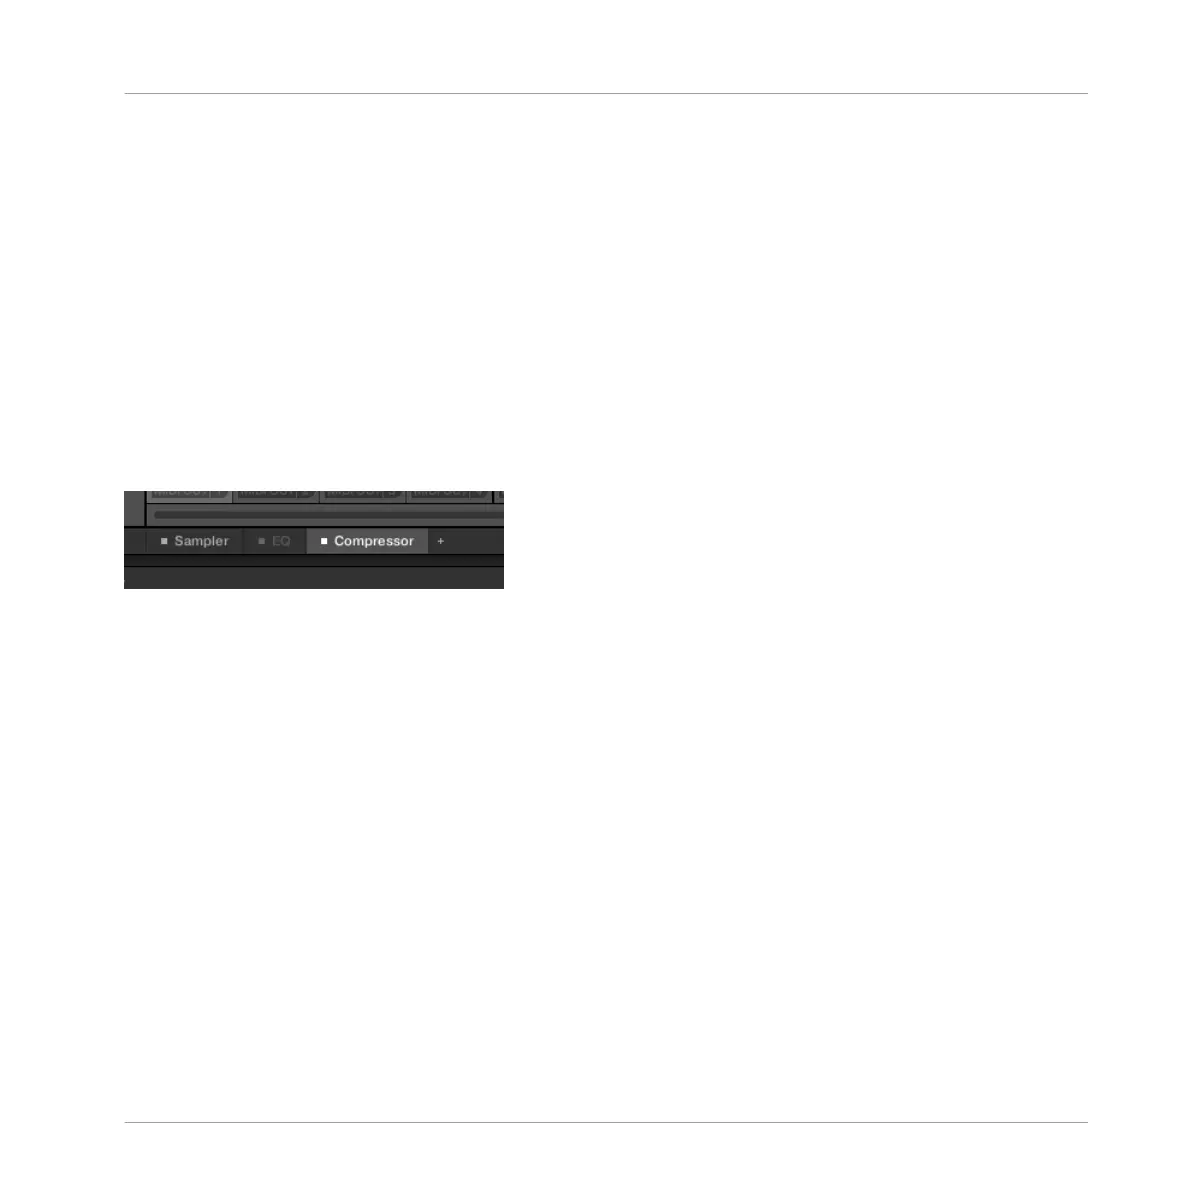
9.3 The Plug-in Chain
In the middle of the Mix view, right under the Mixer, you see an horizontal bar listing all Plug-
ins loaded in the focused channel: the Plug-in Chain. In the Plug-in Chain, Plug-ins are ar-
ranged into an horizontal series, the audio travelling from left to right through each Plug-in of
that channel.
A Plug-in Chain with the Compressor selected and the EQ bypassed.
Except for its horizontal layout, the Plug-in Chain has the same functionality as the Plug-in
List found in the channel strips of the Mixer above — namely to organize the Plug-ins of that
channel:
▪ Click a Plug-in name to select it. If this Plug-in is currently hidden in the Plug-in Strip un-
derneath, it automatically scrolls to show the interface of that Plug-in.
▪ Click the little “+” icon at the end of the chain and select a Plug-in in the Plug-in menu to
load it at the end of the chain, or right-click (Mac OS X: [Ctrl]-click) a Plug-in name to re-
place this Plug-in with another one. See section ↑6.1.3, Loading, Removing, and Replacing
a Plug-in for more information.
▪ Click the little square on the left of a Plug-in name to bypass this Plug-in slot (bypassed
slots are grayed out). Click the little square again to unmute the Plug-in slot and insert the
Plug-in back into the processing chain. See section ↑6.1.5, Bypassing Plug-in Slots for
more information.
Controlling Your Mix
The Plug-in Chain
MASCHINE MIKRO - Manual - 481