Make a scan and remove a strip
Introduction
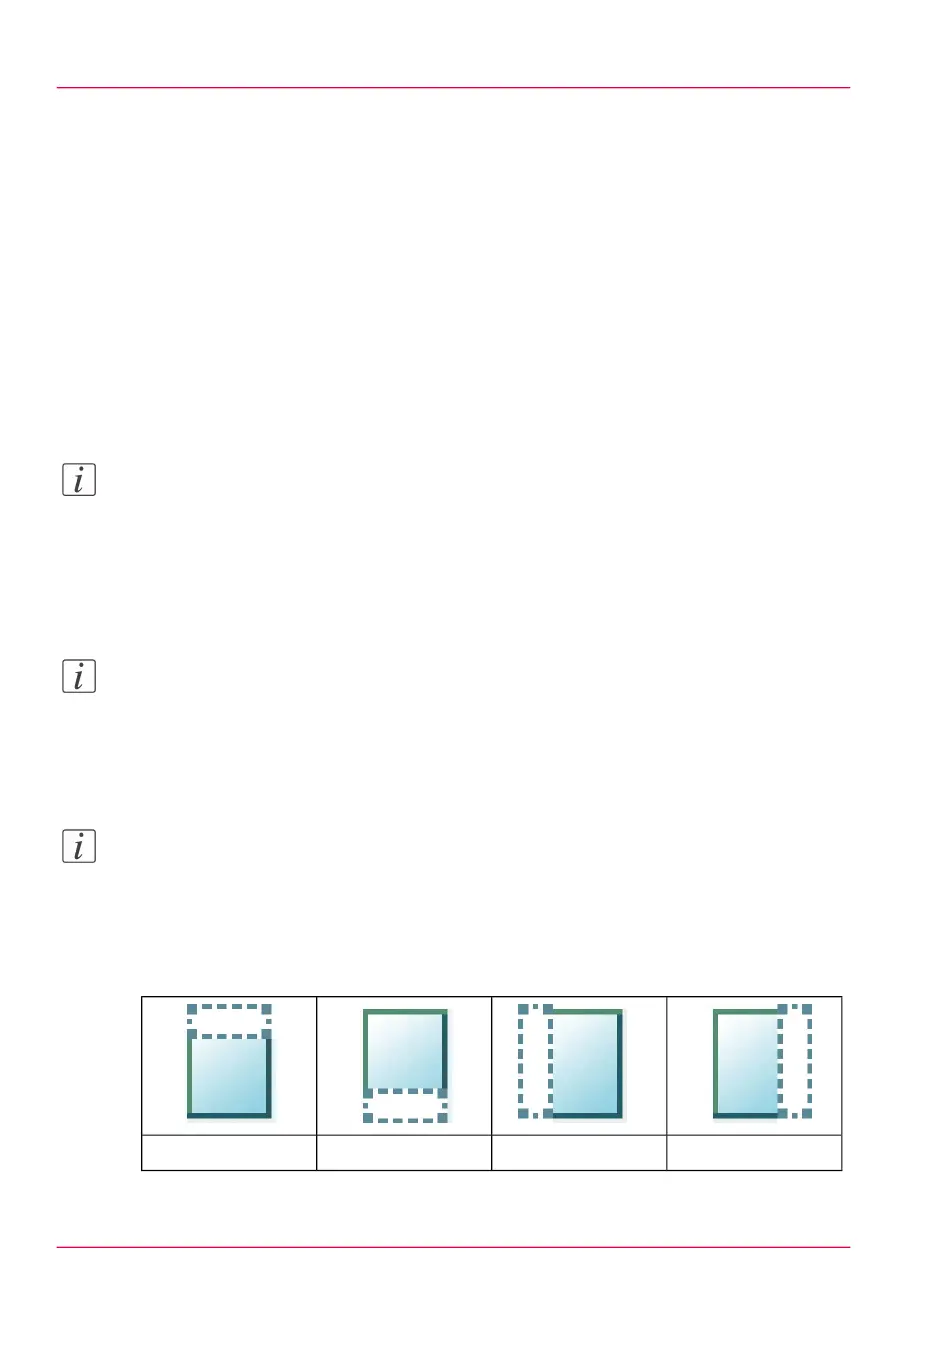
When you have an original with a strip, you can remove the strip from your scanned file.
Use the option 'Remove strip' on the user panel to scan an original with a strip and remove
the strip from the file. You can remove a strip from the top, the bottom, the left, or the
right side of the original.
Before you begin
When you remove a strip, make sure that you scan all the required information.
Note:
For more information on the file size settings, see ‘Preset: File size ’ on page 264.
How to make a scan and remove a strip
1.
Feed the original face up and centred on the original feeding table.
Note:
You do not need to centre the original precisely. The exact position of the original is au-
tomatically detected by the scanner.
2.
Tap the 'Scan' tile on the user panel and select your preferred location in the scan Smart
Access.
Note:
When you do not select a location the file is sent to the public Smart Inbox.
3.
Tap the 'Scan' tile again. A window with a list of presets opens.
4.
Tap 'All settings'. A list with settings opens.
5.
Tap 'Remove strip' under the 'File size' preset.
#
The 'Right' stripThe 'Left' stripThe 'Bottom' stripThe 'Top' strip
Chapter 4 - Use the Printing System272
Make a scan and remove a strip