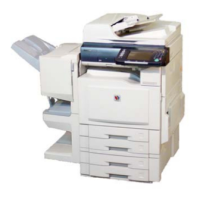
640
DP-C405/C305/C265
FEB 2008Ver. 1.1
8.4. Setting
8.4.1. Internet Fax Function Confirmation
It is not necessary to set the parameter for the following suffix (Destinations). The Internet Fax Firmware is
automatically loaded with the Host Firmware.
PB : UK PK : China PT : Taiwan PU : USA
Note:
For other destinations below, set the Fax Service Mode 1 Function Parameter #005 (Destination Code)
by following the steps below.
000 : Austria 001 : UK 002 : Canada 003 : Denmark
004 : Taiwan 005 : Finland 006 : Germany 007 : Netherlands
008 : Italy 009 : Spain 010 : Hong Kong 011 : Australia
012 : Switzerland 013 : Norway 015 : Portugal 016 : Ireland
017 : Belgium 018 : Sweden 019 : Turkey 020 : USA
021 : France 022 : New Zealand 025 : Japan 030 : Czech
031 : Russia 032 : Greece 033 : Hungary 034 : Indonesia
035 : South Korea 038 : Malaysia 039 : China 045 : Thailand
048 : South Africa 049 : Singapore 050 : Universal 051 : East Europe
1. Press the “Function”, “Copy”, and the “3” keys simultaneously on the Control Panel.
2. Input the password, and select the “OK” button to enter the Service Mode (default password is
00000000).
3. Press the “9” key on the Control Panel, and then press the “Start” key to enter the F9 Service Mode
(Unit Maintenance).
4. Select “00 Fax Service Mode” on the Touch Panel display.
5. Select “01 Function Param. Setting” on the Touch Panel display.
6. Scroll the menu with the “” button on the Touch Panel display, and select “05 Destination Code”,
and then select the “Input” buttons.
7. Input the new Destination Code, and select the “OK”, “Close” buttons on the Touch Panel display.
8. Scroll the menu with the “” button on the Touch Panel display, and select “06 RAM Initialize”.
9. Select “01 Parameter Initialize”, and the “Yes” button on the Touch Panel display.
10. Select the “Close” button three time on the Touch Panel display.
11. Press the “Function”, and the “C (Clear)” keys simultaneously on the Control Panel to exit the
Service Mode.
12. Turn the Power Switch on the Left side of the machine to the OFF ( ) , and back to the ON ( I )
position to enable the parameter settings.
8.4.2. Set the Date and the Time
1. Press the “Function” key on the Control Panel.
2. Select “General Settings” on the Touch Panel display.
3. Scroll the menu with the “” button on the Touch Panel display, and select “09 Key Operator
Mode”.
4. Enter the 8 character Code (default is 00000000), and then select the “OK” button.
5. Scroll the menu with the “” button on the Touch Panel display, and select “22 Date Time Setting”.
6. Select “Input”, and then enter the Date and the Time.
7. Select the “OK” button on the Touch Panel display.
8. Select the “Close” button on the Touch Panel display.
9. Press the “Reset” key on the Control Panel, to exit the General Settings mode.