Section 7. Component Procedures Model 8210/8250 Maintenance Manual
Lead Acid Battery Electrical Components
7-42 Publication: 1146945/001, Revised: 25 Sep 2018
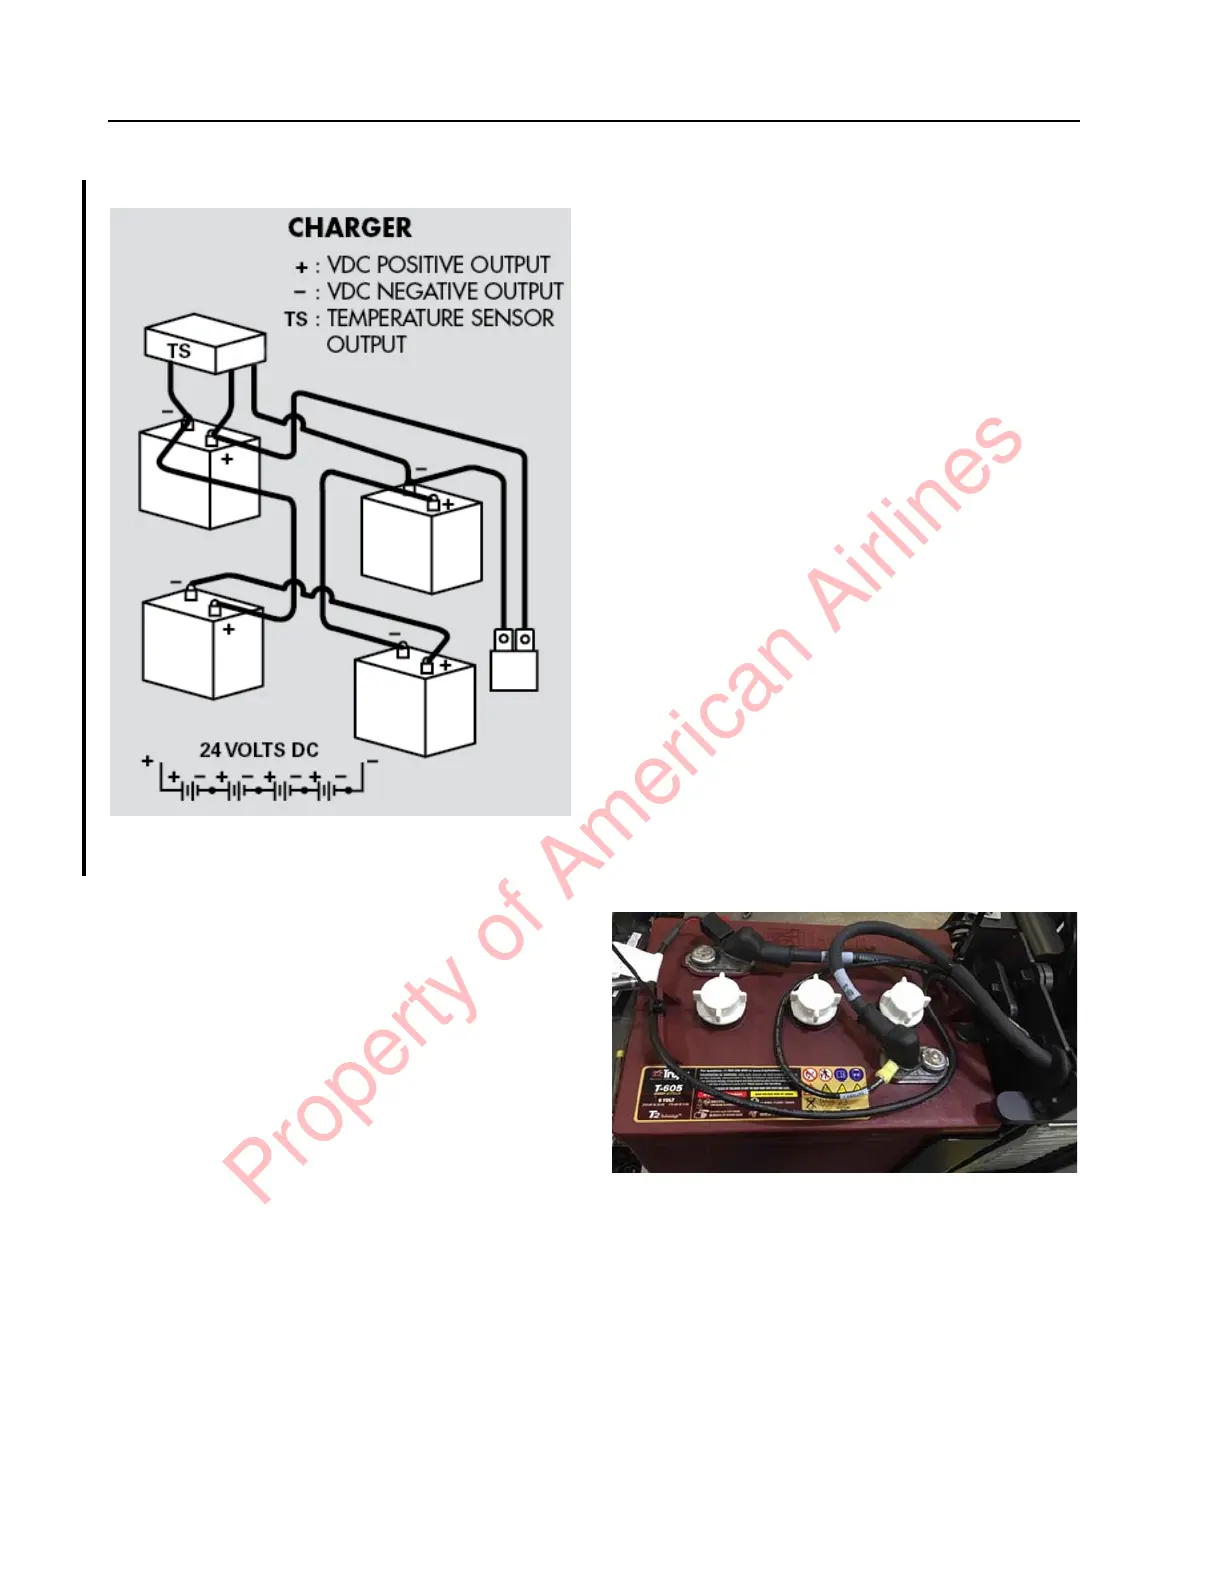
Figure 7-52. Multiple Battery Wiring Hookup
NOTE: Make sure there is sufficient cable to
allow battery swing-out movement.
4. Install the battery cover,
5. Rewind the charger cord on the charger
cord storage handle.
6. Reconnect the battery connector. Place the
Main ON/OFF Switch in the ON position.
If equipped with the optional keypad, enter
your PIN-key code and then press the
green ON ( | ) key.
7. Configure the truck parameters 21, 24,
and 44 for the battery type installed.
Charger Replacement
1. Park truck on a level surface and make
sure the parking brake is applied.
2. If equipped with the optional keypad,
press the red OFF ( O ) key. Place the Main
ON/OFF Switch in the OFF position.
3. Disconnect the battery connector found at
the top of console cover.
4. Remove the battery pack cover.
5. Swing out the top battery trays.
6. Disconnect all cables and wires from the
charger assembly to the batteries. Note the
orientation and location for reconnection.
7. Remove the screws and nuts securing the
charger unit to the battery tower.
8. Slide the charger unit out of the battery
tower.
9. Disconnect all cables and wires from the
charger assembly. Note the orientation
and location for reconnection.
10. Connect cables and wires to the new
charger. Make sure the orientation and
location is the same as previously noted.
11. Place the new charger unit in the battery
tower in the same orientation as the one
that was removed.
12. Secure the charger to the battery tower
frame with bolts and nuts. Use a 10mm
wrench to hold the nuts while torquing the
bolts to 89 in. lb. (10 Nm).
13. Connect the cables from the charger to the
batteries. Follow the battery wiring
hookup shown in Figure 7-52. Make sure
to loop cables and secure with cable ties.
Figure 7-53. Battery Cables Looped and Secured
14. Torque terminal nuts to 101 in. lb.
(11.4 Nm) for wet cell batteries. Torque
nuts to 89 in. lb. (10 Nm) for AGM
batteries.
15. Install terminal caps.
16. Reconnect the battery connector. Place the
Main ON/OFF Switch in the ON position.
If equipped with the optional keypad, enter
Property of American Airlines