Section 7. Component Procedures Model 8210/8250 Maintenance Manual
Switches (General) Electrical Components
7-80 Publication: 1146945/001, Revised: 25 Sep 2018
2-Position Keyed Switch
(Optional)
A 2-position keyed Main ON/OFF switch is
available as an option.
Replacement
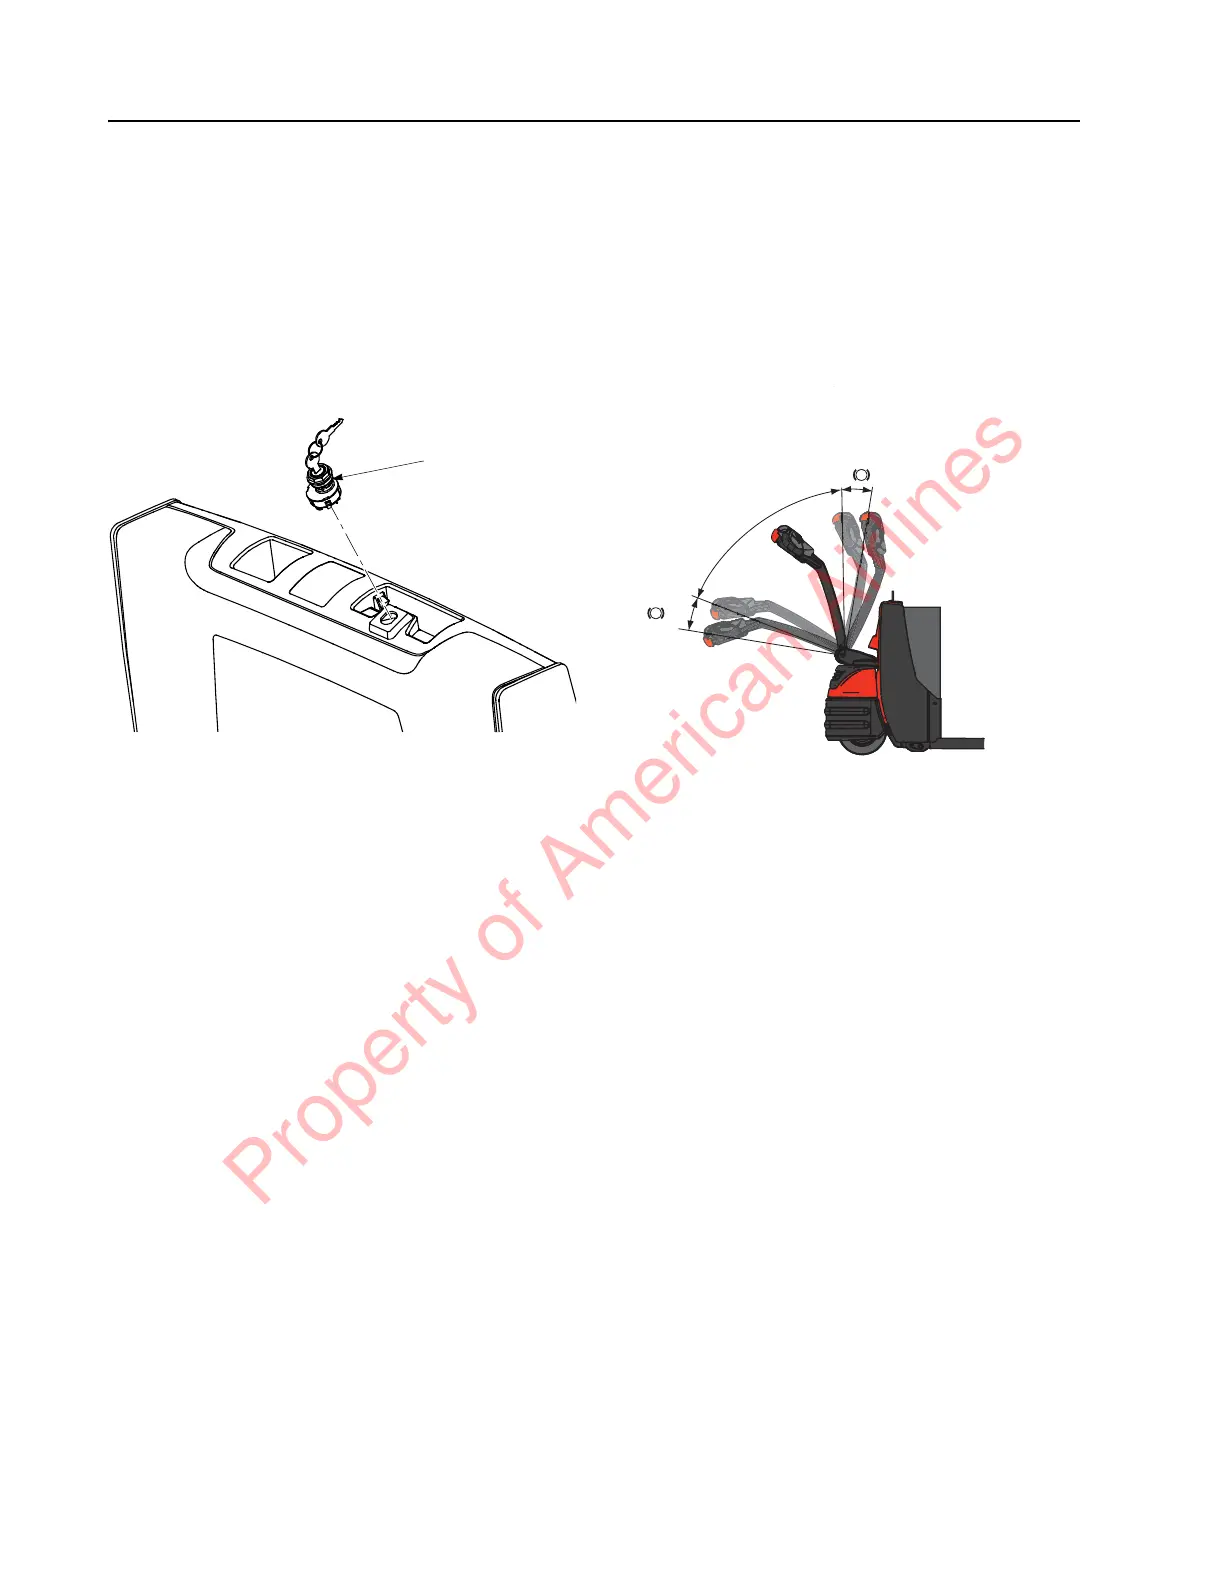
Figure 7-94. Main ON/OFF Switch - Keyed Option
1. Place the Main ON/OFF Switch in the OFF
position. Disconnect the battery connector
from the truck.
2. Remove the truck covers.
3. Disconnect the wires from the switch
terminal.
4. Remove the key switch.
5. Install the new key switch.
6. Install the truck covers.
7. Reconnect the battery connector.
Arm Angle Proximity Switch
The arm angle proximity switch is found at the
base of the tiller arm stem. SW2 determines
brake activation and truck travel. The switch is
activated by the control handle position. The
control handle must be in the T1 position in
order for the switch to be closed, permitting
travel. See
Figure 7-95.
Figure 7-95. Brake Actuation
Replacement
1. Lower the forks completely.
2. If equipped with the optional keypad,
press the red OFF ( O ) key. Place the Main
ON/OFF Switch in the OFF position.
Disconnect the battery connector from the
truck.
3. Remove the truck covers.
4. Disconnect the wires from the switch.
5. Remove the screws and carefully remove
the bracket and switch.
6. Remove the screws holding the switch on
the mounting bracket. Remove the switch.
7. Mount the new switch to the mounting
bracket.
8. Install the bracket and screws.
9. Connect the wires to the switch.
10. Reconnect the battery connector. Place the
Main ON/OFF Switch in the ON position.
Press the green ON ( | ) key on the keypad,
or turn the optional key switch ON.
11. Test the operation of the truck.
2-Position
Keyed Main
ON/OFF
Switch
Property of American Airlines