Model 8210/8250 Maintenance Manual Section 7. Component Procedures
Electrical Components Switches (General)
Publication: 1146945/001, Revised: 25 Sep 2018 7-81
12. Adjust the switch if necessary.
13. If equipped with the optional keypad,
press the red OFF ( O ) key. Place the Main
ON/OFF Switch in the OFF position.
Disconnect the battery connector from the
truck.
14. Install the truck covers.
15. Reconnect the battery connector.
Arm Angle Proximity Switch
Adjustment
1. If equipped with the optional keypad,
press the red OFF ( O ) key. Place the Main
ON/OFF Switch in the OFF position.
Disconnect the battery connector from the
truck.
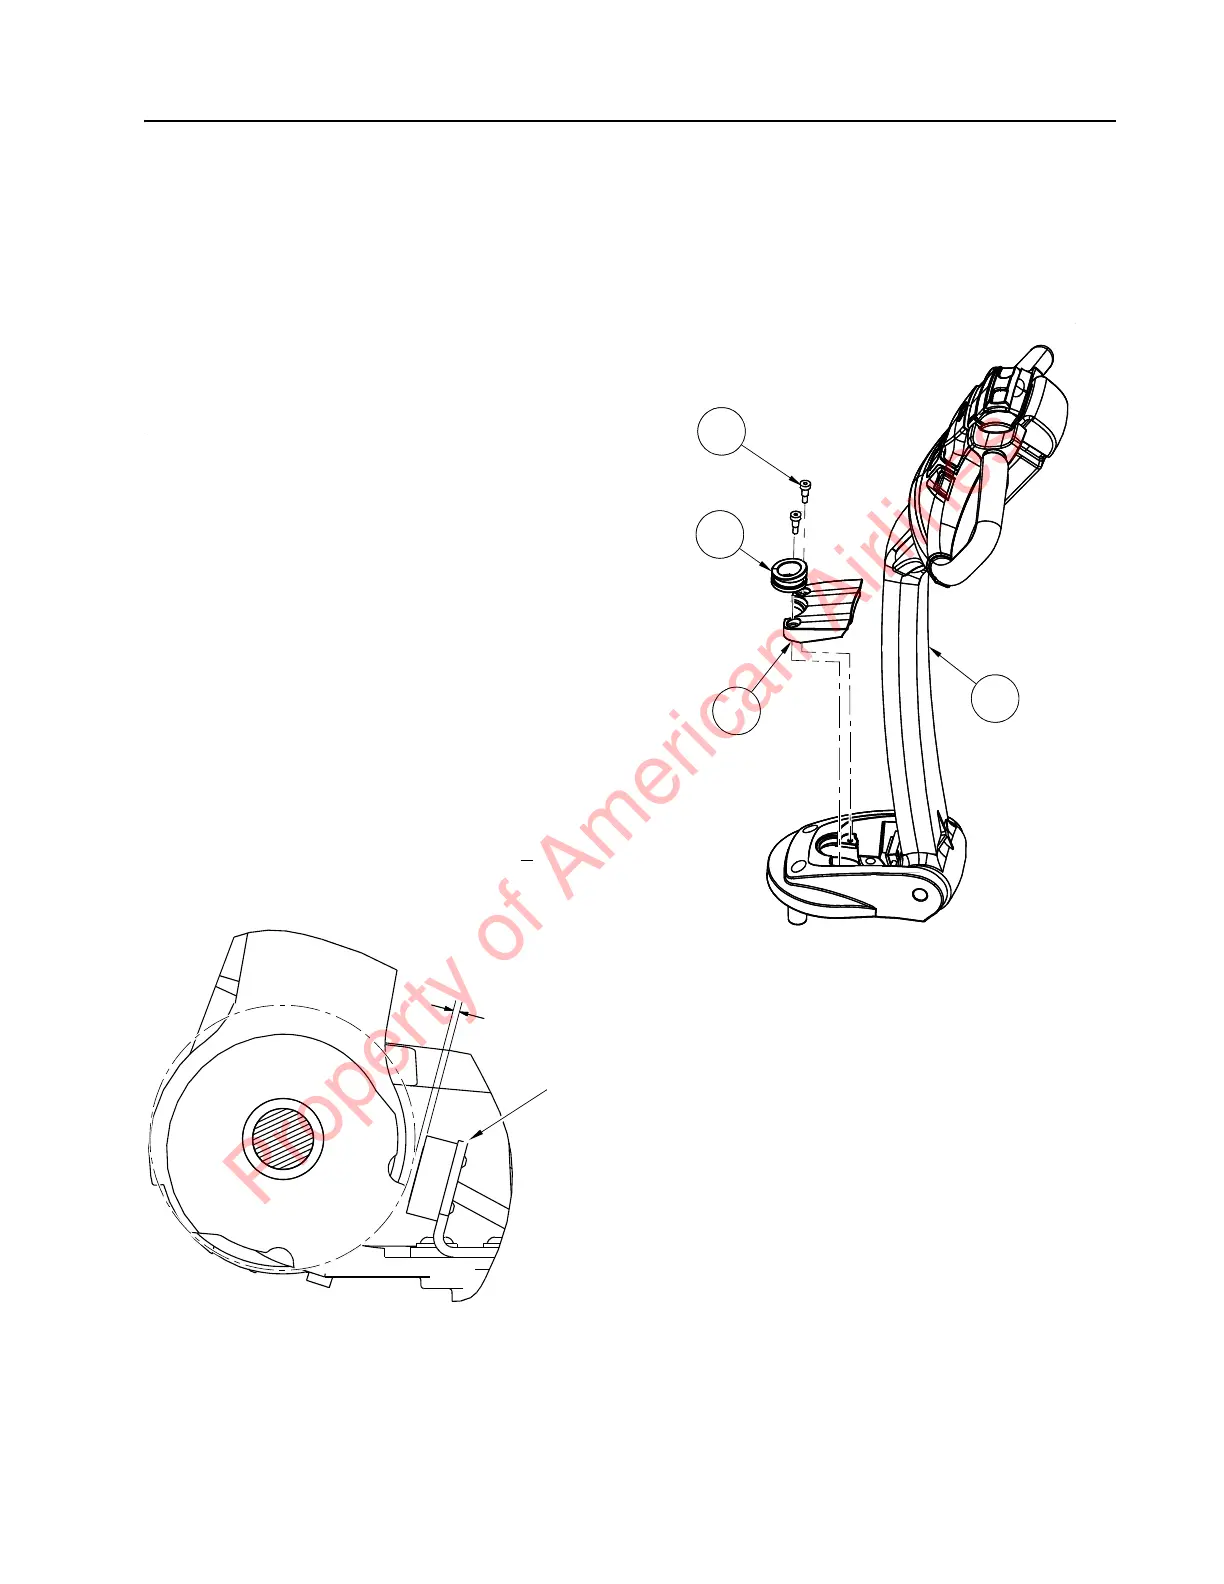
2. Remove the screws and control handle
bumper stop to access the angle arm
proximity switch.
3. Loosen the screws securing the proximity
switch bracket to the tiller arm base. Slide
the bracket toward or away from the cam
surface of the raised tiller arm to adjust
the gap. Correct gap between the switch
sensing face and the raised tiller cam
surface is 0.070 to 0.086 in. (2.0 +
0.20
mm). See Figure 7-96.
Figure 7-96. Arm Angle Proximity Switch Adjustment
4. Reconnect the battery connector. Place the
Main ON/OFF Switch in the ON position.
If equipped with the optional keypad, enter
your PIN-key code and then press the
green ON ( | ) key.
5. Test the operation of the truck.
6. Install the control handle bumper stop [4]
and grommet [2] using socket head locking
screws [3]. Torque screws to 13 ft. lb.
(17.6 Nm). See Figure 7-97.
Figure 7-97. Control Handle Bumper Stop Installation
Property of American Airlines