2. MOUNTING
IMR02L04-E3
2-5
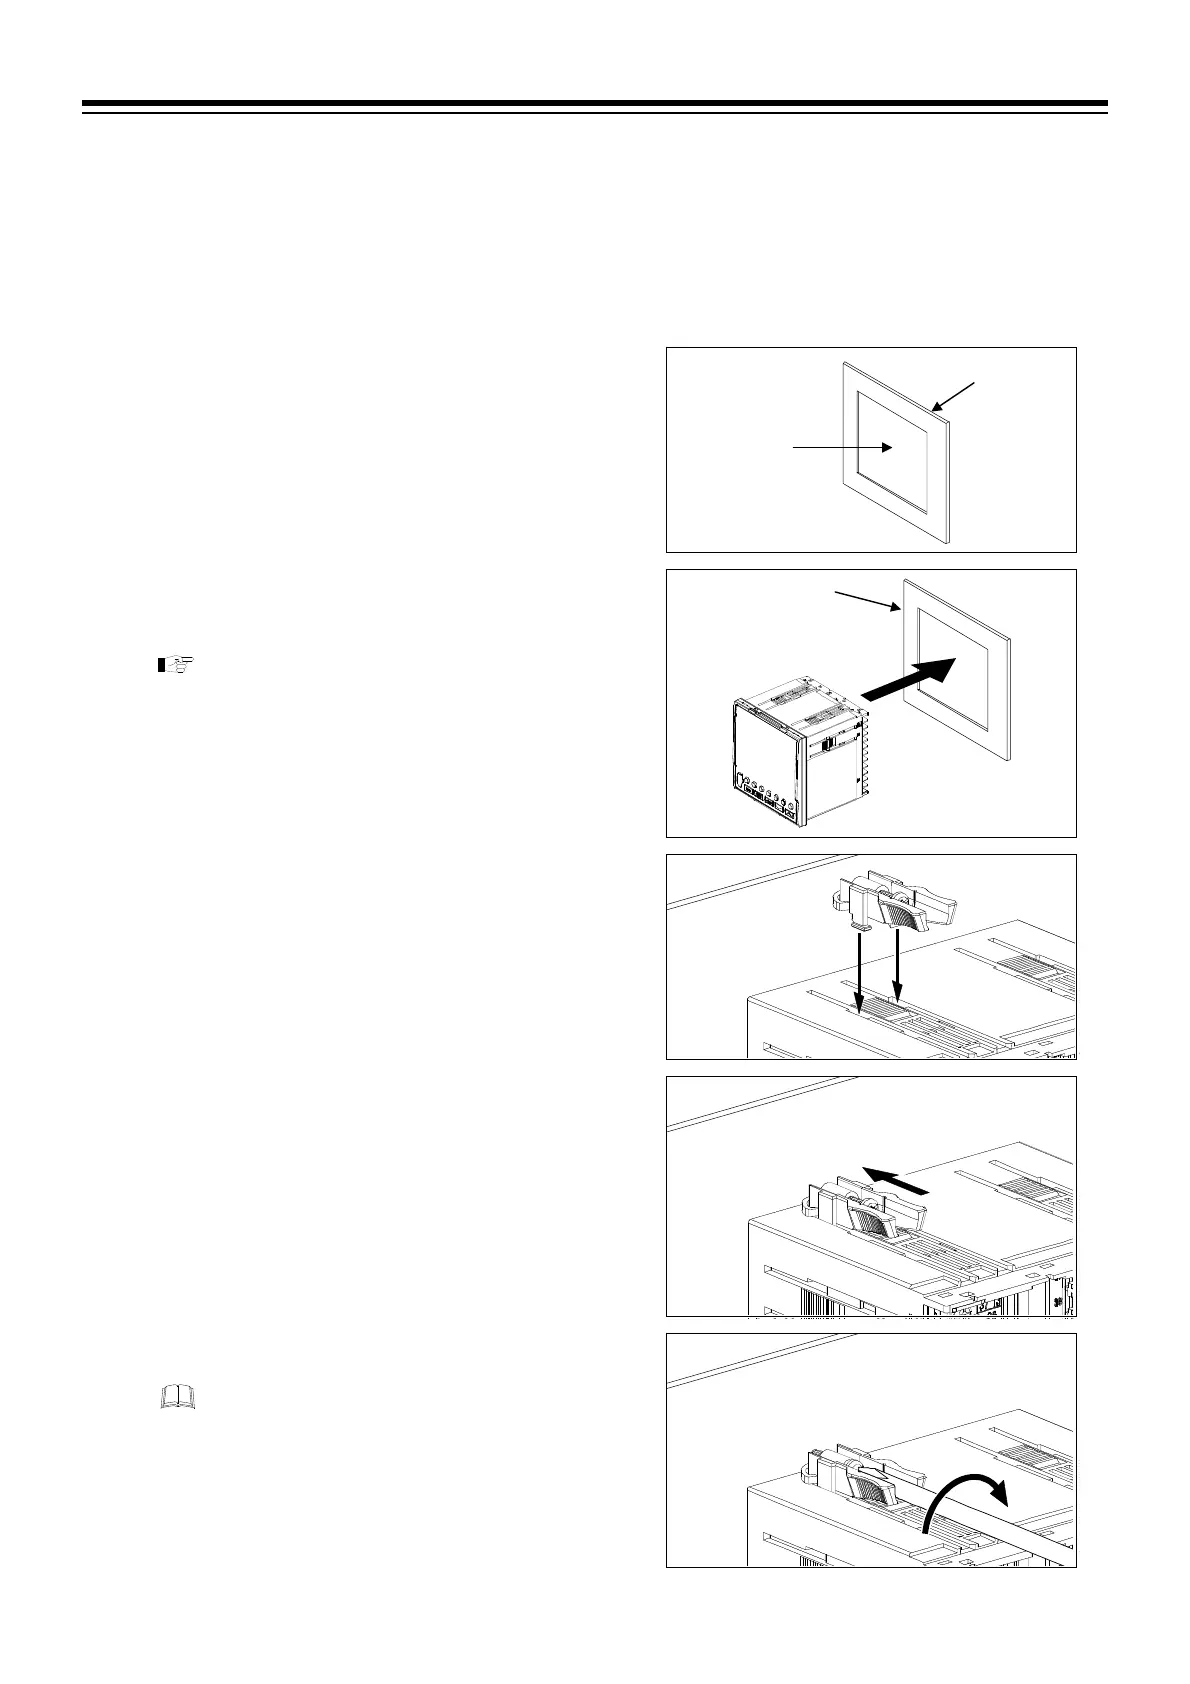
2.4 Procedures of Mounting and Removing
Mounting procedures
The front of the controller conforms to IP55 (NEMA Type 3) when mounted to the panel. For effective
Waterproof/Dustproof, the waterproof/dustproof rubber packing must be securely placed between instrument
and panel without any gap. If waterproof/dustproof rubber packing is damaged, please contact RKC sales
office or the agent.
1. Prepare the panel cutout as specified in 2.3 Dimensions.
(Panel thickness: 1 to 10 mm)
2. Set the water/dustproof rubber packing on the case
from the back side of the instrument shown in Fig. 2.2.
Insert the instrument through the panel cutout.
To replace Waterproof/dustproof rubber
packing, refer to APPENDIX of
the PF900/PF901 Instruction Manual
(IMR02L03-E) on the CD-ROM.
3. Insert the mounting bracket into the mounting groove
of the instrument. (Fig. 2.3)
4. Push the mounting bracket forward until the bracket is
firmly secured to the panel. (Fig. 2.4)
5. Turn only one full revolution after the screw touches
the panel. (Fig. 2.5)
If the screw has been rotated too tight, the screw
may turn idle. In such a case, loosen the screw
once and tighten it again until the instrument is
firmly fixed.
6. The other mounting bracket should be installed the
same way described in 3 to 5.
Mounting
holes
Panel
Fig. 2.1
Panel
Fig. 2.2
Fig. 2.4
Fig. 2.5
Fig. 2.3

 Loading...