Contents
Issue 06/15 Publication PUB059-002-00 5 of 136
9. LONG TERM DATALOGGER (LTD) .............................................................. 121
9.1 Removing the memory card and copying data ............................................................... 122
9.2 Viewing the data with the LTD Viewer software .............................................................. 124
9.2.1 Messages ..................................................................................................... 125
9.2.2 Messages – Filter Options ............................................................................ 125
9.2.3 Reports ........................................................................................................ 128
9.2.4 FCU Data ..................................................................................................... 129
10. RESETTING THE MASTER STATION TO DEFAULT VALUES .................... 130
11. REPLACING THE P3 MASTER STATION BATTERY ................................... 132
GENERAL SAFETY INFORMATION ...................................................................... 133
TABLE OF FIGURES:
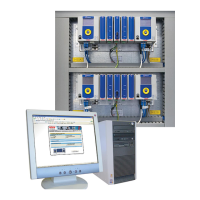
Fig 1: The Pakscan 3 Single Master Station – option: Current loop ............................................7
Fig 2: The Pakscan 3 Hot Standby Master Station - option: Current loop ...................................7
Fig 3: The Pakscan 3 Single Master Station – option: Wireless ..................................................8
Fig 4: The Pakscan 3 Hot Standby Master Station – option: Wireless ........................................8
Fig 5: The P3W (Pakscan 3 Wireless) coordinator – PS722. .....................................................8
Fig 6: Pakscan 3 surface mounting dimensions. ........................................................................9
Fig 7: Pakscan 3, 19-inch rack mounting dimensions............................................................... 10
Fig 8: View below the Pakscan P3 master station showing the Connectors ............................. 10
Fig 9: P3W coordinator, P3W WMA and P3W Repeater mounting details ................................ 11
Fig 10: Serial Communication connections ................................................................................ 12
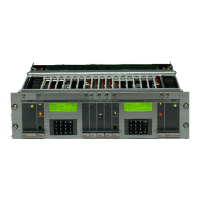
Fig 11: PS710 CPU module connector terminal functions .......................................................... 13
Fig 12: PS720/PS730/PS731/PS732 Current Loop connections ................................................ 13
Fig 13: PS721 to PS722 connections (Master station to P3W Coordinator) ................................ 14
Fig 14: Power module for P3W Repeater and P3W WMA. ......................................................... 15
Fig 15: Connections from DC power supply to P3W WMA or P3W repeater .............................. 16
Fig 16: Connections from Modbus device to P3W WMA ............................................................ 17
Fig 17: P3W WMA operation ..................................................................................................... 19
Fig 18: P3W Repeater and P3W WMA database....................................................................... 20
Fig 19: CPU LEDs (Light Emitting Diodes) ................................................................................ 21
Fig 20: Pakscan P3 Wired Network ........................................................................................... 23
Fig 21: Pakscan P3 Current Wired Loop System Block Diagram (hot standby master station) .... 25
Fig 22: Pakscan P3 Current Wired Loop System Block Diagram (single master station) ............. 26
Fig 23: A typical P3 wireless network ........................................................................................ 27
Fig 24: Pakscan P3 Wireless network Block Diagram (hot standby master station) .................... 29
Fig 25: Pakscan P3 Chassis, CPU and Key Switch modules removed ....................................... 31
Fig 26: Port Function Switches shown in RS-232 position ......................................................... 32
Fig 27: Port Termination Switches shown in Off position............................................................ 32
Fig 28: Cross connection switch settings on the backplane behind the Switch Module ............... 33
Fig 29: Hot Standby Serial Communications.............................................................................. 34
Fig 30: Hot Standby Ethernet Communications ......................................................................... 35
Fig 31: Hot Standby, Dual Redundant Ethernet Communications .............................................. 36
Fig 32: Pakscan P3 Main module connection to laptop and keypad detail .................................. 39
Fig 33: Connecting a Laptop to the Pakscan P3 Main Module ................................................... 52
Fig 34: Changing the Network Connections TCP/IP Properties – Windows XP .......................... 53
Fig 35: Web Page Menu Layout ................................................................................................ 55