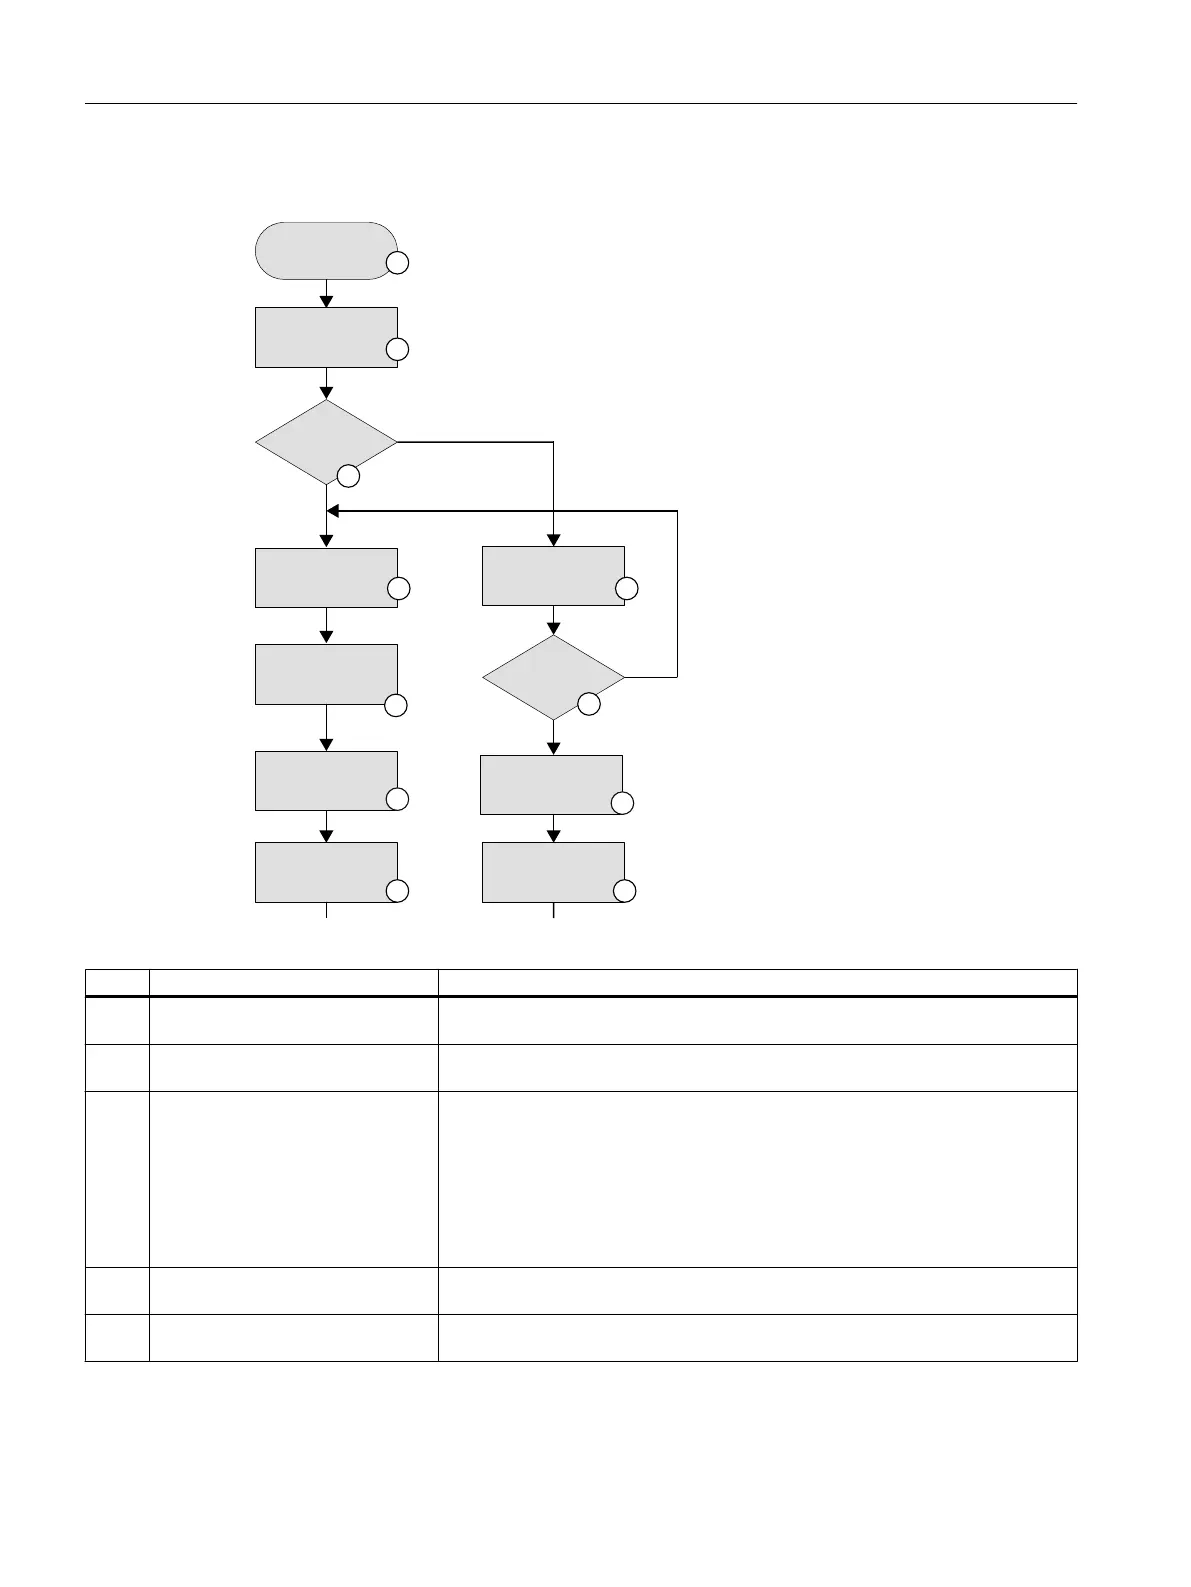
Example workflow
+HDGOHVV
PRGH
LQWHQGHG"
&RQILJXUH
UHVSRQVHILOH
%DFNXSGHOLYHU\
VWDWH
&RQQHFWVFUHHQ
,QVHUW86%IODVKGULYH
ZLWKUHVSRQVHILOH
$WWHQGHGLQVWDOODWLRQ
SRVVLEOH"
6ZLWFKRQ3&86ZLWFKRQ3&8
&RQQHFW3*3&
,QVWDOO:LQGRZV
DWWHQGHG
6HWXS3&8
<HV
<HV
1R
1R
Figure 2-1 Example sequence of first commissioning
No. Step Description
1 Set up PCU Information about installation and mounting of the PCU 50.5 is provided in the
SINUMER‐
IK 840D sl Operator Components and Networking Manual
, Chapter
Operator panels
.
2 Back up delivery state Before starting the actual first commissioning, you can back up the delivery condition of
the Windows 7 PCU base software as disk image (Page 18).
3 ● Headless mode intended?
– Configure response file
– Insert USB flash drive with
response file
● Attended installation possible?
– Connect screen
– Install Windows 7 attended
As soon as you start with the first commissioning of the PCU base software, you must
decide on an installation type:
● Configure a response file and complete installation and user settings unattended
(Page 20).
● Connect screen (Page 36) and complete installation attended (Page 19), at the same
time set up users.
4 Switch on PCU Do not switch on the PCU without the response file (Page 20) if you want the installation
to be performed unattended.
5 Connect PG/PC To be able to access a directory of a PG/PC in the network, for example, connect the PG/
PC in the network (Page 141).
First commissioning of the PCU 50.5
2.1 Overview
PCU Base Software (IM10)
16 Commissioning Manual, 12/2017, 6FC5397-1DP40-6BA1
 Loading...