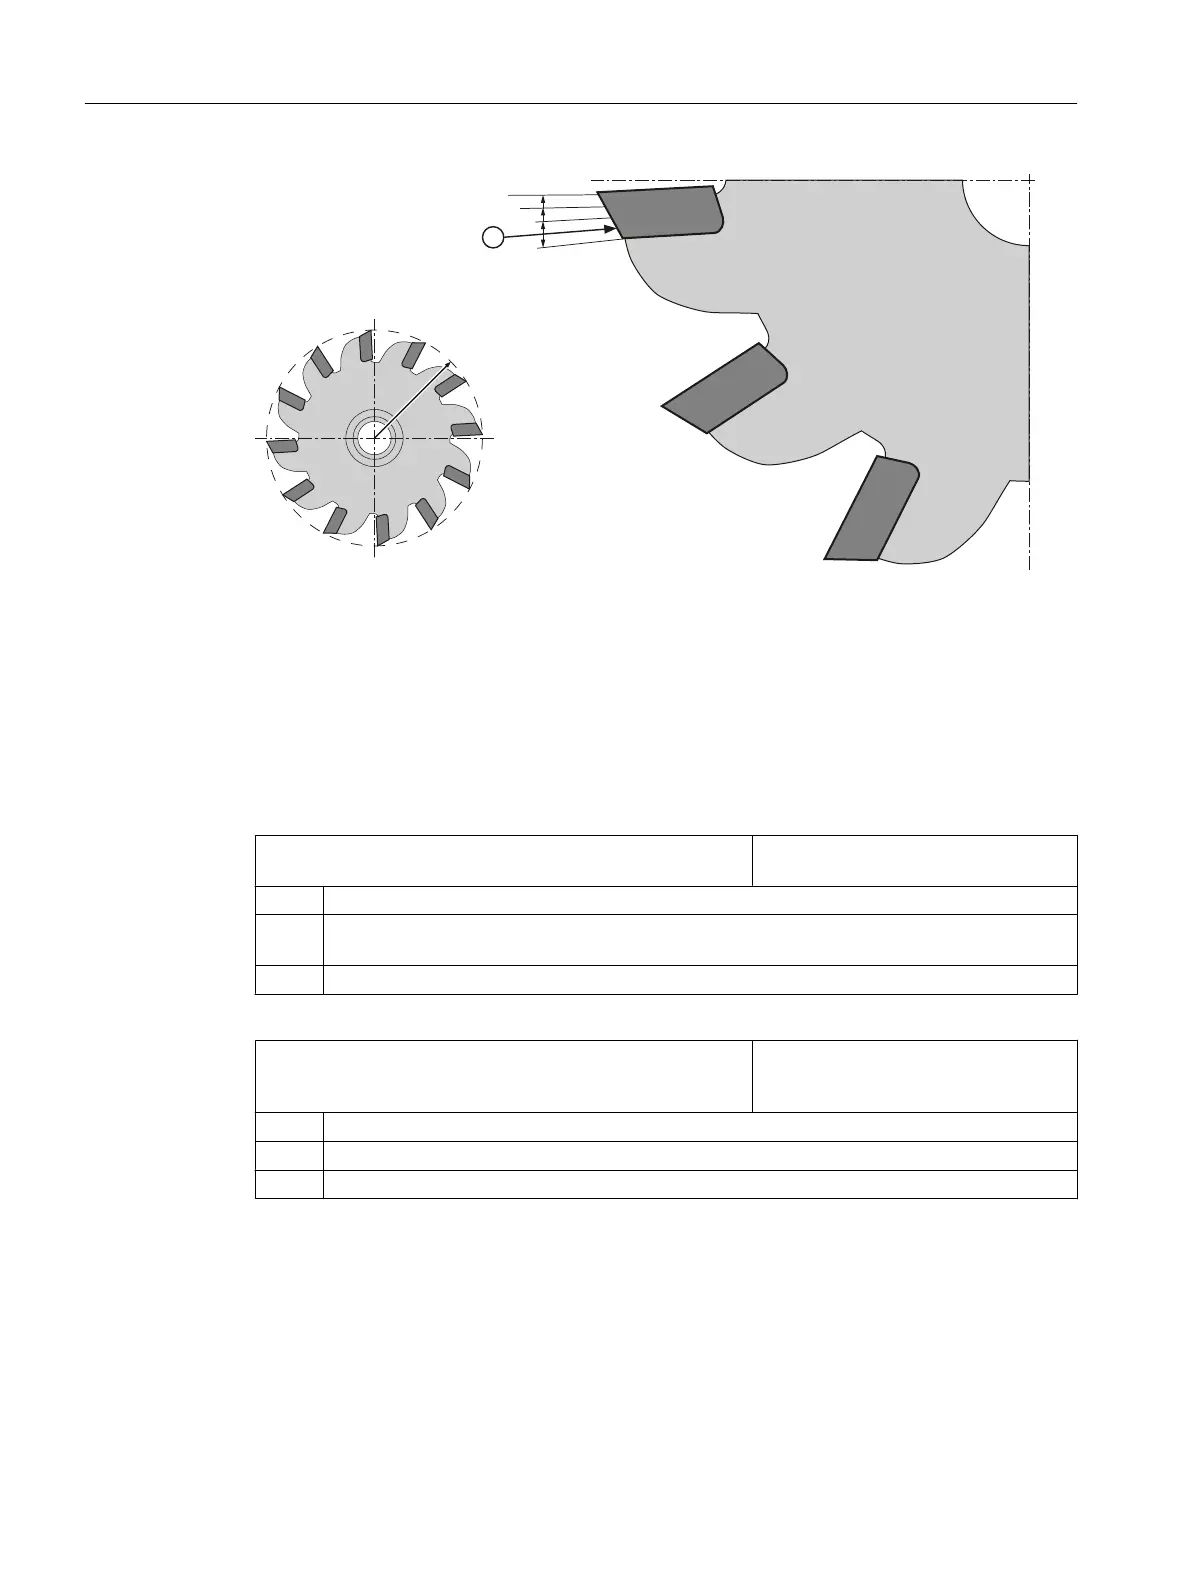
r Effective radius of the tool
b Arc distance = SD54692
n Maximum number of probe contacts = SD54693
① 1st measuring point.
Figure 21-18 Single cutting edge measurement
General cycle setting data for correction using the correction tables when forming measurements with
rotating spindle.
SD54691 $SNS_MEA_T_PROBE_OFFSET Activate the measuring result compen‐
sation
= 0 No data, default value
= 1 Correction in the cycle. This is only effective if SD54689 $SNS_MEA_T_PROBE_MANUFAC‐
TURER>0.
= 2 Correction using user-defined correction table
SD54689 $SNS_MEA_T_PROBE_MANUFACTURER Activates pre-configured compensa‐
tion tables for several tool probe mod‐
els (customer-specific)
= 0 No data, default value
= 1 TT130 (Heidenhain)
= 2 TS27R (Renishaw)
Technologies and cycles
21.10 Measuring cycles and measurement functions
SINUMERIK Operate (IM9)
632 Commissioning Manual, 12/2017, 6FC5397-1DP40-6BA1

 Loading...


