8.10.3 REPLACING SENSOR FOR UPPER AXIS (X)
1 ) Switch off the machine and disconnect the power lead.
2) Raise the safety shield (V).
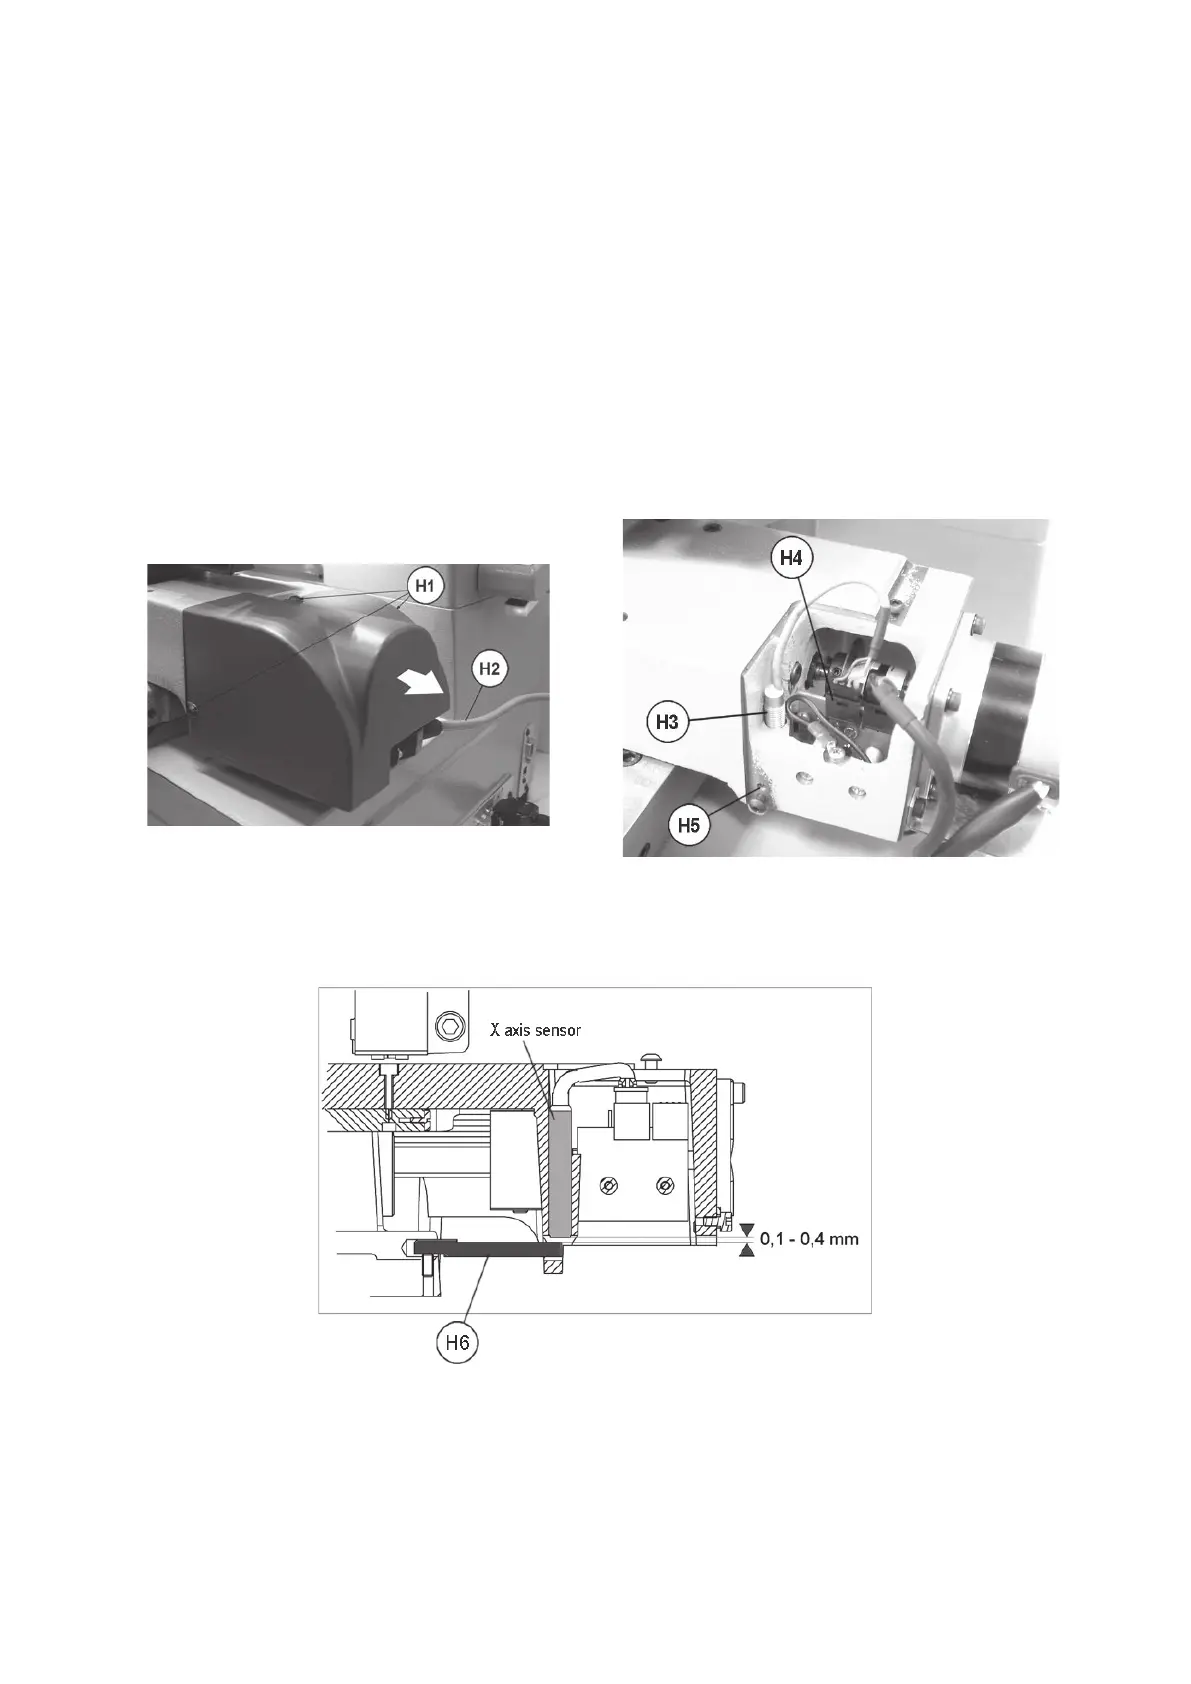
3) Disconnect the upper axis connection cable (H2) from the carriage.
4) Remove the upper axis carriage cover by loosening the 3 locking screws (H1) and pull out in the direction given.
5) Disconnect the sensor connector (H4).
6) Loosen the grub screw (H5) with the allen wrench provided.
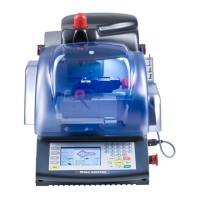
7) Remove the faulty sensor (H3) and place the new sensor in position until it almost touches the pin below (H6)
and tighten the grub screw (H5).
8) Connect the sensor connector (H4).
9) Replace the upper axis carriage cover.
10) Connect the upper axis cover cable (H2) to the carriage.
Fig. 52 Fig. 53
Drawing references for SENSOR REPLACEMENT AND REGULATION (see MACHINE ZEROS).
Fig. 54
Operating manual TRIAX PRO
Copyright Silca 2016
90