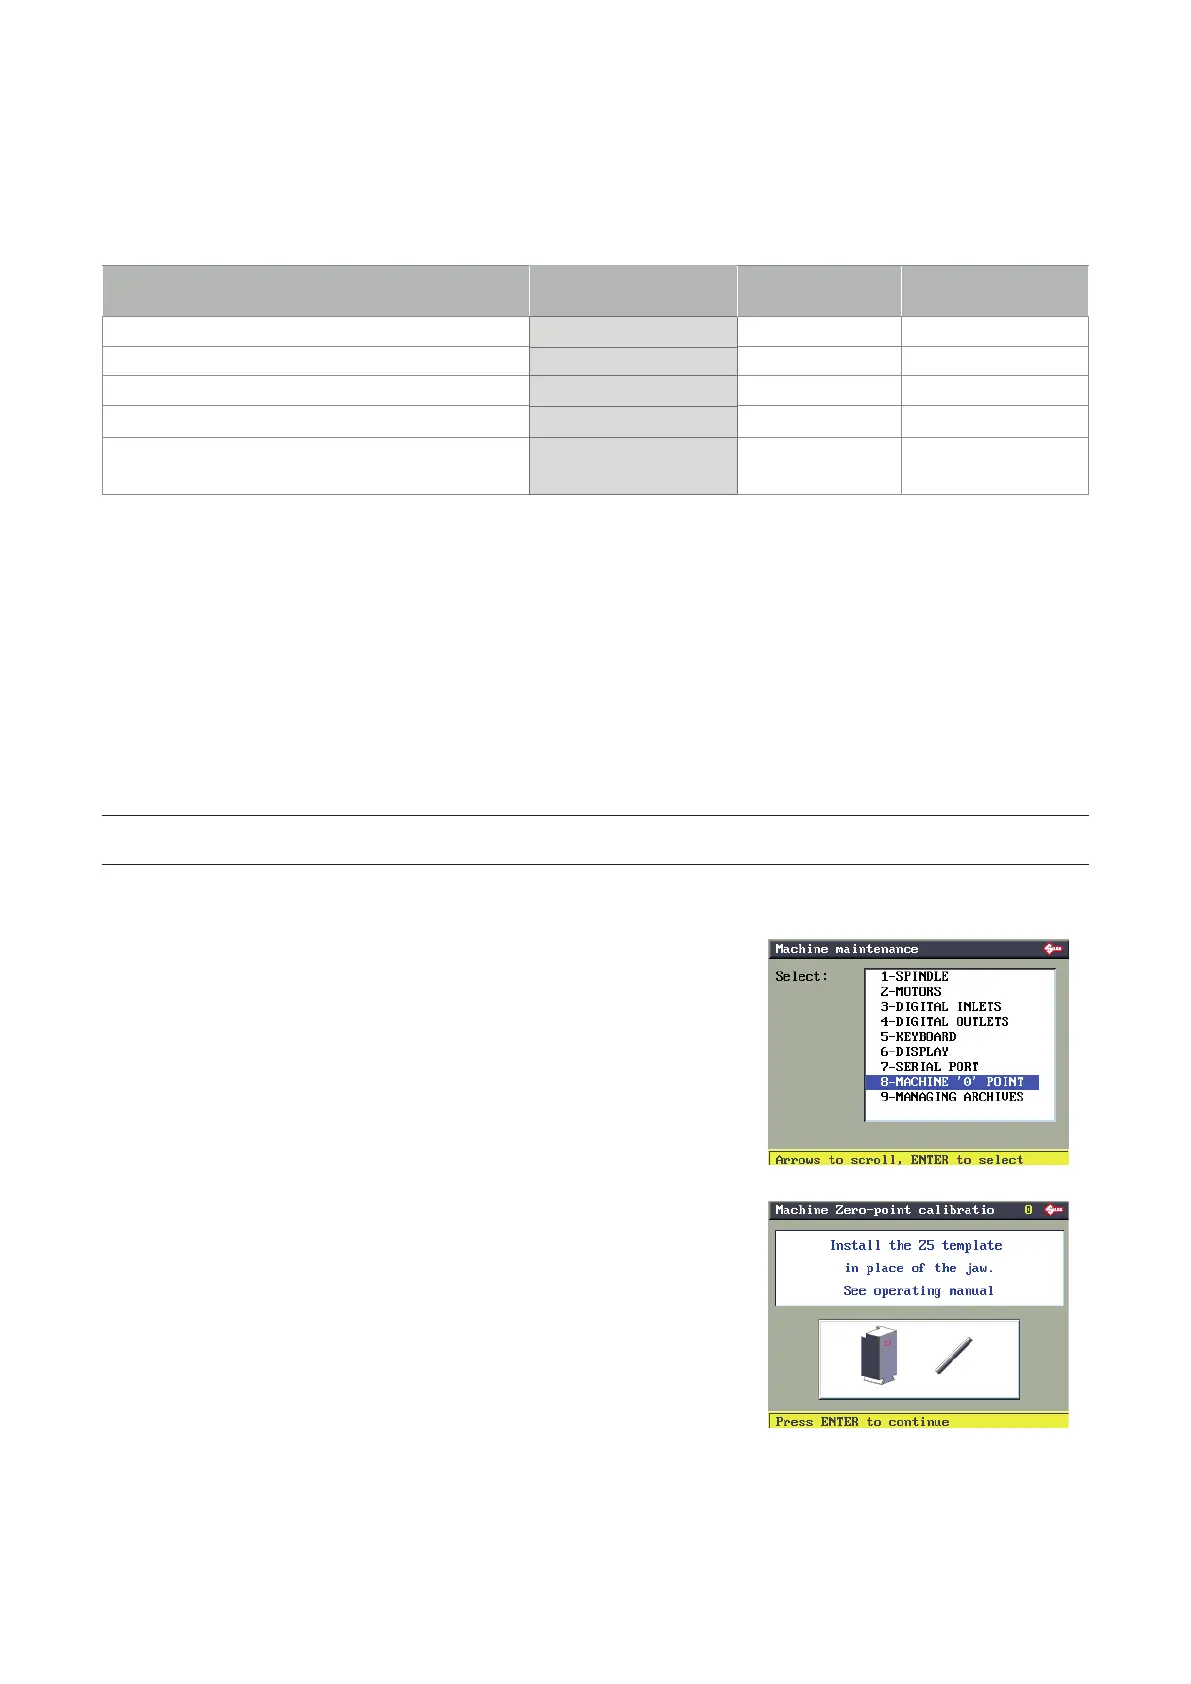
6.13.8 MACHINE ZEROS
The machine is prepared with a “self-calibration” system which uses a template (provided) and special procedures.
THE MACHINE ZEROS PROCEDURE MUST BE CARRIED OUT ONLY WHEN THE FOLLOWING EVENTS
OCCUR:
EVENT
MACHINE ZEROS
CLAMP
calibration
TRACER TOWER
calibration
Photocell replacement
YES YES NO
Electronic circuit board replacement
YES YES YES
Sensor replacement
NO YES NO
Ball screw replacement
YES YES NO
Tracer Tower decoder replacement or maintenance
NO NO YES
PRELIMINARY OPERATIONS
1. Switch off the machine and disconnect from mains.
2. Remove back plate.
3. Loosen the grub screws securing the photocell disk for Y (G) and Z (L) axes.
4. Remove bottom plate.
5. Remove the X axis carriage cover by loosening the 3 screws (B5) and pull out in the direction given, then remove the
belt cover.
6. Loosen the grub screws securing the X axis photocell disk.
7. Reconnect the power lead.
8. Switch on the machine and follow the procedure described below.
NOTE: the operation to load “machine zeros” must be carried out by following the instructions below. After this
operation keys cannot be cut or decoded because the machine program will require all clamps to be re-calibrated!
PROCEDURE
Select Machine zeros and press ENTER.
Remove the clamp from its support and t the template (Z5 - wording
towards operator) all the way into the dovetail guide and secure by
tightening the grub screw.
Press ENTER.
Operating manual TRIAX PRO
Copyright Silca 2016
64