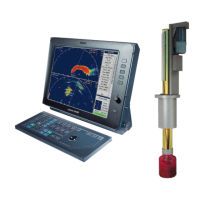
SimradSX90
Actionsinthesonarroom
Note
Thisproceduremustbeperformedsimultaneouslywiththe
procedureandchecklistinthepreviousprocedure;“Actionson
thebridge”.
Theinstructionsmarked[Bridge]areperformedonthebridge.
Notethatthoseproceduresaremoredetailedthatwhatis
presentedhere.
1[Bridge]Startupthesonar.
2[Bridge]Checkthatthedepthissufcientforloweringof
thetransducer.
3[Bridge]PresstheMiddlebuttonontheOperatingPanelto
lowerthetransducertoitsmiddleposition.
4[Bridge]ClicktheModebuttononthetopofthemenu
system,andselectmodeBowup/Audio.
5[Bridge]OpentheHorizontalmenu,andlocatetheTXPower
button.
6[Bridge]SettheTXPowertoLow,andcheckthatechoes
appearonthedisplay.
7[Bridge]Selectasuitablerange.
8Checkthatyoucanhearthesoundofthetransmitpulse
fromthetransducer.
9[Bridge]SettheTXPowertoMedium,andcheckthat
echoesappearstronger.
10Checkthatthesoundofthetransmitpulseisstronger.
11[Bridge]SettheTXPowertoFull,andcheckthatechoes
appearevenstronger.
12Checkthatthesoundofthetransmitpulseisevenstronger.
Alignmentofthesonarpicture
Independentofthehullunitorientation,thealignmentisalways
denedas:theanglemeasuredclockwisefromthebowtothe
0degreestransducermark.The0degreestransducermarkis
locatedoutermostonthemountingange,anditismarkedasa
red“0”.Dependingonthetransducermounting,itcanbelocated
atanyangleonthemountingange,notnecessarilyasshown
intheillustrationbelow.
122
307531/C

 Loading...