11-12.
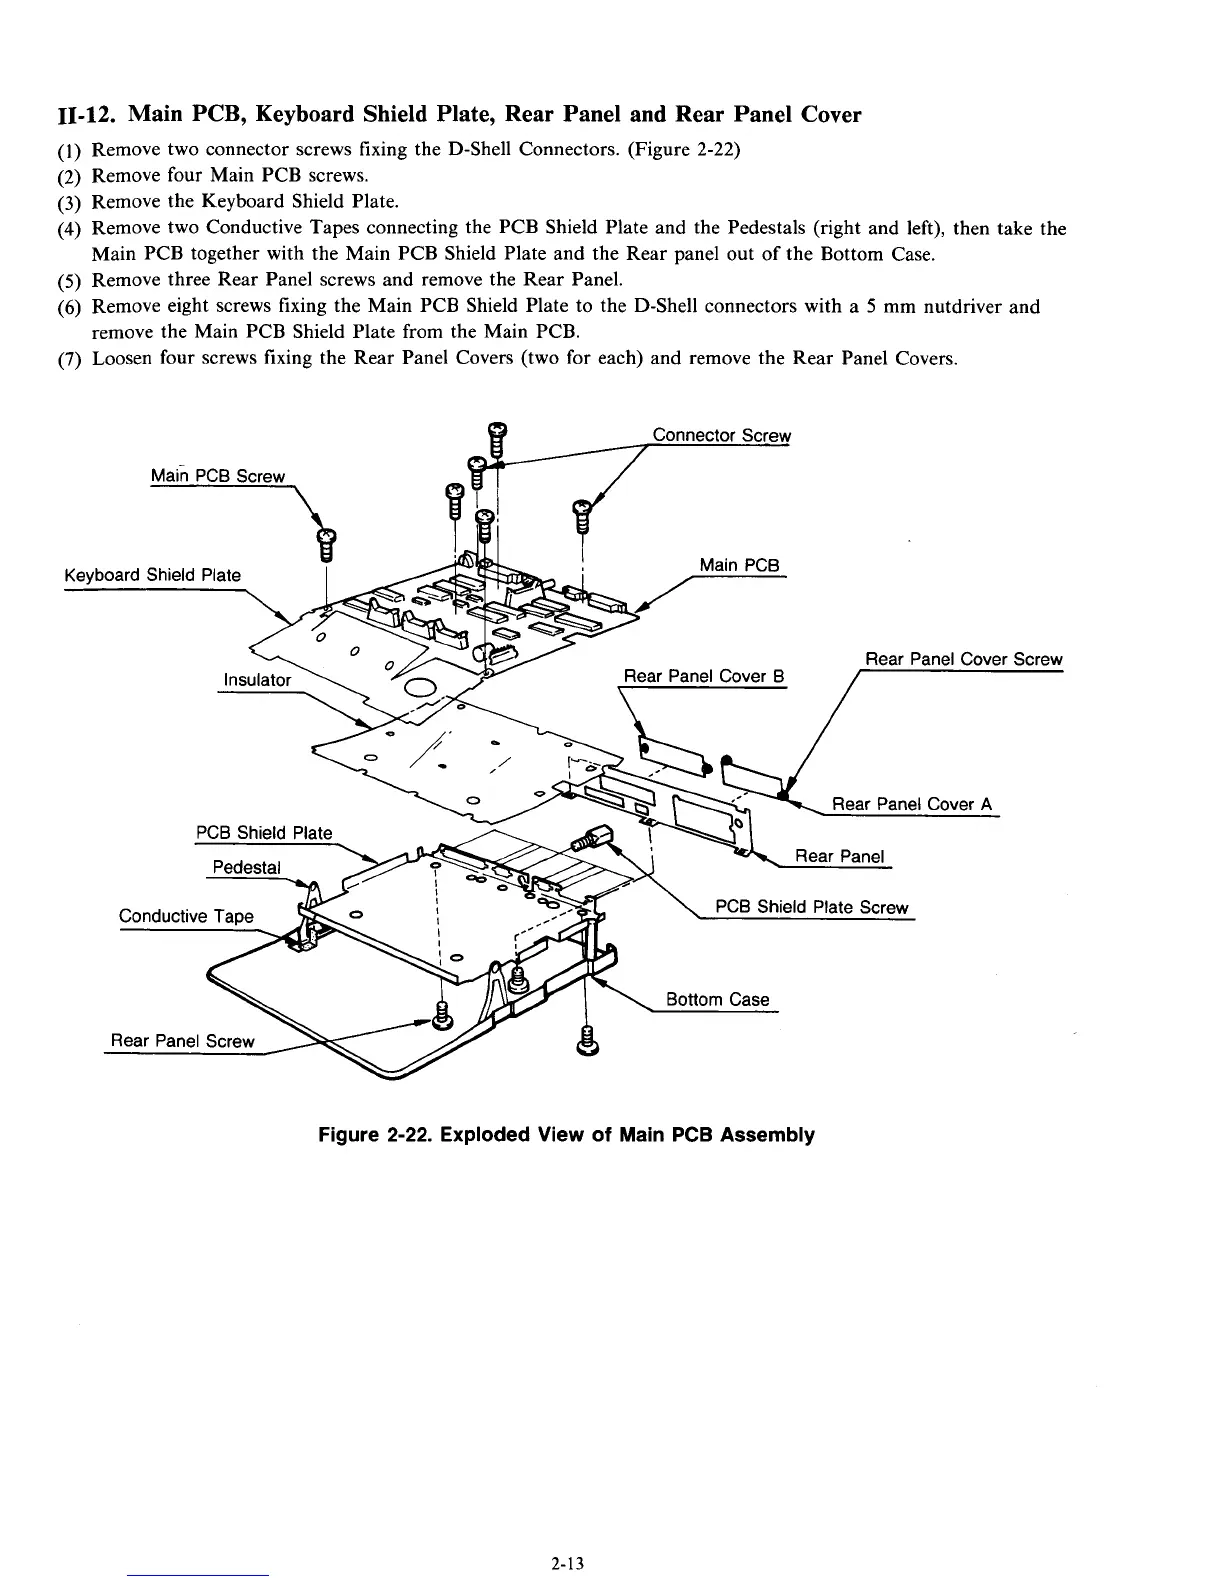
Main PCB, Keyboard Shield Plate, Rear Panel and Rear Panel Cover
(1)
Remove two connector screws fixing the D-Shell Connectors. (Figure
2-22)
(2)
Remove four Main PCB screws.
(3)
Remove the Keyboard Shield Plate.
(4)
Remove two Conductive Tapes connecting the PCB Shield Plate and the Pedestals (right and left), then take the
(5)
Remove three Rear Panel screws and remove the Rear Panel.
(6)
Remove eight screws fixing the Main PCB Shield Plate
to
the D-Shell connectors with a
5
mm nutdriver and
remove the Main PCB Shield Plate from the Main PCB.
(7)
Loosen four screws fixing the Rear Panel Covers (two for each) and remove the Rear Panel Covers.
Main PCB together with the Main PCB Shield Plate and the Rear panel out of the Bottom Case.
Figure
2-22.
Exploded View of Main
PCB
Assembly
2-13