9-4 4262930-Rev A
MISCELLANEOUS
9
Figure 9-8
NOTE
Always use new seals.
3. Apply a thin film of grease that meets or exceeds
NLGI Grade 2 LB specifications to the lips of the
seals (8).
4. Using a seal driver, install seals (8) in the wheel hub
(9).
5. Install clutch sleeve (7) into seals (8) and bearing (2).
6. Install bushing (6) and washer (5) over the clutch
sleeve (7).
Installation
See Figures 9-9 through 9-11.
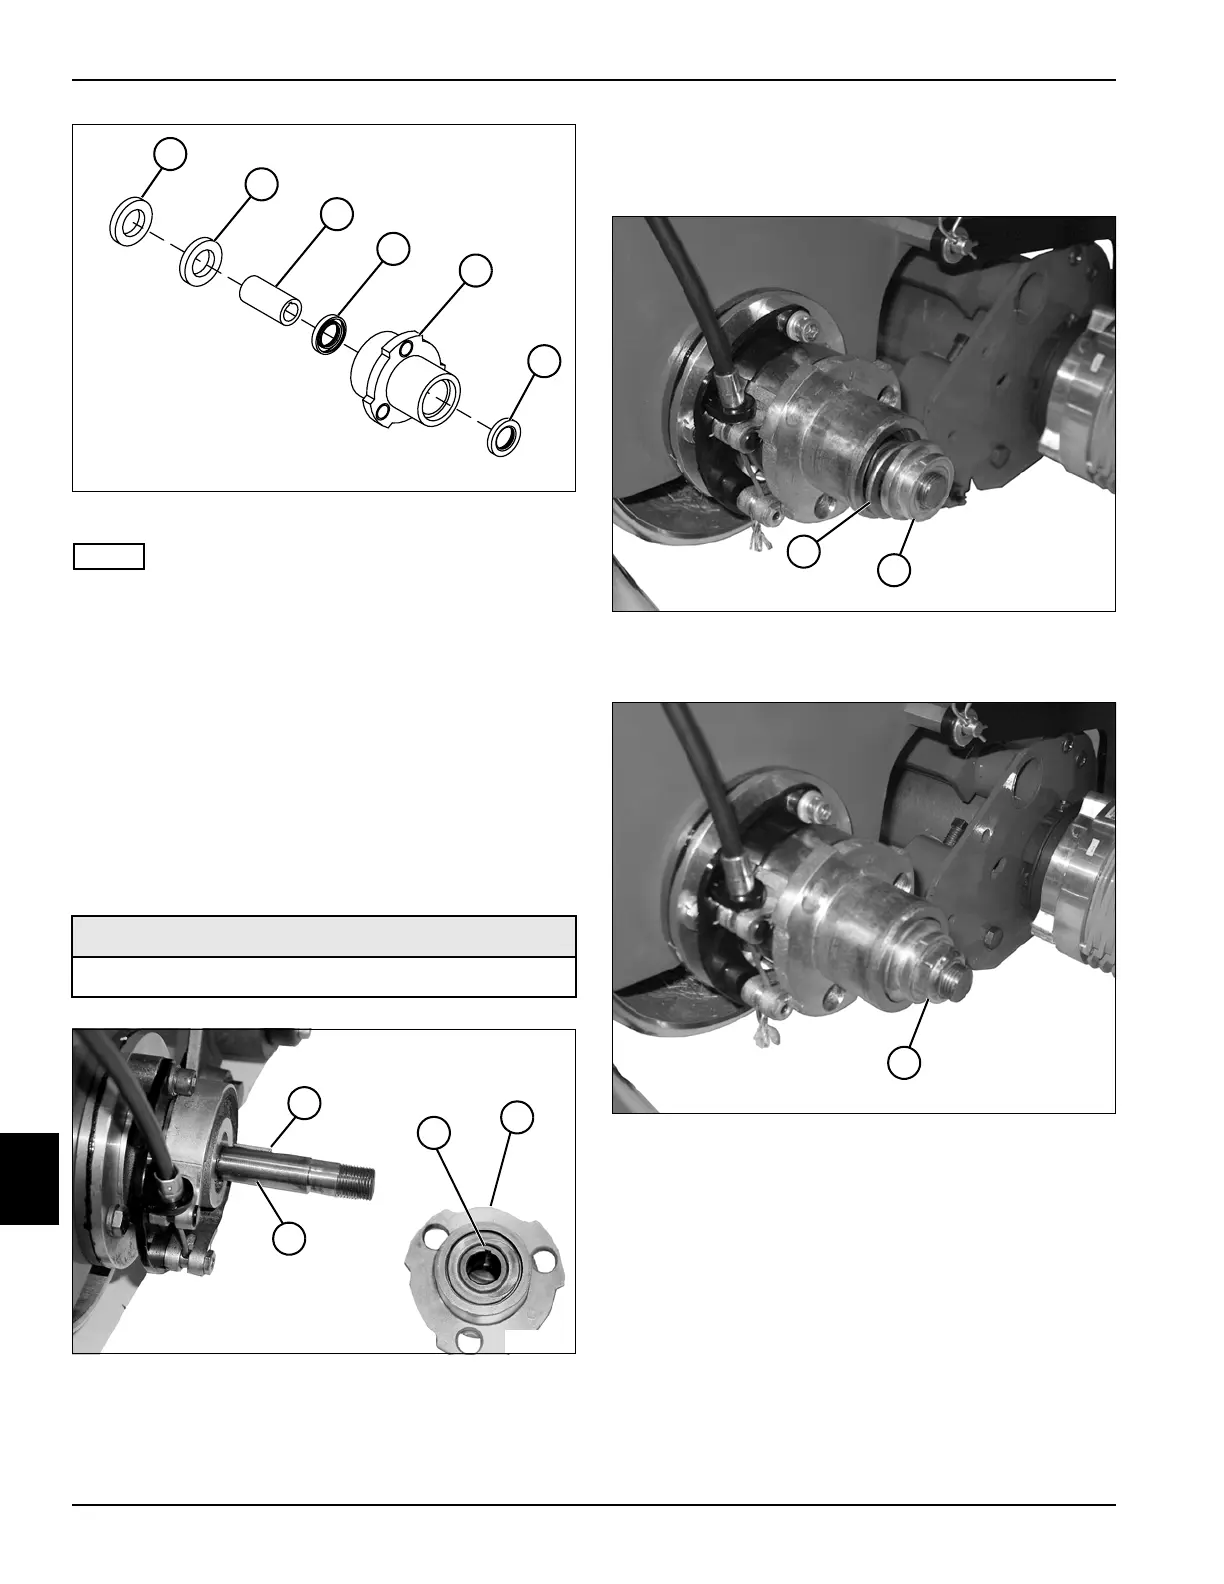
Figure 9-9
1. Apply anti-seize compound to keyway (1).
2. Align the groove (2) in the hub (3) with the keyway
(1) in the transport roller shaft (4), and install the hub
assembly on the shaft.
Figure 9-10
3. Install bushing (5) and latching collar (6).
Figure 9-11
4. Install a new lock nut (7) on the transport roller shaft.
Tighten lock nut (7) until all end play is removed, then
back off nut just enough to ensure latching collar (6)
rotates freely.
5. Install the transport wheels (if equipped). (See
“Transport Wheels (Optional)” on page 9-2.)
Required Materials
Anti-Seize Compound
TN0056
6
7
8
9
8
5*
* Item 5, left-side only, as needed.
1
TN0190
2
4
3
5
TN4410
6
7
TN4409