5-66 4203781 First Edition
HYDROSTATIC POWER TRAIN
5
NOTICE
Inspection Notes
• Keeping parts in assembly order, clean and air dry
each item for inspection.
• Inspect for worn or defective parts.
• Look for metal chips or slivers during cleaning (an
indication of damage to pump or other hydraulic
component).
• Inspect all parts for cracks, nicks, burrs, and
excessive wear. Inspect for scoring, galling, and
scratches on surfaces. Replace parts as necessary.
Assembly Notes
NOTICE
• Assemble the rear wheel motor by reversing the
order of disassembly.
• Lubricate all O-rings prior to assembly.
• Time the motor correctly. (See “Rear Wheel Motor
Timing” on page 5-67.)
• Tighten valve housing screws (19) to 36–37 lb-ft
(49–50 N·m).
• Pressure filter traction system upon start-up if metal
debris is found in system oil or motor. (See “Portable
In-Line Filter” on page 5-4.)
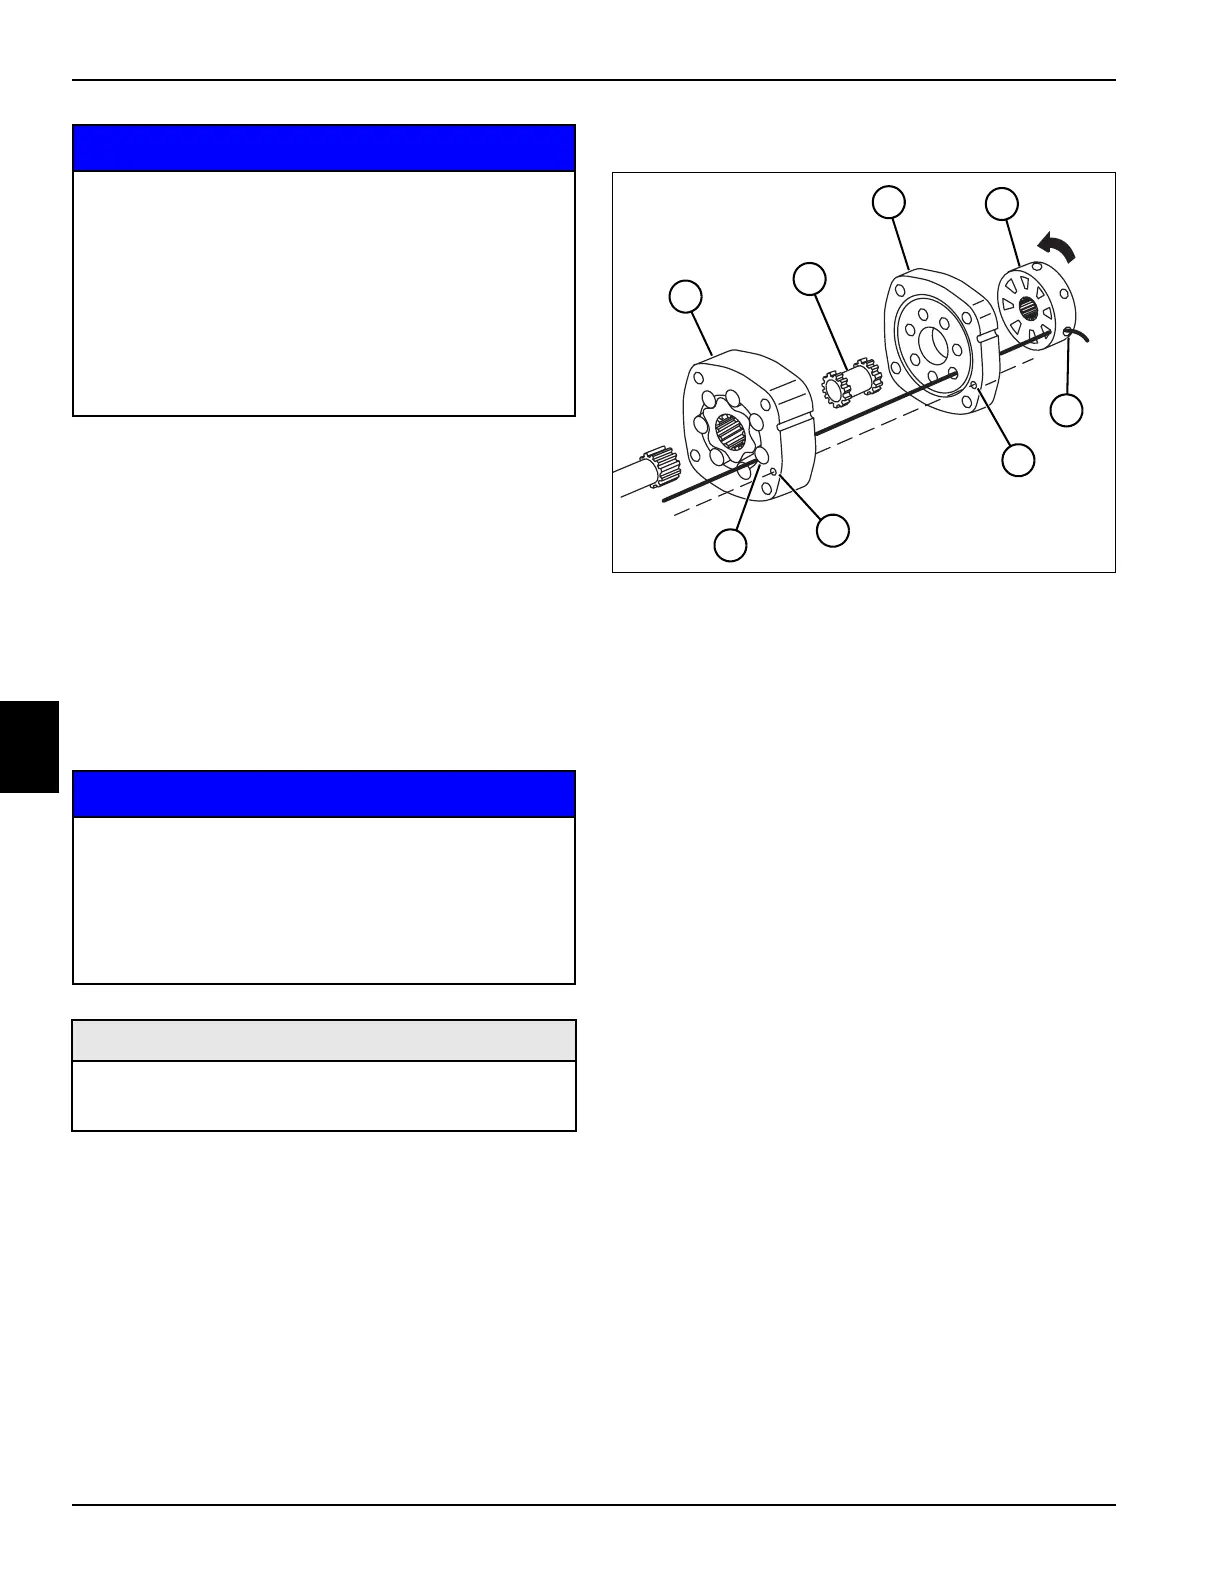
Rear Wheel Motor Timing
Figure 5-63: Correct Motor Timing
1. Locate the largest open pocket (8) in geroler (1).
Mark the location of the pocket on the outside edge
of geroler.
2. Align the case drain hole (7) in the geroler with the
case drain hole in the bearing housing. Install the
geroler on the bearing housing. Retain the rollers in
the outer geroler ring if they are loose.
3. Install the valve drive (2) in geroler (1).
4. Lubricate the seal and install it in the valve plate (3).
5. Align the case drain hole (6) in the valve plate (3)
with the case drain hole (7) in the geroler (1). Install
the valve plate (3) with the seal side toward the
geroler.
6. Locate the slot in the valve plate (3) that is in line with
the largest open pocket (8) of geroler.
7. Locate any side valve opening (5) through to the face
of the valve. Line up the opening with the open slot of
the valve plate that is in line with the largest open
pocket of geroler. Rotate valve (4) clockwise 1/2
spline tooth to engage with the valve drive.
• It is important that motor parts are marked
and placed in assembly order to aid in
assembly.
• It is important that all motor parts are
absolutely clean, as contamination can result
in serious damage and/or improper operation.
• Never use shop towels or rags to dry parts
after cleaning, as lint may clog passages. Dry
parts using compressed air.
• It is important that all component parts are
absolutely clean, as contamination can result
in serious damage and/or improper operation.
• Never use shop towels or rags to dry parts
after cleaning, as lint may clog passages. Dry
parts using compressed air.
Required Materials
• Seal Kit (Jacobsen PN 5003385)
• Shaft and Bearing Kit (Jacobsen PN 5003384)
TN1541
8
7
5
4
3
6
1
2

 Loading...

