Copying Functions
ADVANCED OPERATION GUIDE 1-27
In each option, the available ranges are as below.
NOTE: To specify the default width value of Border Erase, refer to Border
Erase Default on page 6-27 for details.
1
Press the Copy key.
2
Press [Layout/Edit] and then [Border Erase].
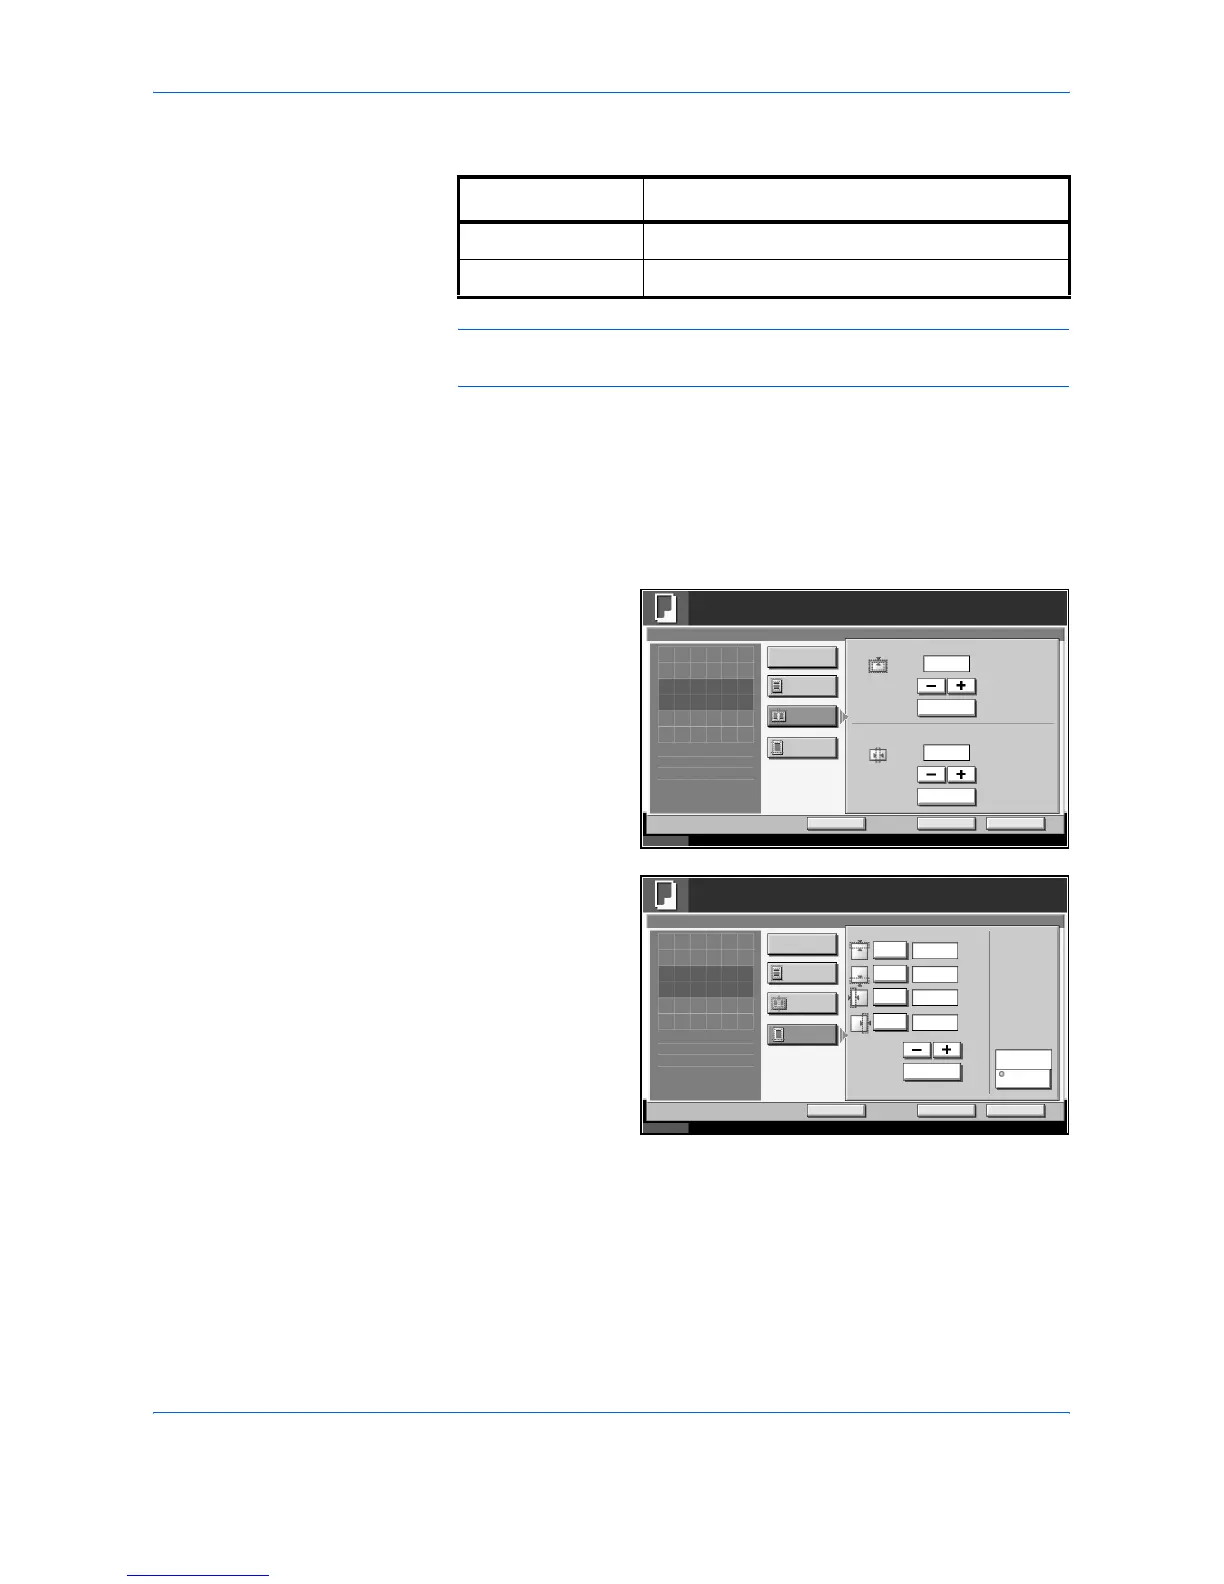
3
Press [Border Erase Sheet] or [Border Erase Book] to select the border
erase of the book border erase.
Use [+] or [–] to enter
the width in Border
or Gutter. Press [#
Keys] to use the
numeric keys for
entry.
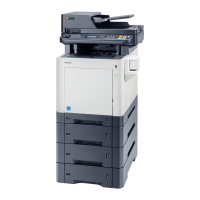
Press [Individual
Border Erase] to
select the individual
border erase.
Use [+] or [–] to enter
the width in Top,
Bottom, Left or
Right. Press [#
Keys] to use the
numeric keys for
entry.
Press [Original Orientation] to select the original orientation from either
[Top Edge Top] or [Top Edge Left]. Then press [OK].
4
Press [OK].
5
Press the Start key to start copying.
Specifications Border Erase Range
Inch Models 0 to 2"(in 0.01" increments)
Metric Models 0 mm to 50 mm (in 1 mm increments)
Status 10/5/2006 10:10
Ready to copy.
Copies
Cancel OK
Border Erase
Press [OK] to display
Add Shortcut
Border
Off
Border Erase
Sheet
mm
(0 - 50)
Gutter (0 - 50)
mm
# Keys
# Keys
Border Erase
Book
Individual
Border Erase
1
0
0
the image.
Status 10/5/2006 10:10
Ready to copy.
Copies
Cancel OK
Border Erase
Press [OK] to display
Add Shortcut
Top
Off
Border Erase
Sheet
mm
(0 - 50)
mm
# Keys
Border Erase
Book
Individual
Border Erase
Top Edge Top
Original
Orientation
Bottom
Left
Right
1
mm
mm
0
0
0
0
the image.