PERIODIC MAINTENANCE
3-6
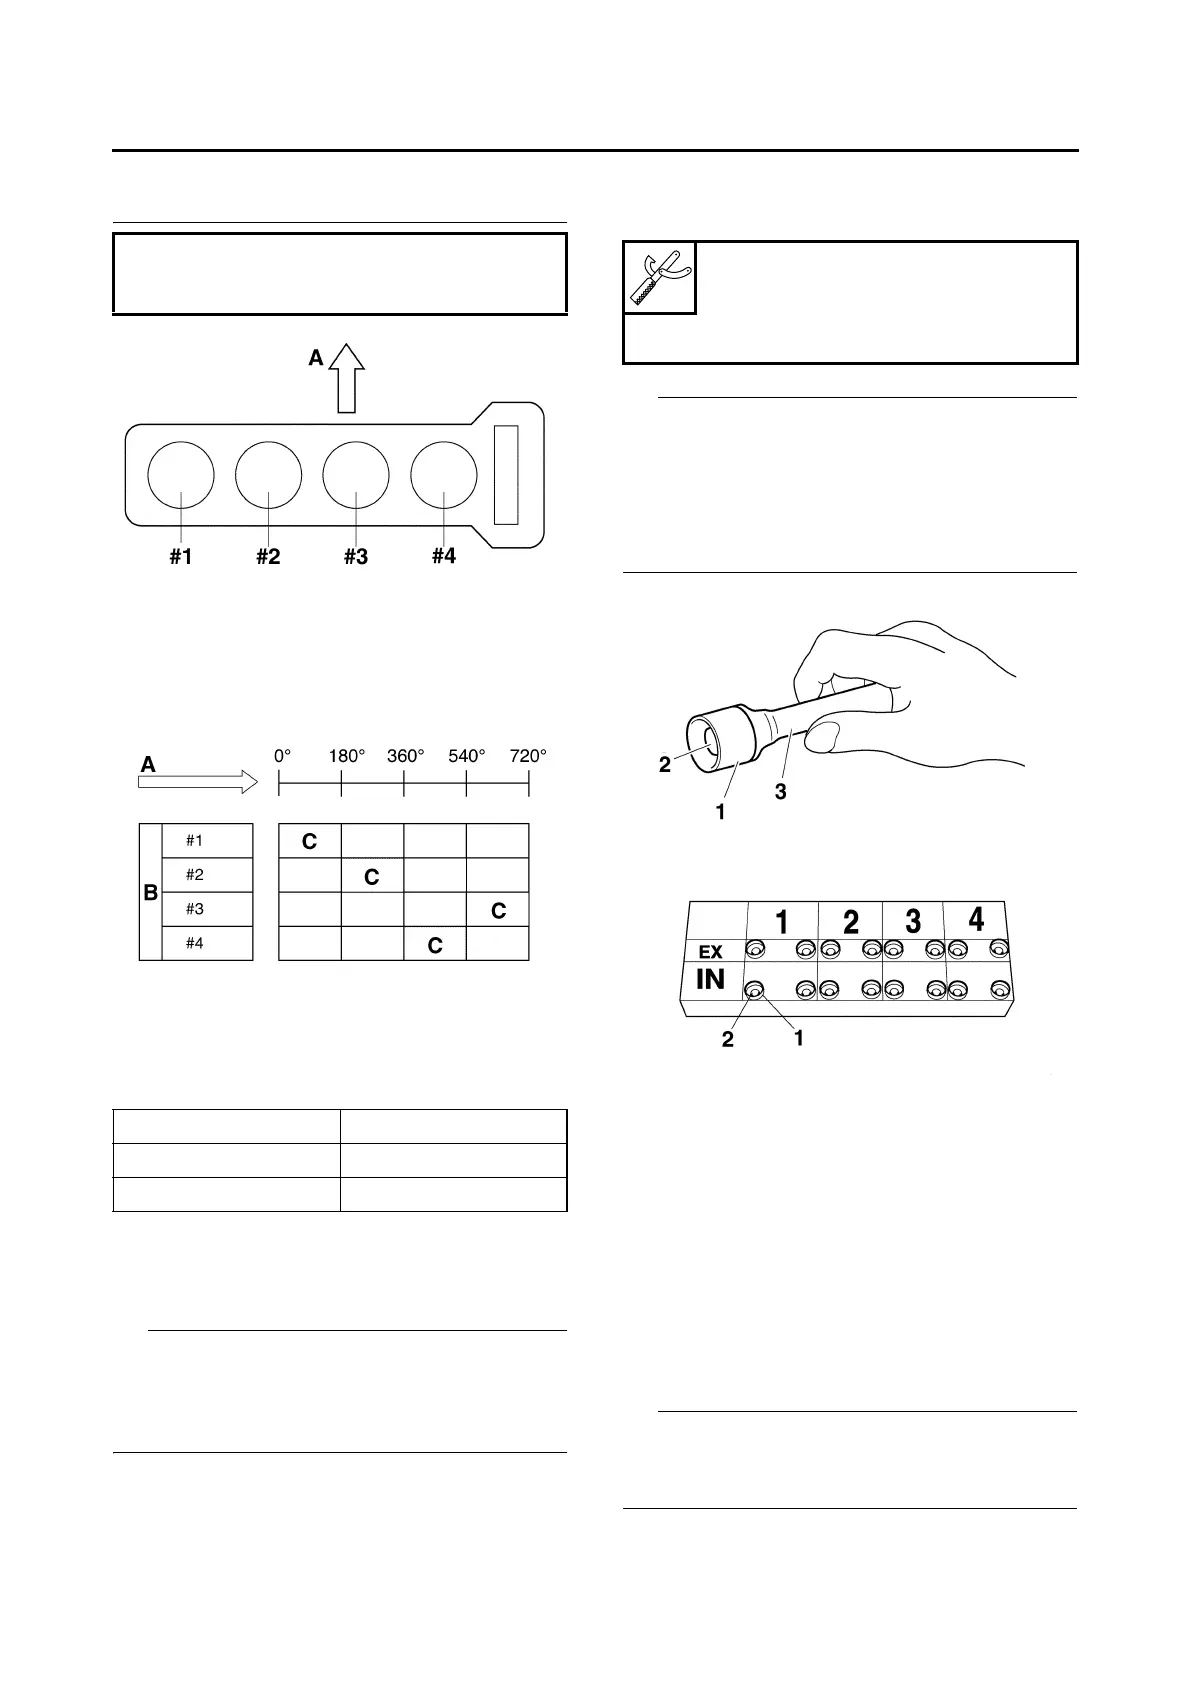
• Measure the valve clearance in the following
sequence.
d. To measure the valve clearances of the other
cylinders, starting with cylinder #1 at TDC,
turn the crankshaft clockwise as specified in
the following table.
▲▲▲▲ ▲ ▲▲▲▲▲▲▲▲▲ ▲ ▲▲▲▲ ▲ ▲▲▲▲ ▲ ▲▲▲▲▲▲▲
5. Remove:
• Camshafts
• Refer to “CAMSHAFTS” on page 5-11.
• When removing the timing chain and cam-
shafts, fasten the timing chain with a wire to re-
trieve it if it falls into the crankcase.
6. Adjust:
• Valve clearance
▼▼▼▼ ▼ ▼▼▼▼▼▼▼▼▼ ▼ ▼▼▼▼ ▼ ▼▼▼▼ ▼ ▼▼▼▼ ▼▼▼
a. Remove the valve lifter “1” and the valve pad
“2” with the valve lapper “3”.
• Cover the timing chain opening with a rag to
prevent the valve pad from falling into the
crankcase.
• Make a note of the position of each valve lifter
“1” and valve pad “2” so that they can be in-
stalled in the correct place.
b. Calculate the difference between the speci-
fied valve clearance and the measured valve
clearance.
Example:
Specified valve clearance = 0.15–0.22 mm
(0.0059–0.0087 in)
Measured valve clearance = 0.25 mm
(0.0098 in)
0.25 mm (0.0098 in) - 0.22 mm (0.0087 in) =
0.03 mm (0.001 in)
c. Check the thickness of the current valve pad.
The thickness “a” of each valve pad is marked in
hundredths of millimeters on the side that touch-
es the valve lifter.
Valve clearance measuring sequence
Cylinder #1 → #2 → #4 → #3
A. Front
A. Degrees that the crankshaft is turned
clockwise
B. Cylinder
C. Combustion cycle
Cylinder #2 180°
Cylinder #4 360°
Cylinder #3 540°
Valve lapper
90890-04101
Valve lapping tool
YM-A8998