FRONT BRAKE
4-45
3. Install:
• Brake pad bolts
• Brake caliper
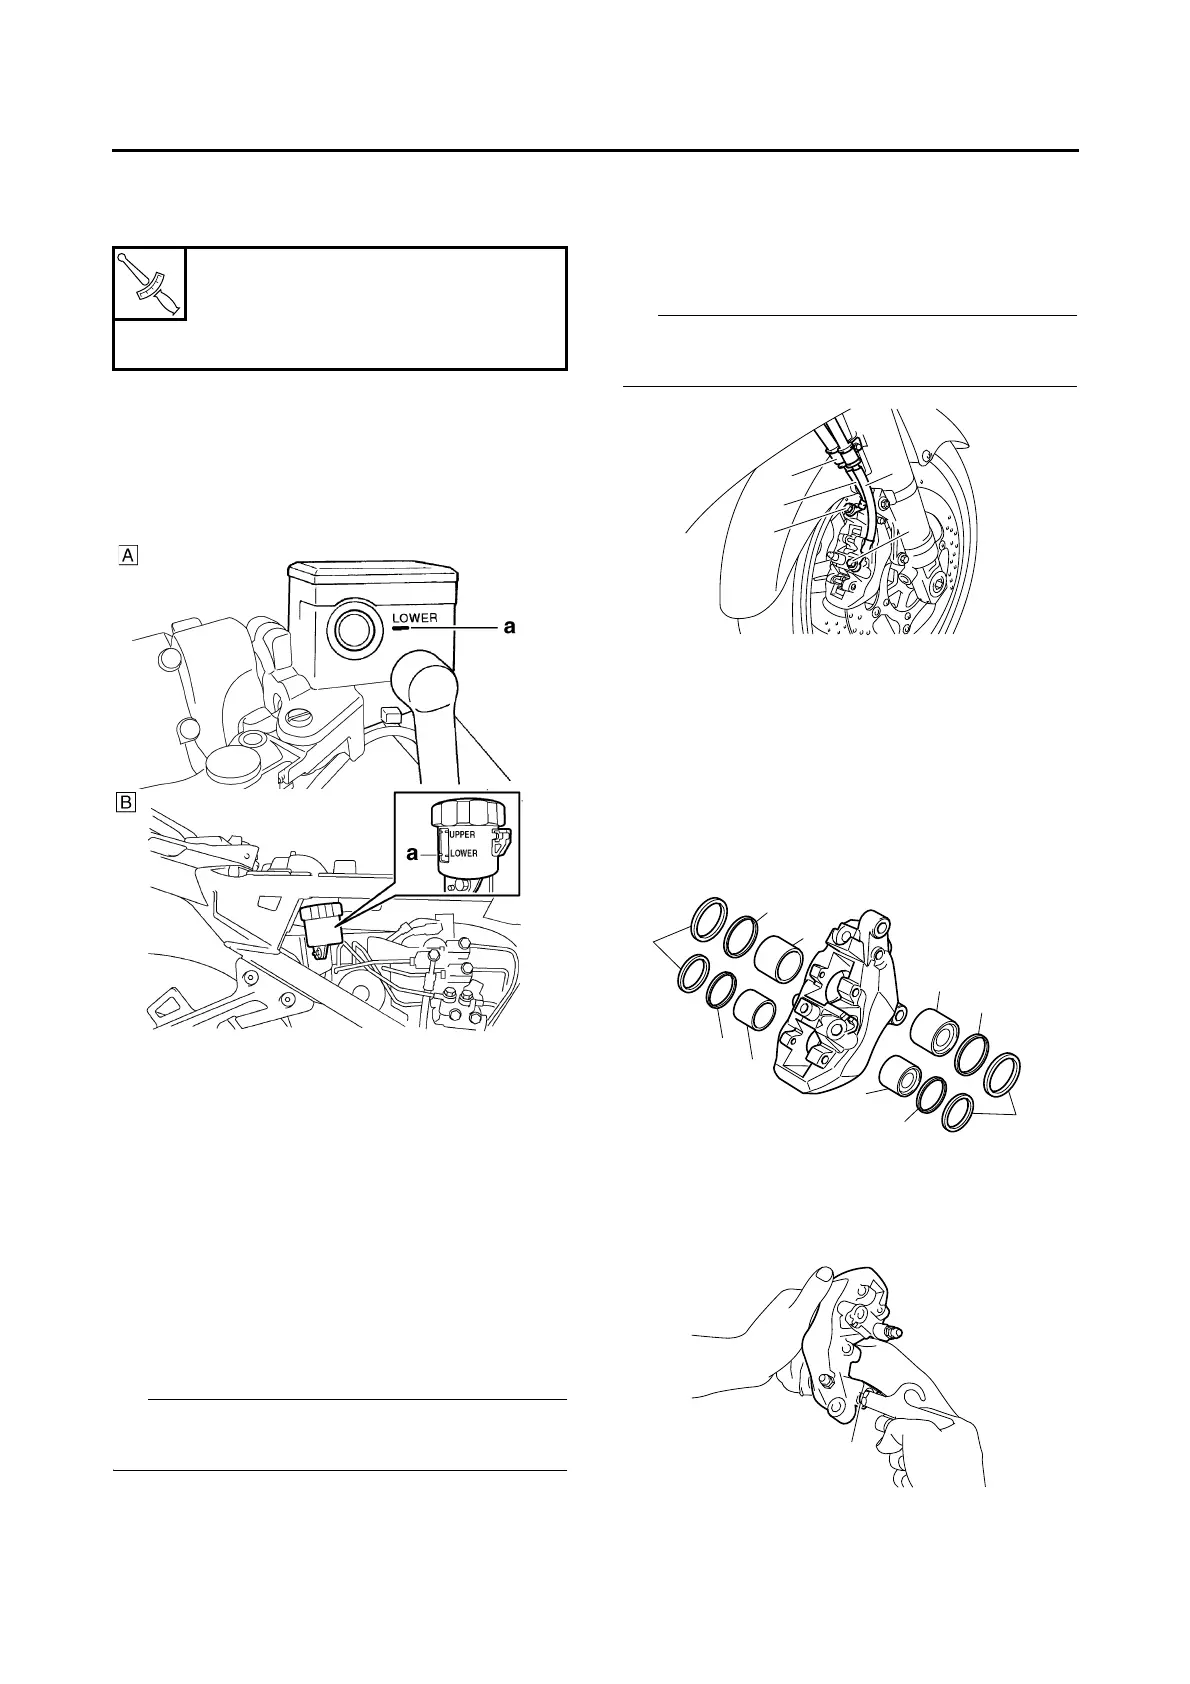
4. Check:
• Brake fluid level
Below the minimum level mark “a” → Add the
specified brake fluid to the proper level.
Refer to “CHECKING THE BRAKE FLUID
LEVEL” on page 3-14.
5. Check:
• Brake lever and brake pedal operation
Soft or spongy feeling → Bleed the brake sys-
tem.
Refer to “BLEEDING THE HYDRAULIC
BRAKE SYSTEM (ABS)” on page 3-14.
EAS22300
REMOVING THE FRONT BRAKE CALIPERS
The following procedure applies to both of the
brake calipers.
Before removing the brake caliper, drain the
brake fluid from the entire brake system.
1. Remove:
• Brake hose holder “1”
• Brake hose union bolts “2”
• Copper washers
• Brake hose (brake pipe/upper joint assembly
to right front brake caliper) “3”
• Brake hose (metering valve to right front
brake caliper) “4”
Put the end of the brake hoses into a container
and pump out the brake fluid carefully.
EAS22360
DISASSEMBLING THE FRONT BRAKE
CALIPERS
The following procedure applies to both of the
brake calipers.
1. Remove:
• Brake caliper pistons “1”
• Brake caliper piston dust seals “2”
• Brake caliper piston seals “3”
▼▼▼▼ ▼ ▼▼▼▼▼▼▼▼▼ ▼ ▼▼▼▼ ▼ ▼▼▼▼ ▼ ▼▼▼▼ ▼▼▼
a. Blow compressed air into the brake hose joint
opening “a” to force out the pistons from the
brake caliper.
Brake pad bolt
17 Nm (1.7 m·kg, 12 ft·lb)
Brake caliper bolt
40 Nm (4.0 m·kg, 29 ft·lb)
A. Front brake
B. Unified brake system