TRANSMISSION
5-104
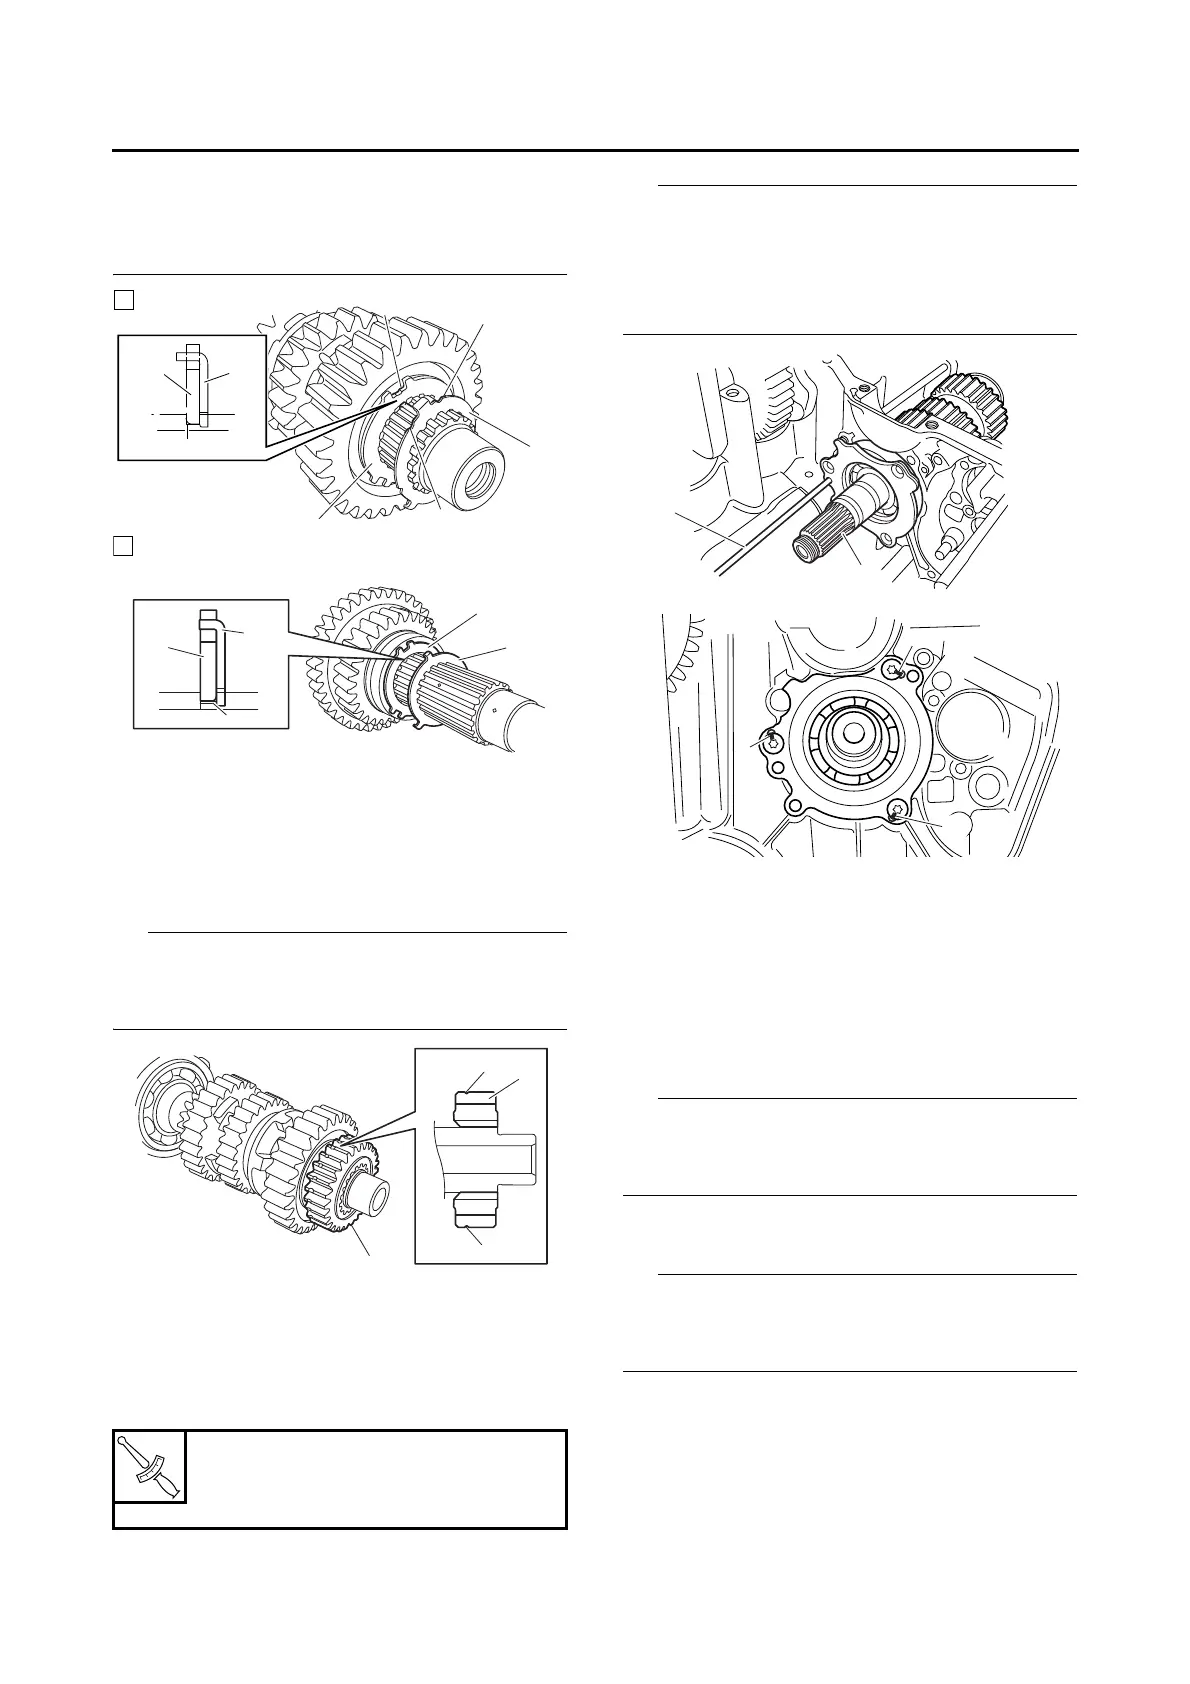
• Be sure to align the projection on the toothed
lock washer that is between the alignment
marks “b” with the alignment mark “c” on the re-
tainer.
3. Install:
• 2nd pinion gear “1”
Make sure that the side of the 2nd pinion gear
with the groove “d” is facing inward as shown in
the illustration.
EAS26350
INSTALLING THE TRANSMISSION
1. Install:
• Main axle assembly “1”
• Main axle assembly screws
• When installing the main axle assembly, use a
pin “2” to align the bearing housing hole with
the corresponding hole in the upper crankcase.
• Stake the main axle assembly screws at a cut-
out “a” in the main axle bearing housing.
2. Install:
• Shift fork-C
• Shift drum assembly
• Springs
• Short shift fork guide bar
• Shift fork-R
• Shift fork-L
• Long shift fork guide bar
The embossed marks on the shift forks should
face towards the right side of the engine and be
in the following sequence: “R”, “C”, “L”.
3. Install:
• Washer “1”
Install the washer with its chamfered side facing
towards the drive axle assembly as shown in the
illustration.
A. Main axle
B. Drive axle
Main axle assembly screw
12 Nm (1.2 m·kg, 8.7 ft·lb)
LOCTITE®