CLUTCH
5-54
EAS25290
CHECKING THE CLUTCH MASTER
CYLINDER
1. Check:
• Clutch master cylinder body
Cracks/damage → Replace the clutch mas-
ter cylinder.
• Clutch fluid delivery passage
(clutch master cylinder body)
Obstruction → Blow out with compressed air.
2. Check:
• Clutch master cylinder
• Clutch master cylinder kit
Rust/scratches/wear → Replace the clutch
master cylinder and clutch master cylinder kit
as a set.
3. Check:
• Clutch master cylinder reservoir
Cracks/damage → Replace.
• Clutch master cylinder reservoir diaphragm
Damage/wear → Replace.
4. Check:
• Clutch hose
Cracks/damage/wear → Replace.
EAS25300
ASSEMBLING THE CLUTCH MASTER
CYLINDER
EW3P61015
• Before installation, all internal clutch com-
ponents must be cleaned and lubricated
with clean or new clutch fluid.
• Never use solvents on internal clutch com-
ponents.
EAS25310
INSTALLING THE CLUTCH MASTER
CYLINDER
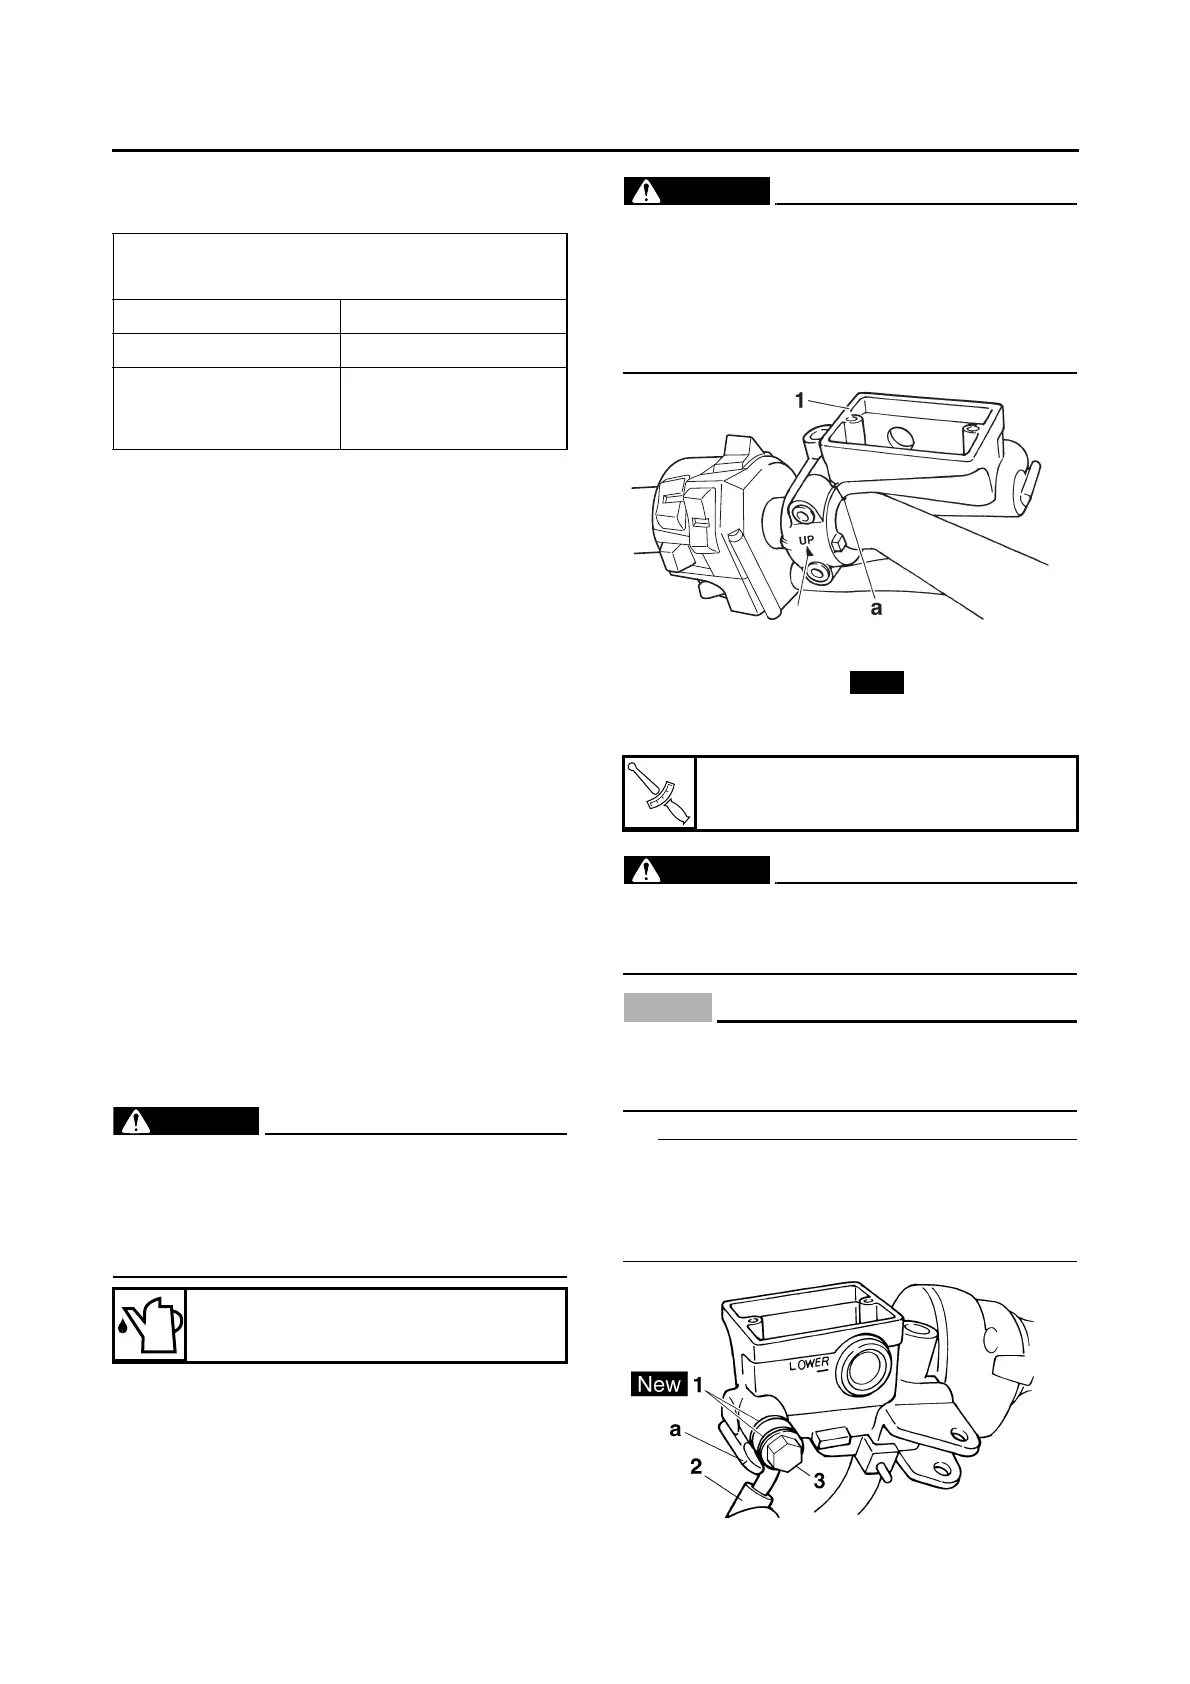
1. Install:
• Clutch master cylinder “1”
• Clutch master cylinder holder “2”
EW3P61016
• Install the clutch lever holder with the “UP”
mark facing up.
• Align the end of the clutch lever holder with
the punch mark “a” on the left handlebar.
• First, tighten the upper bolt, then the lower
bolt.
2. Install:
• Copper washers “1”
• Clutch hose “2”
• Clutch hose union bolt “3”
EW3P61017
Proper clutch hose routing is essential to in-
sure safe vehicle operation. Refer to “CABLE
ROUTING” on page 2-47.
EC3P61034
When installing the clutch hose onto the
clutch master cylinder, make sure the clutch
pipe touches the projection “a” as shown.
Turn the handlebars to the left and to the right to
make sure the clutch hose does not touch other
parts (e.g., wire harness, cables, leads). Correct
if necessary.
Recommended clutch component replace-
ment schedule
Piston seal Every two years
Clutch hose Every four years
Clutch fluid
Every two years and
whenever the clutch
is disassembled
Specified brake and clutch fluid
DOT 4
Clutch hose union bolt
30 Nm (3.0 m·kg, 22 ft·lb)