ENGINE REMOVAL
5-8
EAS1MC1066
REMOVING THE ENGINE
1. Loosen:
• Spacer bolt
Loosen the spacer bolt with the pivot shaft
wrench “1” and pivot shaft wrench adapter “2”.
EAS23720
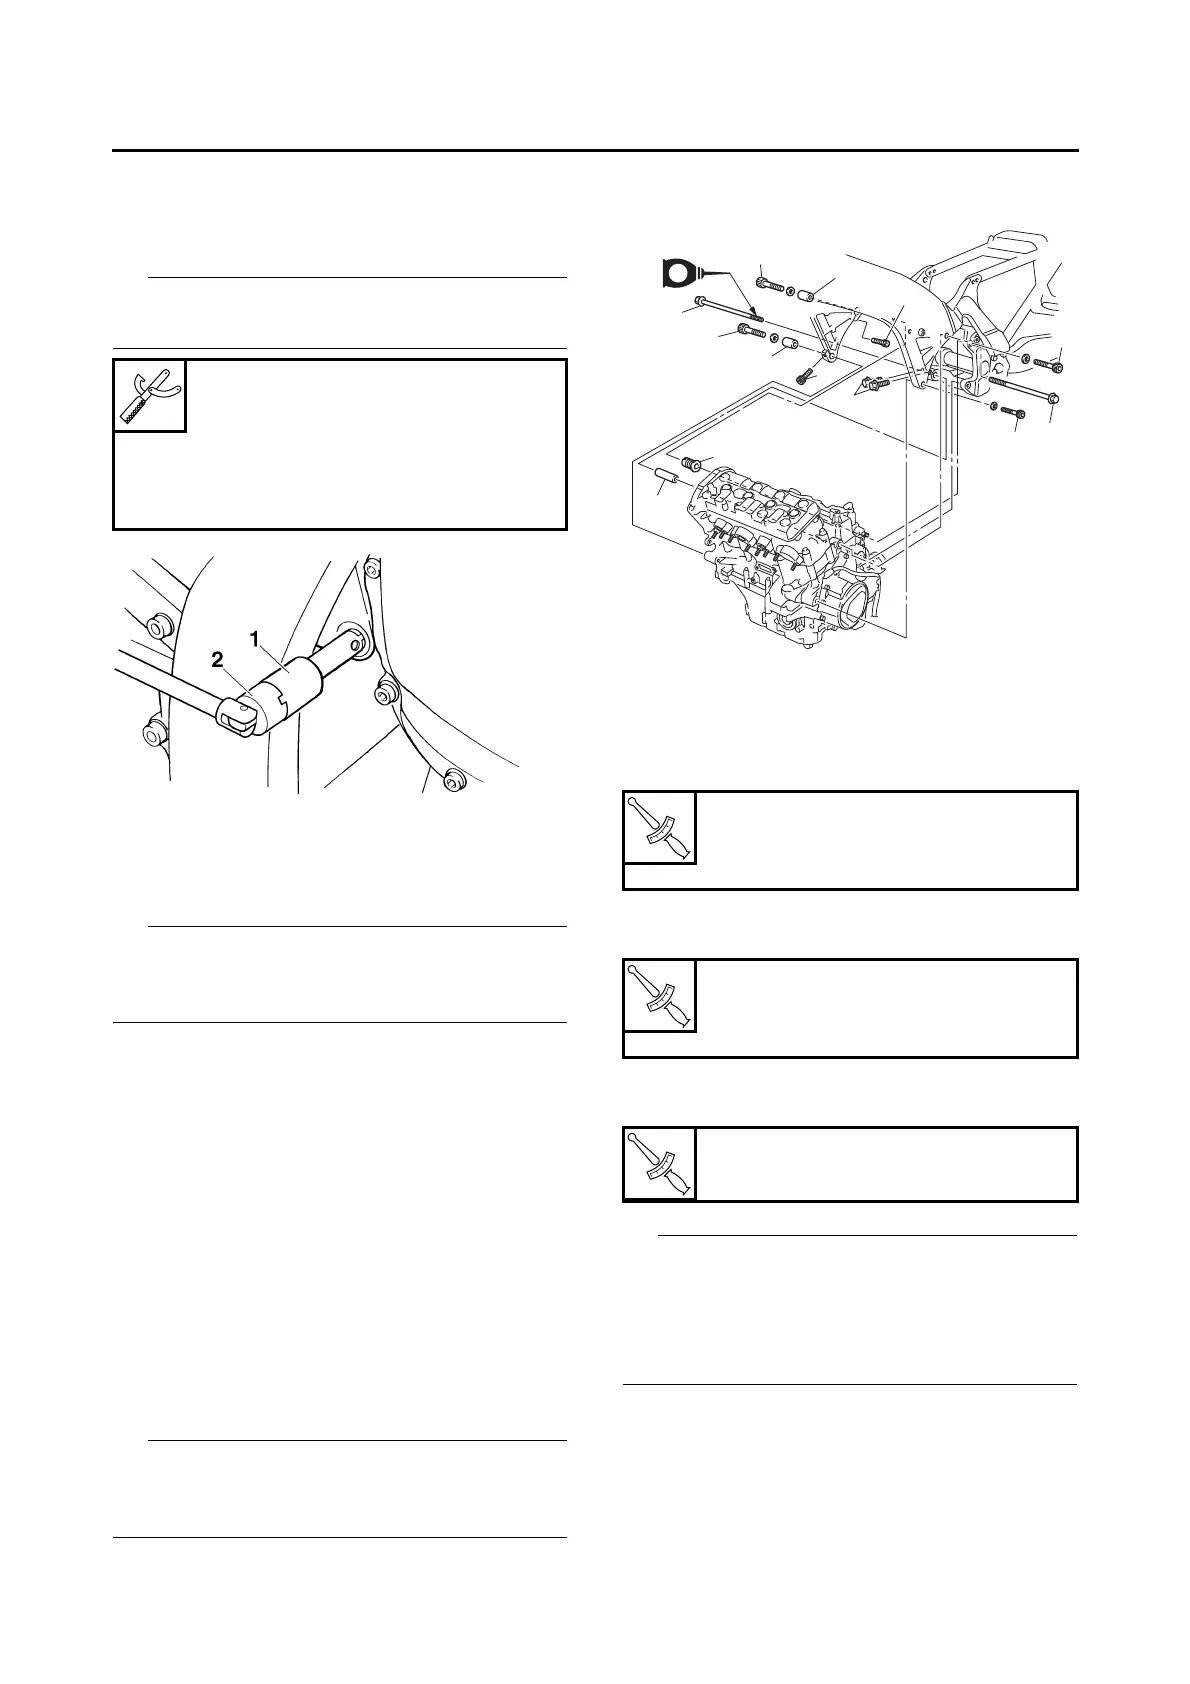
INSTALLING THE ENGINE
1. Install:
• Engine
When mounting the engine to the frame, be sure
to align the splines on the middle driven shaft
with the splines on the universal joint.
2. Install:
• Spacer bolt “1”
• Engine mounting bolt (rear upper side) “2”
• Spacer “3”
• Engine mounting bolt (rear lower side) “4”
• Engine mounting bolt (left front upper side)
“5”
• Engine mounting bolt (left front lower side) “6”
• Spacers “7”
• Engine mounting bolt (right front upper side)
“8”
• Engine mounting bolt (right front lower side)
“9”
• Pinch bolts (front side) “10”
• Pinch bolts (rear lower side) “11”
• Lubricate the engine mounting bolt (rear lower
side) threads with engine oil.
• Do not fully tighten the bolts.
3. Tighten:
• Engine mounting bolt (left front upper side)
“5”
4. Tighten:
• Engine mounting bolt (rear lower side) “4”
5. Tighten:
• Spacer bolt “1”
• Tighten the spacer bolt “1” to specification with
the pivot shaft wrench and pivot shaft wrench
adapter.
• When tightened, the spacer bolt should be flat
against the engine surface.
Pivot shaft wrench
90890-01471
Frame spanner socket
YM-01471
Pivot shaft wrench adapter
90890-01476
Engine mounting bolt (left front
upper side)
49 Nm (4.9 m·kg, 35 ft·lb)
Engine mounting bolt (rear lower
side)
45 Nm (4.5 m·kg, 32 ft·lb)
Spacer bolt
18 Nm (1.8 m·kg, 13 ft·lb)
E
10
10
7
7
8
4
9
1
3
2
5
6
11