PERIODIC MAINTENANCE
3-10
• Exhaust pipe assembly bolts “6”
• Exhaust pipe assembly and muffler bolts “7”
• Muffler bolts “8”
4. Install:
• Side cowlings
Refer to “GENERAL CHASSIS” on page 4-1.
EAS20600
ADJUSTING THE EXHAUST GAS VOLUME
Be sure to set the CO density level to standard,
and then adjust the exhaust gas volume.
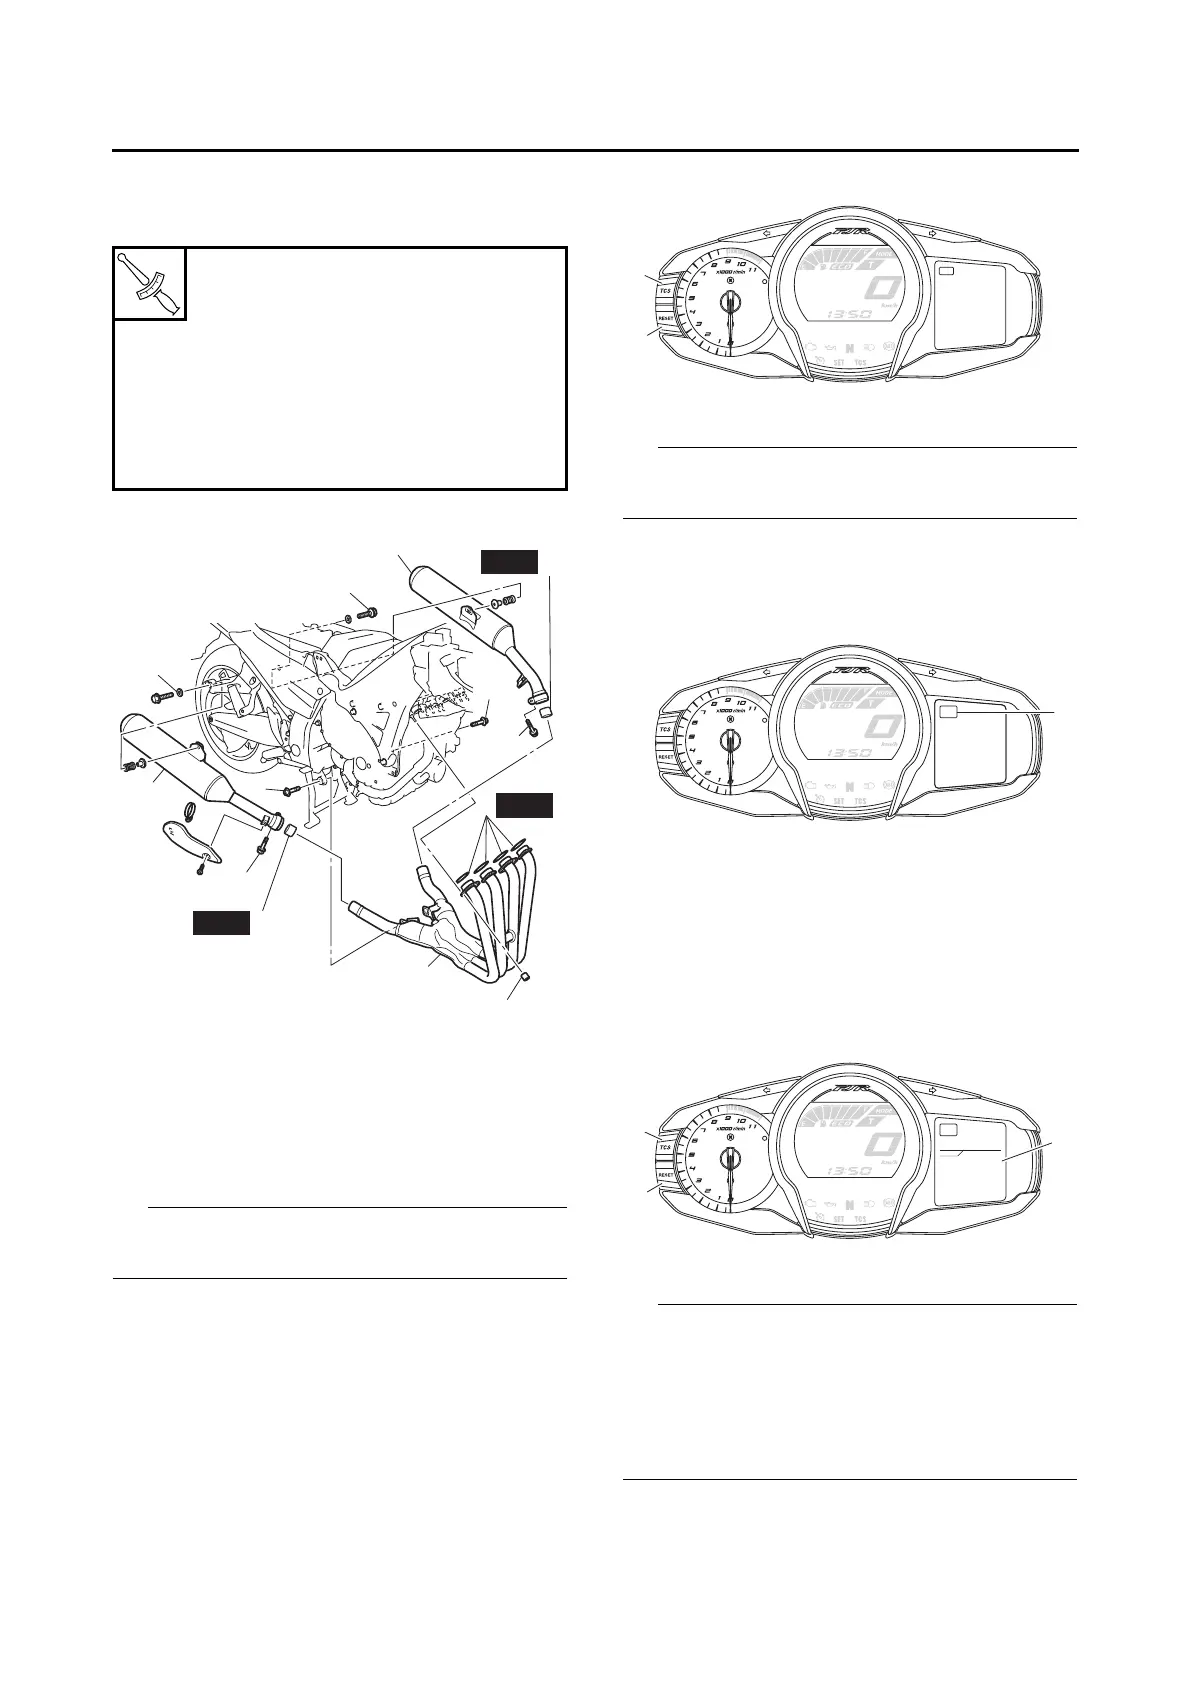
1. Turn the main switch to “OFF”.
2. Simultaneously press and hold the “TCS”
button “1” and “RESET” button “2”, turn the
main switch to “ON”, and continue to press
the buttons for 8 seconds or more.
All displays on the multi-function meter right dis-
play disappear and “DIAG” appears.
3. Press the “TCS” button to select the CO ad-
justment mode “CO” “1” or the diagnostic
mode “DIAG”.
4. After selecting “CO”, simultaneously press
the “TCS” button “1” and “RESET” button “2”
for 2 seconds or more to execute the selec-
tion.
5. Press the “TCS” button or “RESET” button to
select a cylinder number “3”.
The selected cylinder number appears on the
multi-function meter right display.
• To decrease the selected cylinder number,
press the “RESET” button.
• To increase the selected cylinder number,
press the “TCS” button.
Exhaust pipe assembly nut
20 Nm (2.0 m·kg, 14 ft·lb)
Exhaust pipe assembly bolt
17 Nm (1.7 m·kg, 12 ft·lb)
Exhaust pipe assembly and muf-
fler bolt
20 Nm (2.0 m·kg, 14 ft·lb)
Muffler bolt
25 Nm (2.5 m·kg, 18 ft·lb)
1
5
4
6
6
2
3
(8)
2
7
7
New
New
4
New
8
8
DIAG
2
1
CO
1
CO
CO
01
2
1
3