HANDLEBARS
4-78
EAS1MC1065
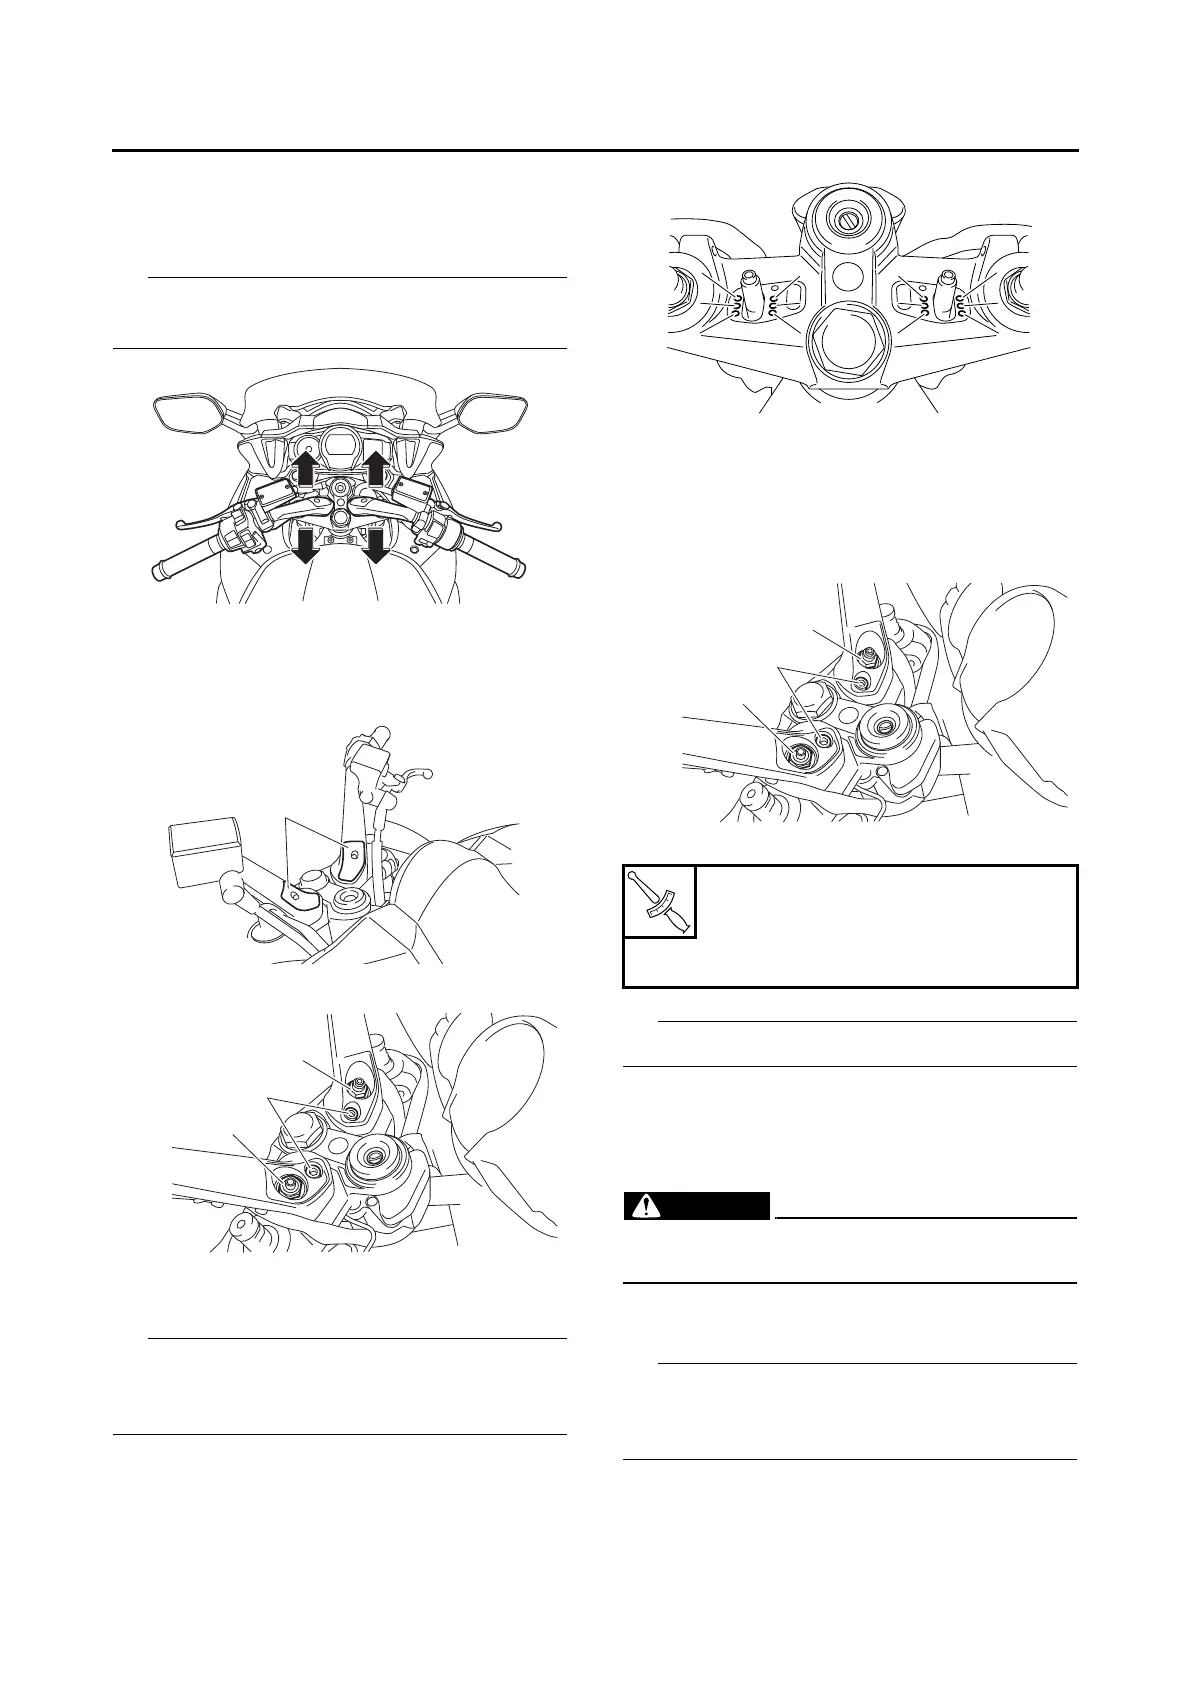
ADJUSTING THE HANDLEBAR POSITION
1. Check:
• Handlebar position
The handlebar position can be adjusted to one
of three positions to suit the rider’s preference.
2. Adjust:
• Handlebar position
▼▼▼▼ ▼ ▼▼▼▼▼▼▼▼▼ ▼ ▼▼▼▼ ▼ ▼▼▼▼ ▼ ▼▼▼▼▼▼▼
a. Remove the plates “1”.
b. Remove the handlebar nuts “2” and bolts “3”.
c. Remove the handlebars.
d. Install the handlebars in the desired position.
Fit the projections on each handlebar into the
holes in the upper bracket, making sure that the
handlebars are installed in the same position.
e. Install the handlebar bolts “3” and nuts “2”
temporarily.
f. Tighten the handlebar bolts and nuts.
First tighten the bolts, then tighten the nuts.
▲▲▲▲ ▲ ▲▲▲▲▲▲▲▲▲ ▲ ▲▲▲▲ ▲ ▲▲▲▲ ▲ ▲▲▲▲ ▲▲▲
EAS22870
REMOVING THE HANDLEBARS
1. Stand the vehicle on a level surface.
EWA13120
Securely support the vehicle so that there is
no danger of it falling over.
2. Remove:
• Handlebar grip “1”
Blow compressed air between the handlebar
and the handlebar grip, and gradually push the
grip off the handlebar.
a. Front position
b. Standard position
c. Rear position
Handlebar bolt
23 Nm (2.3 m·kg, 17 ft·lb)
Handlebar nut
65 Nm (6.5 m·kg, 47 ft·lb)