CLUTCH
5-52
EAS25250
INSTALLING THE CLUTCH
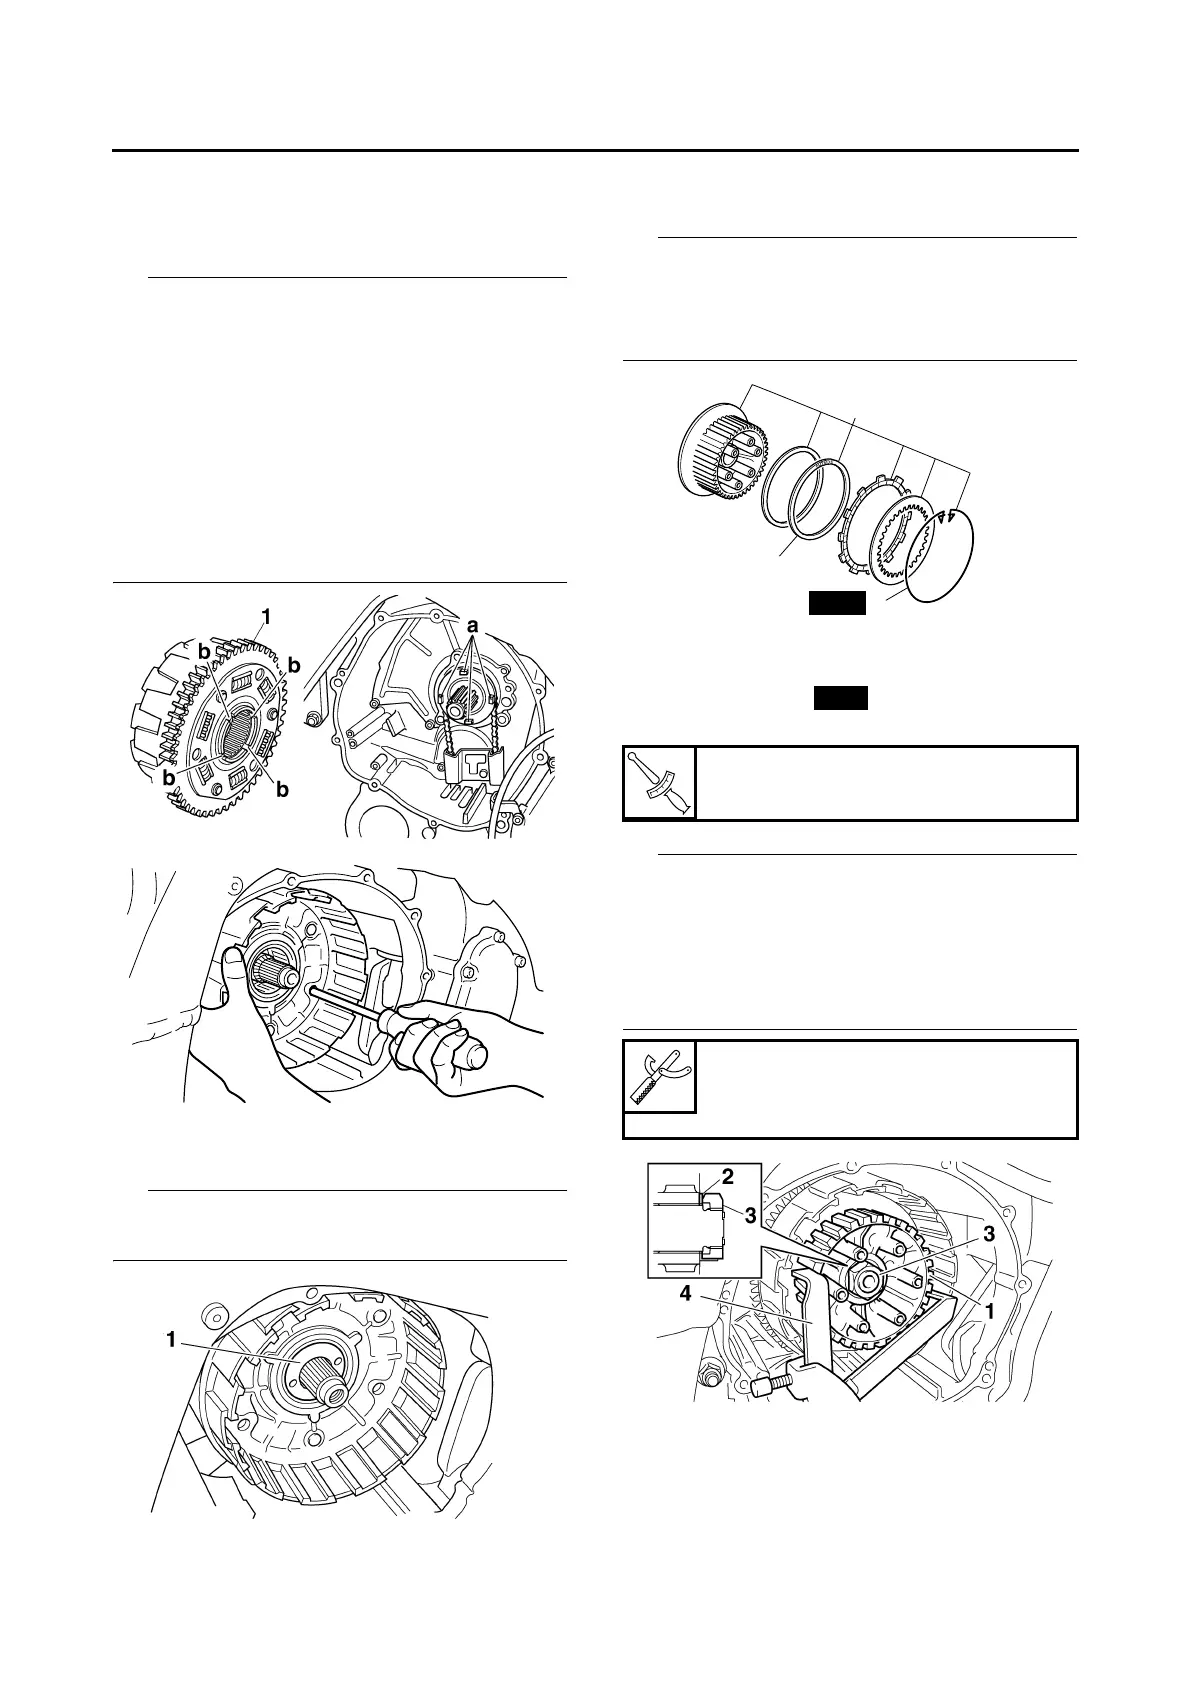
1. Install:
• Clutch housing “1”
• Make sure that the projections “a” in the clutch
housing align with the slots “b” in the oil pump
drive sprocket.
• Make sure that the primary driven gear teeth
and primary drive gear teeth mesh correctly.
• Insert a cross-headed screwdriver into one of
the holes of the clutch housing and primary
driven gear, and then rotate the inner primary
driven gear until both primary drive gears are
aligned. The teeth of both primary driven gears
must be aligned for installation.
2. Install:
• Spacer “1”
Install the spacer with the two screw holes facing
towards the clutch boss.
3. Install:
• Clutch boss assembly “1”
• If the wire circlip “2” has been removed, care-
fully install a new one.
• Install the clutch damper spring “3” with the
“OUTSIDE” mark facing out.
4. Install:
• Clutch boss “1”
• Lock washer “2”
• Clutch boss nut “3”
• Install the clutch boss nut with its large inner di-
ameter side facing inward as shown in the illus-
tration.
• While holding the clutch boss with the univer-
sal clutch holder “4”, tighten the clutch boss
nut.
5. Bend the lock washer tab along a flat side of
the nut.
6. Lubricate:
• Friction plates
Clutch boss nut
90 Nm (9.0 m·kg, 65 ft·lb)
Universal clutch holder
90890-04086
YM-91042