CLUTCH
5-49
EAS25080
REMOVING THE CLUTCH
1. Remove:
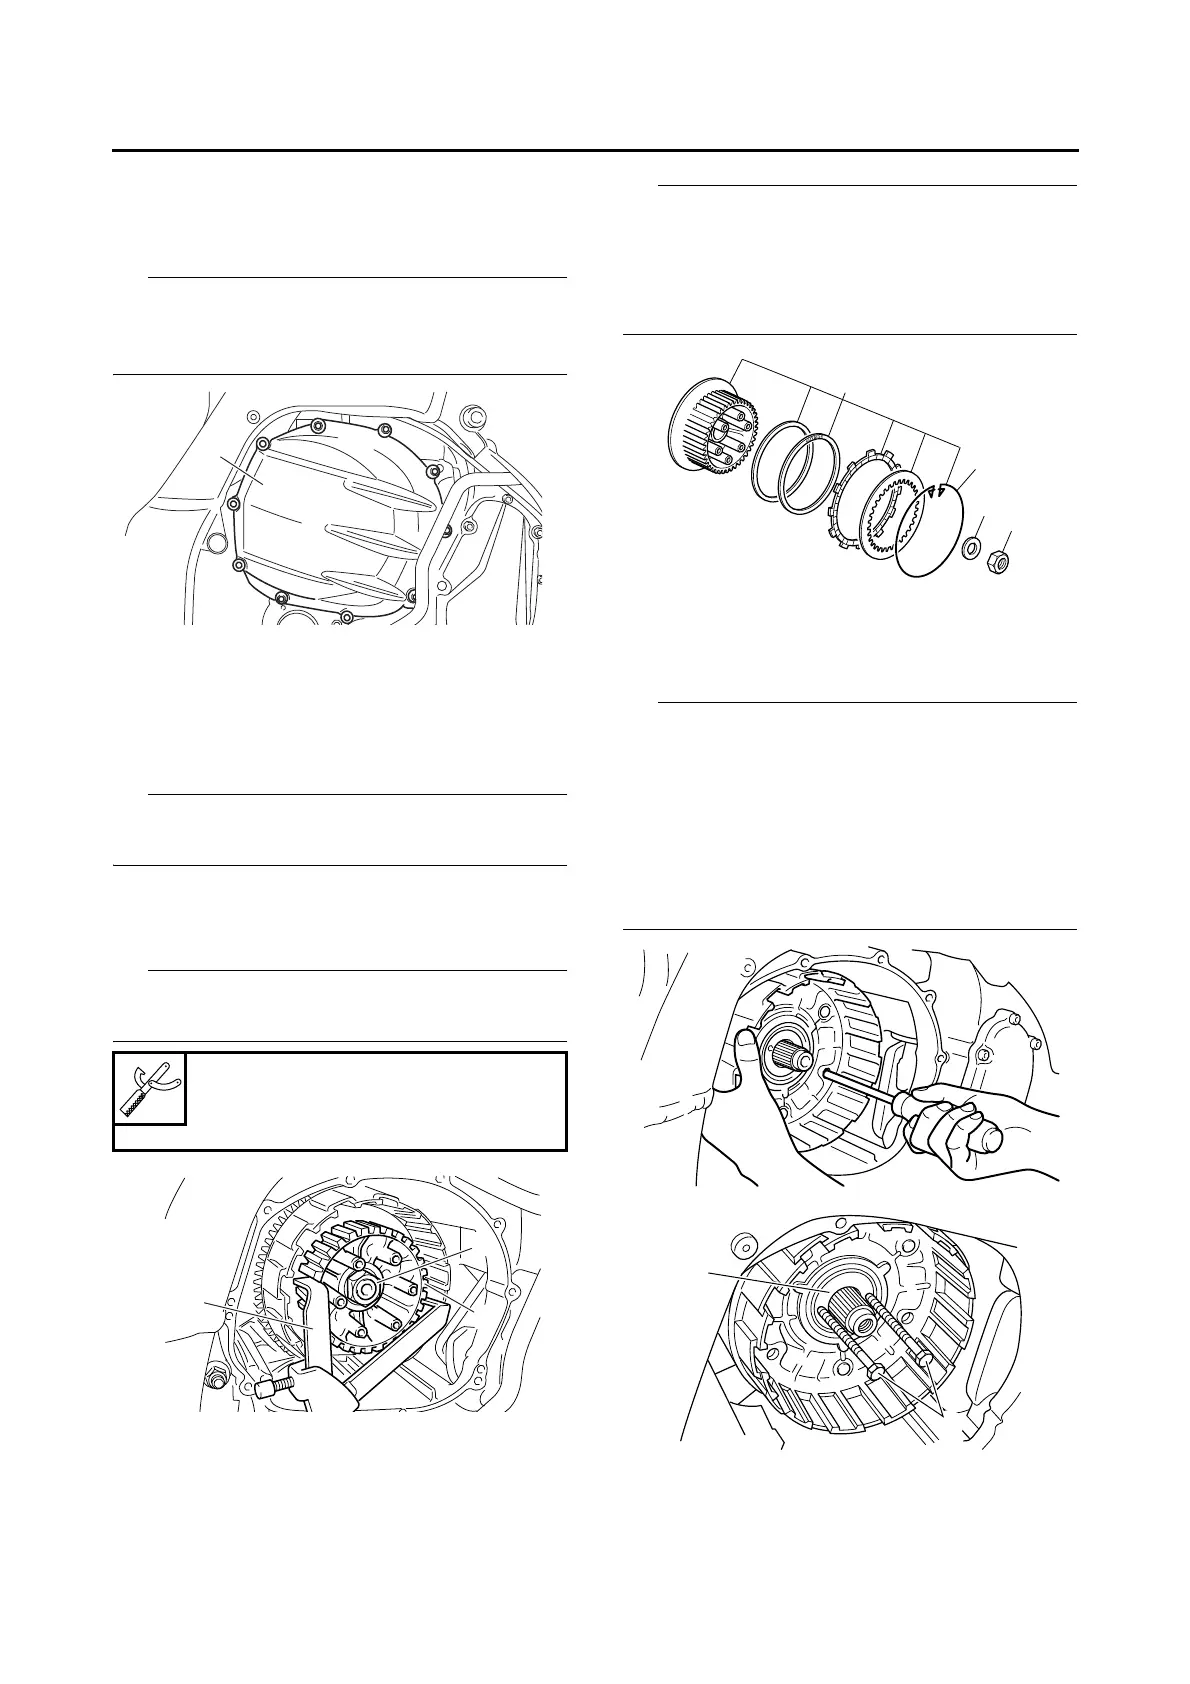
• Clutch cover “1”
Loosen each bolt 1/4 of a turn at a time, in stag-
es and in a crisscross pattern. After all of the
bolts are fully loosened, remove them.
2. Remove:
• Rear balancer weight
Refer to “BALANCERS” on page 5-106.
3. Remove:
• Clutch spring bolt
Loosen the clutch spring bolts in stages and in a
crisscross pattern.
4. Straighten the lock washer tab.
5. Loosen:
• Clutch boss nut “1”
While holding the clutch boss “2” with the univer-
sal clutch holder “3”, loosen the clutch boss nut.
6. Remove:
• Clutch boss nut “1”
• Washer “2”
• Clutch boss assembly “3”
There is a built-in damper between the clutch
boss and the clutch plate. It is not necessary to
remove the wire circlip “4” and disassemble the
built-in damper unless there is serious clutch
chattering.
7. Remove:
• Spacer “1”
• Clutch housing
• Insert a cross-headed screwdriver into one of
the holes of the clutch housing and primary
driven gear, and then rotate the inner primary
driven gear until both primary drive gears are
aligned. The teeth of both primary driven gears
must be aligned for installation.
• Insert two 5 mm bolts “2” into the spacer and
then remove the spacer by pulling on the bolts.
Universal clutch holder
90890-04086
YM-91042