CONNECTING RODS AND PISTONS
5-92
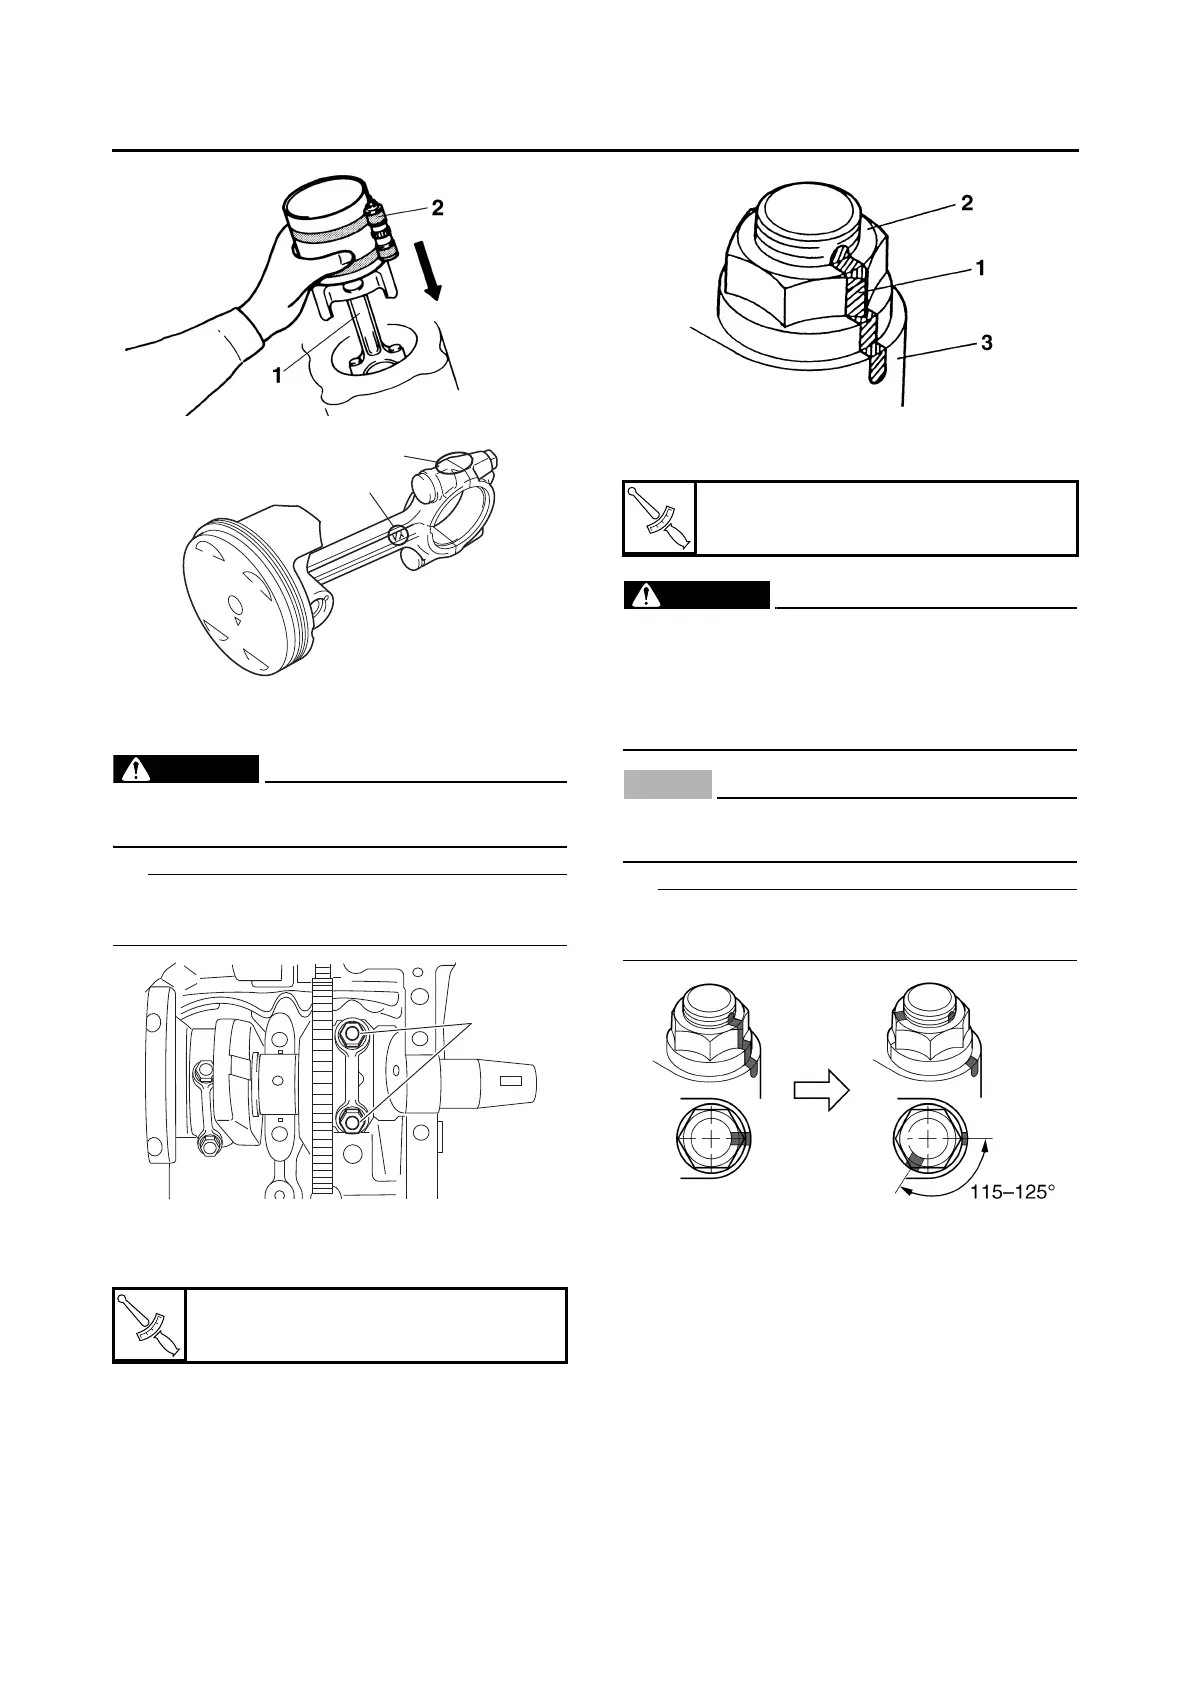
8. Tighten:
• Connecting rod nuts “1”
EW3P61019
Replace the connecting rod bolts and nuts
with new ones.
Tighten the connecting rod nuts using the follow-
ing procedure.
▼▼▼▼ ▼ ▼▼▼▼▼▼▼▼▼ ▼ ▼▼▼▼ ▼ ▼▼▼▼ ▼ ▼▼▼▼▼▼▼
a. Tighten the connecting rod nuts with a torque
wrench.
b. Put a mark “1” on the corner of the connecting
rod nut “2” and the connecting rod “3”.
c. Tighten the connecting rod nuts further to
reach the specified angle 115–125°.
EWA13400
If the connecting rod nut is tightened more
than the specified angle, do not loosen the
nut and then retighten it. Instead, replace the
connecting rod bolt and nut with a new one
and perform the procedure again.
ECA13950
Do not use a torque wrench to tighten the
connecting rod nut to the specified angle.
On a hexagonal nut, note that the angle from
one corner to another is 60°.
▲▲▲▲ ▲ ▲▲▲▲▲▲▲▲▲ ▲ ▲▲▲▲ ▲ ▲▲▲▲ ▲ ▲▲▲▲ ▲▲▲
Connecting rod nut (1st)
20 Nm (2.0 m·kg, 14 ft·lb)
Connecting rod nut (final)
Specified angle 115–125°