4.6 Auto-Tuning
90 YASKAWA ELECTRIC SIEP C710616 30B YASKAWA AC Drive T1000A Technical Manual
• Check the area around the motor to ensure that nothing will accidentally cause the motor to rotate during the Auto-
Tuning process.
• Use Stationary Auto-Tuning 1 when the motor test report is not available. If the motor test report is available, perform
Stationary Auto-Tuning 2 instead.
Stationary Auto-Tuning for Line-to-Line Resistance and PM Motor Stator Resistance
• Perform when entering motor data manually while using motor cables longer than 50 m.
• If the motor cables have been replaced with line over 50 m long after Auto-Tuning as already been performed, then
execute Stationary Auto-Tuning for line-to-line resistance.
n
Notes on Inertia Tuning and ASR Gain Auto-Tuning
WARNING! Electrical Shock Hazard. When executing Inertia Tuning or ASR Gain Auto-Tuning, voltage is applied to the motor even
before it rotates. Do not touch the motor until Auto-Tuning is completed. Failure to comply may result in injury from electrical shock.
• Both tuning methods must be performed with the machine connected to the motor but without load applied.
• The motor will rotate during the Auto-Tuning process. Make sure the areas around the motor and connected machinery
are clear.
• The drive will let the system rotate at a certain speed while superimposing a sine wave test signal. Make sure this
tuning process does not cause any problem or malfunction in the machine before using it.
• Ensure the motor-mounted brake is fully released if installed.
• Connected machinery should be allowed to rotate the motor.
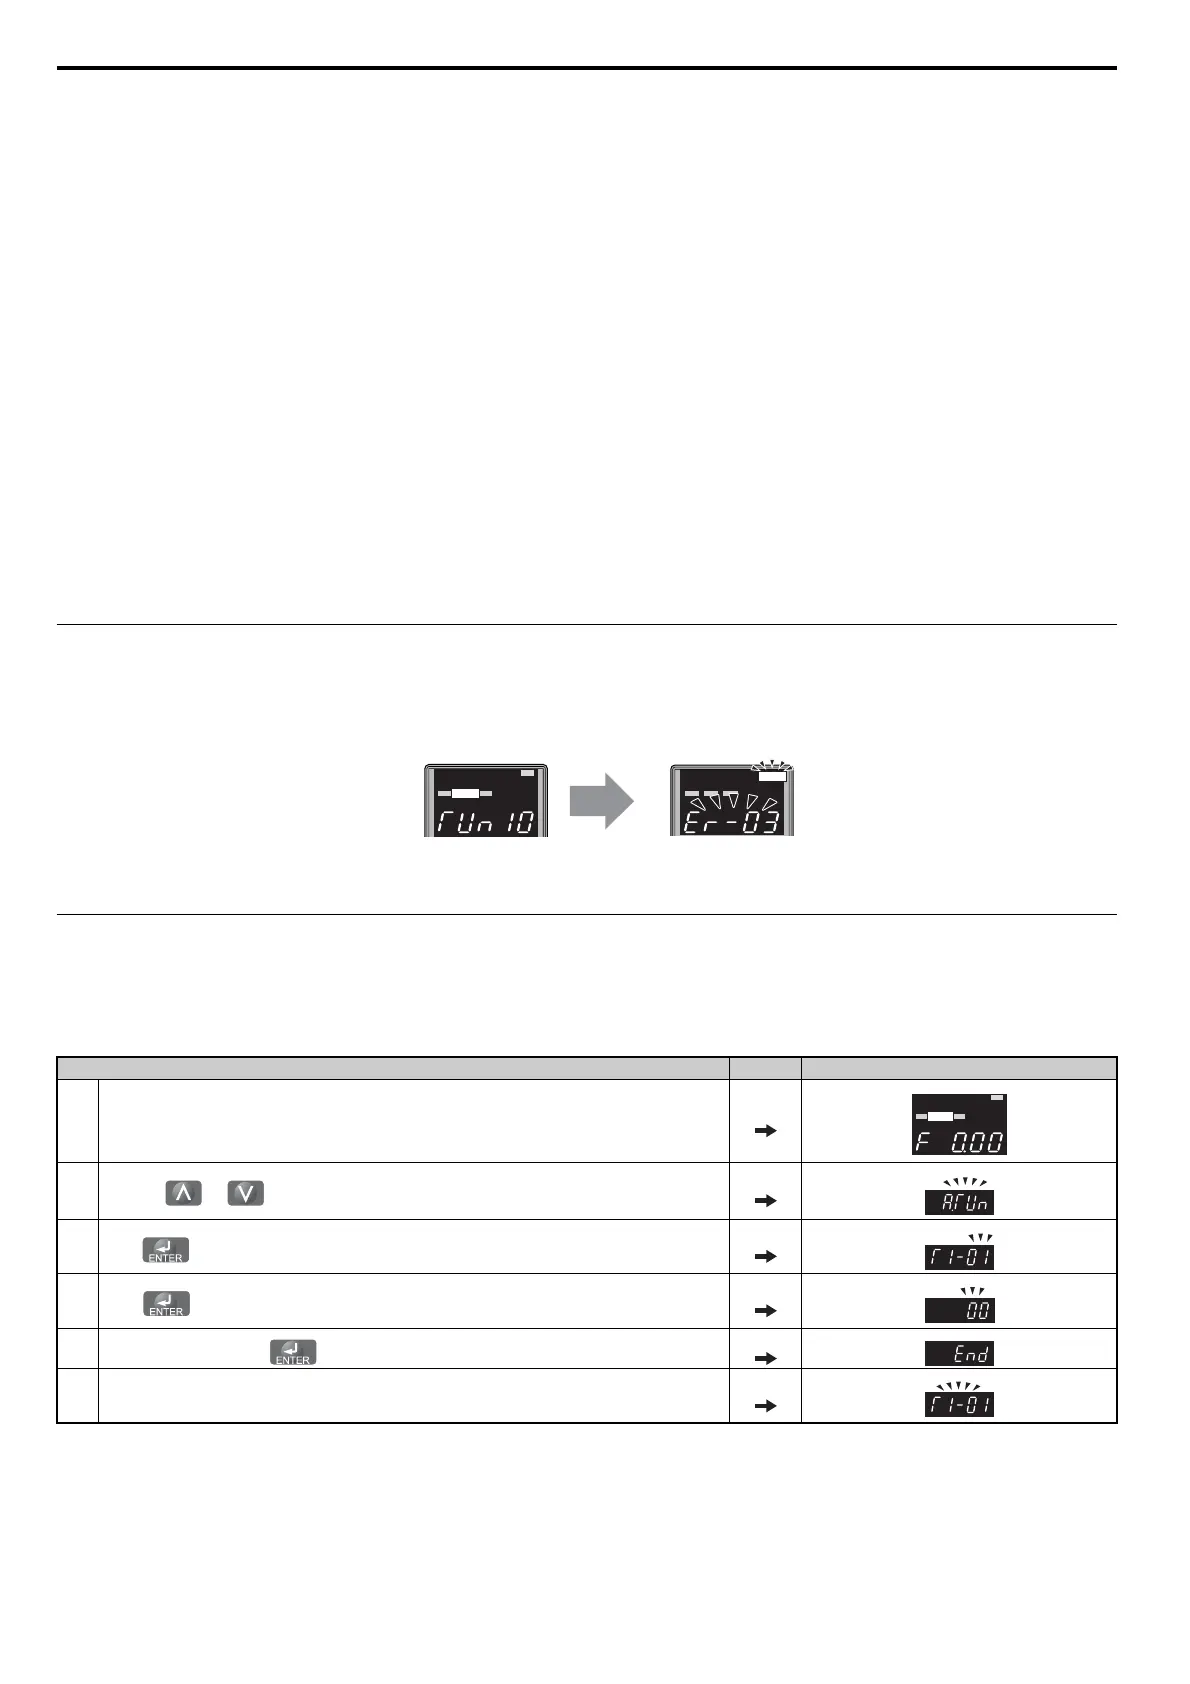
u Auto-Tuning Interruption and Fault Codes
If tuning results are abnormal or the STOP key is pressed before completion, Auto-Tuning will be interrupted and a fault
code will appear on the digital operator.
Figure 4.11
Figure 4.11 Auto-Tuning Aborted Display
u Auto-Tuning Operation Example
The following example demonstrates Rotational Auto-Tuning when using OLV (A1-02 = 2) and CLV (A1-02 = 3).
n
Selecting the Type of Auto-Tuning
Step
<1> T1-00 will appear on the display when one of the multi-function inputs has been set to switch between motor 1 and motor 2 (H1- = 16).
Display/Result
1. Turn on the power to the drive. The initial display appears.
2.
Press the or key until the Auto-Tuning display appears.
3.
Press to begin setting parameters.
4.
Press to display the value for T1-01.
<1>
5.
Save the setting by pressing .
6. The display automatically returns to the display shown in Step 3.
Auto-Tuning Aborted
ALM
REV DRV FOUT
DIGITAL OPERATOR JVOP-182
ALM
During Auto-Tuning
ALM
DIGITAL OPERATOR JVOP-182
REV DRV FOUT
DRV
ALM
DIGITAL OPERATOR JVOP-182
REV DRV FOUT
DRV