ptg
C H A P T E R F I V E Creating Output: Saving, Exporting, and Printing
94
•
Click the Fix Hairlines tool to open a dialog that allows you to
dene a page range, the size of line to target, and the replacement
width. Increasing the width of very thin lines makes it easier to see
them onscreen.
Printing from Acrobat can be much more complex than clicking the Print
button: You can control what you print as well as where and how a docu-
ment is printed. In addition, Acrobat lets you print to a printer or to a le,
dene a portion of your document for printing, or create a PostScript le.
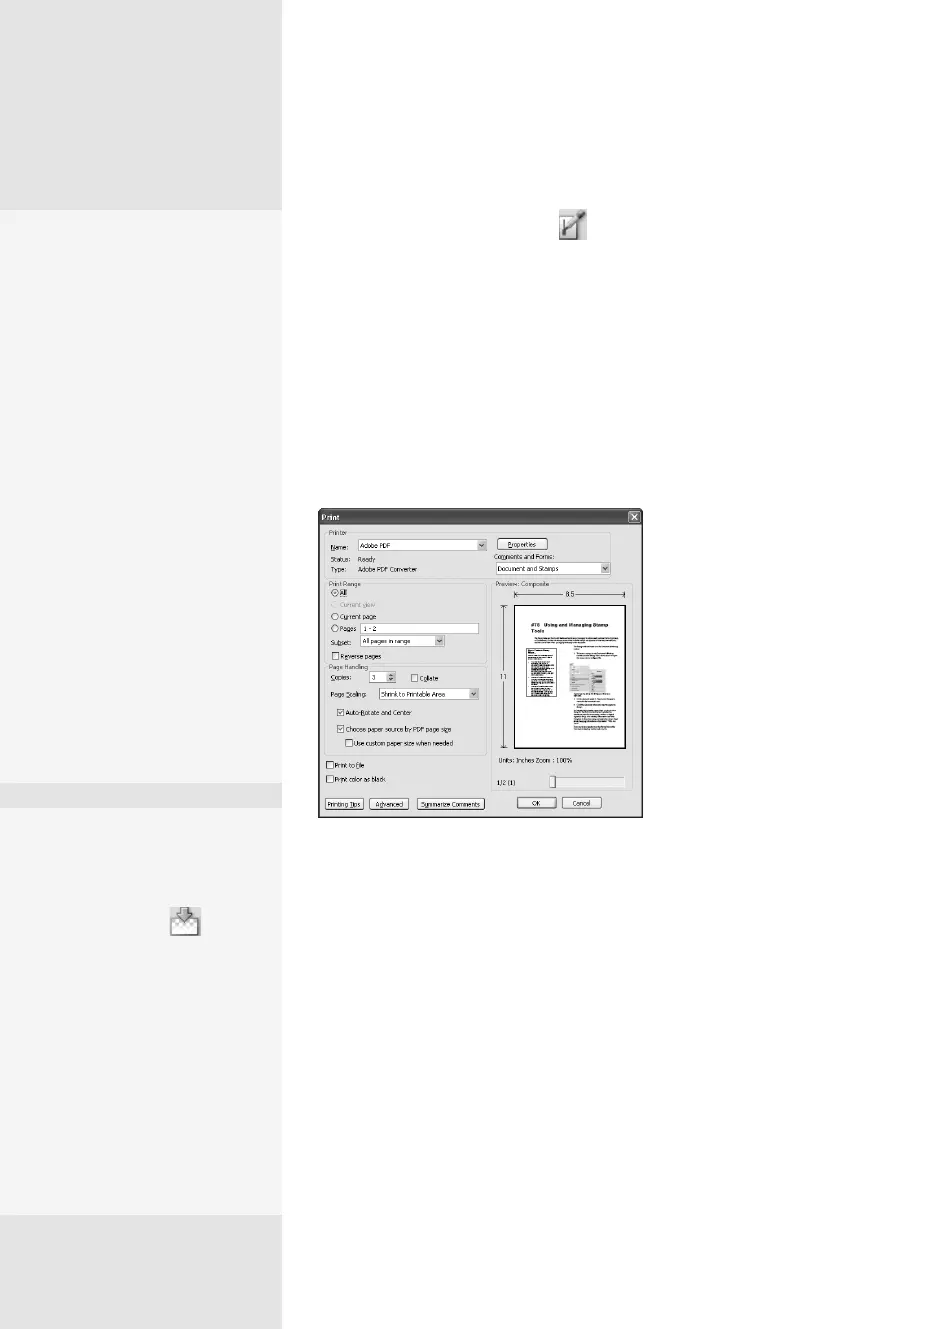
Choose File > Print. In the Print dialog (Figure 36b), you can choose spe-
cic print characteristics, such as the print range and number of copies.
Figure 36b The Print dialog offers many ways to
configure and prepare a document or its
components for printing.
Let’s take a look at the Print dialog options:
•
Choose a printer from the Name pop-up menu in the Printer area
of the dialog; in Mac OS, choose an option from the Presets pop-up
menu. Your operating system’s printer and printer driver installations,
as well as your network conguration, determine the Presets and
Printer lists.
•
In Windows, select the “Print to le” check box to create a PostScript le.
Handling Proofs
Traditionally proofs are
printed and then the proof
and the original are com-
pared side by side. Instead
of printing paper proofs,
use the Commenting sum-
mary feature to produce a
single document that shows
the comment in the sum-
mary with a connector line to
the correction or comment
added to the document.
Choose either to split the
view with document and
comment pages separated,
or to place the comments
and document page on the
same page. Read more about
comment summaries in #77,
“Setting Comment Status and
Creating Summaries.”
Avoiding White
Patches
Click the Transparency
Flattening tool to open
the Flattener Preview dia-
log. Where you have layered
images in your documents,
unless the layers are flat-
tened before printing,
transparent areas print as
white—not what you
usually want to see in your
masterpiece. Choose the
desired settings and click
Apply.
Print What You See
Suppose you want to print a portion of an image that shows your new com-
pany logo or your dog’s face. Resize the program window to show only the
content you want to print; use the scroll bars and magnification tools to get the
placement correct. Then choose File > Print and click Current view in the Print
Range settings of the Print dialog. The area displayed in the program window
displays in the Preview area. Choose other print settings, and click OK to print.
From the Library of Daniel Dadian
 Loading...