ptg
61
#24: Attaching Source Files to a PDF
Acrobat 9 provides a feature for attaching source les to a converted
document (except for open les), and oers a pane for managing
attachments.
If you are working in a source program that contains a PDFMaker
(such as Word in Windows), choose Adobe PDF > Change Conversion
Settings to open the Acrobat PDFMaker dialog. Click “Attach source le to
Adobe PDF” in the Application Settings area of the Settings tab, shown in
Figure 10a in #10, “Using PDFMaker in Microsoft Word.” Then click OK.
You can attach any type of le from within Acrobat, and use an icon placed
anywhere on your page that your users click to view the attachment.
1. Choose Comments > Comment & Markup Tools > Attach a File as a
Comment.
2. Move the pointer, which looks like a pushpin, over the document to
where you want to display the attachment icon and click to place the
icon.
3. Locate and select the le in the Browse for Attachment dialog, and
click Select.
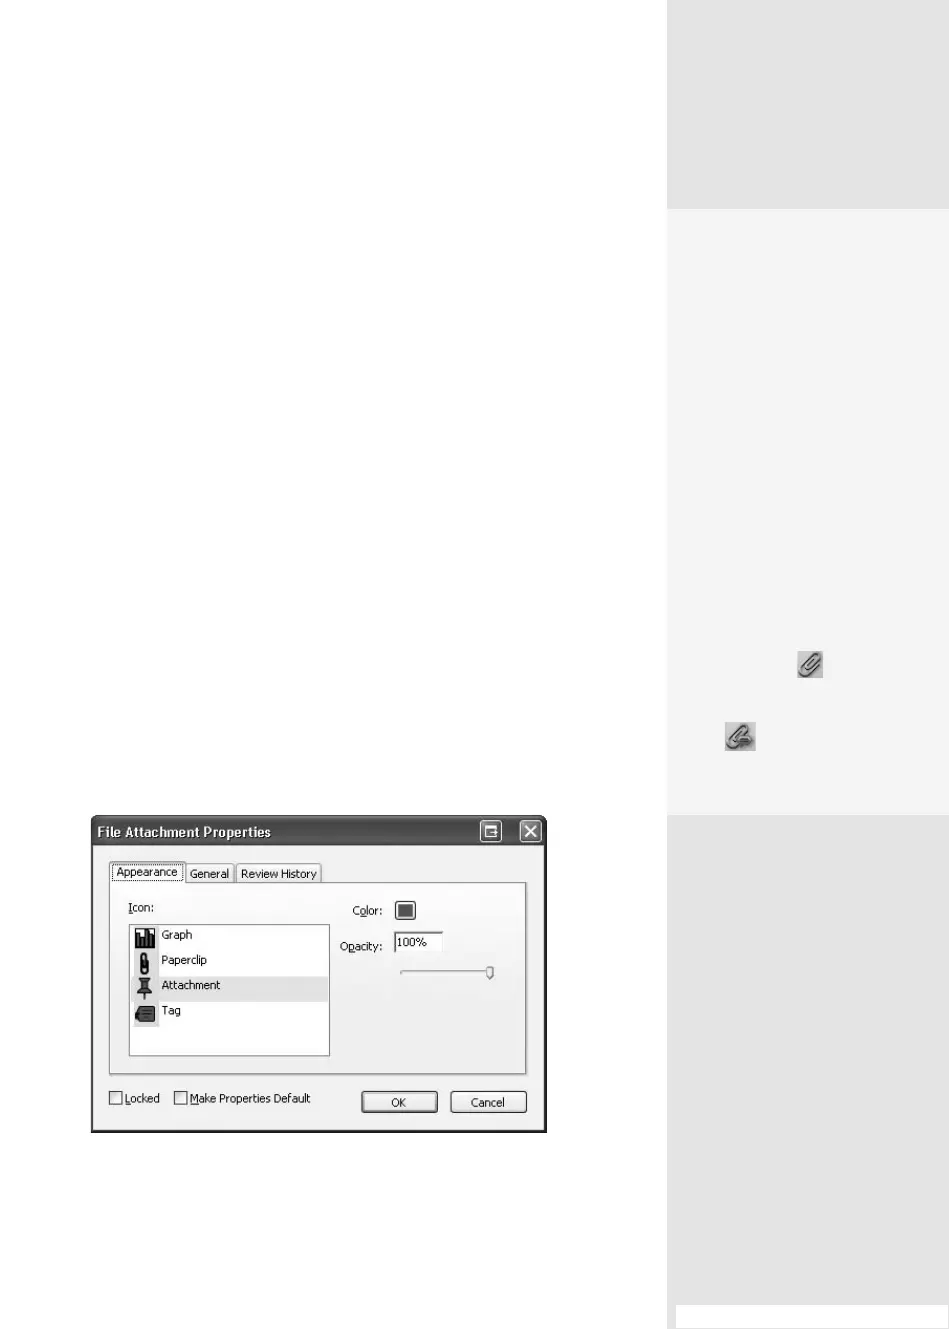
4. Choose an alternate icon, color, or opacity in the File Attachment
Properties dialog (
Figure 24a). Select the General tab to display
elds where you can modify the attachment’s name, your name, and
a description of the attachment. Click Close.
Figure 24a You can customize the appearance of the icon in the dialog.
Attaching Source
Files to a PDF
#
24
Tools, Tools, and
More Tools
The tools for attaching a file
to a document aren’t shown
on the default Acrobat 9
toolbars. You can add the
tools if you intend to work
with attached files during
a session. It’s not worth the
time to locate and attach the
tools for attaching (get it?)
if you are likely to reset the
toolbars. Instead, use the
command from the menu.
Right-click (Control-click)
the toolbar well and choose
More Tools. You can select
the Attach a File tool
from the File toolbar list, or
the Attach a File as a Com-
ment tool from the
Comment & Markup toolbar
list in the More Tools dialog.
From the Library of Daniel Dadian