ptg
C H A P T E R T H I R T E E N Using Flash Video and 3D Media
266
To add legacy media les that you don’t want to convert to FLV format,
follow steps 1–3 of the previous set of steps and then do the following:
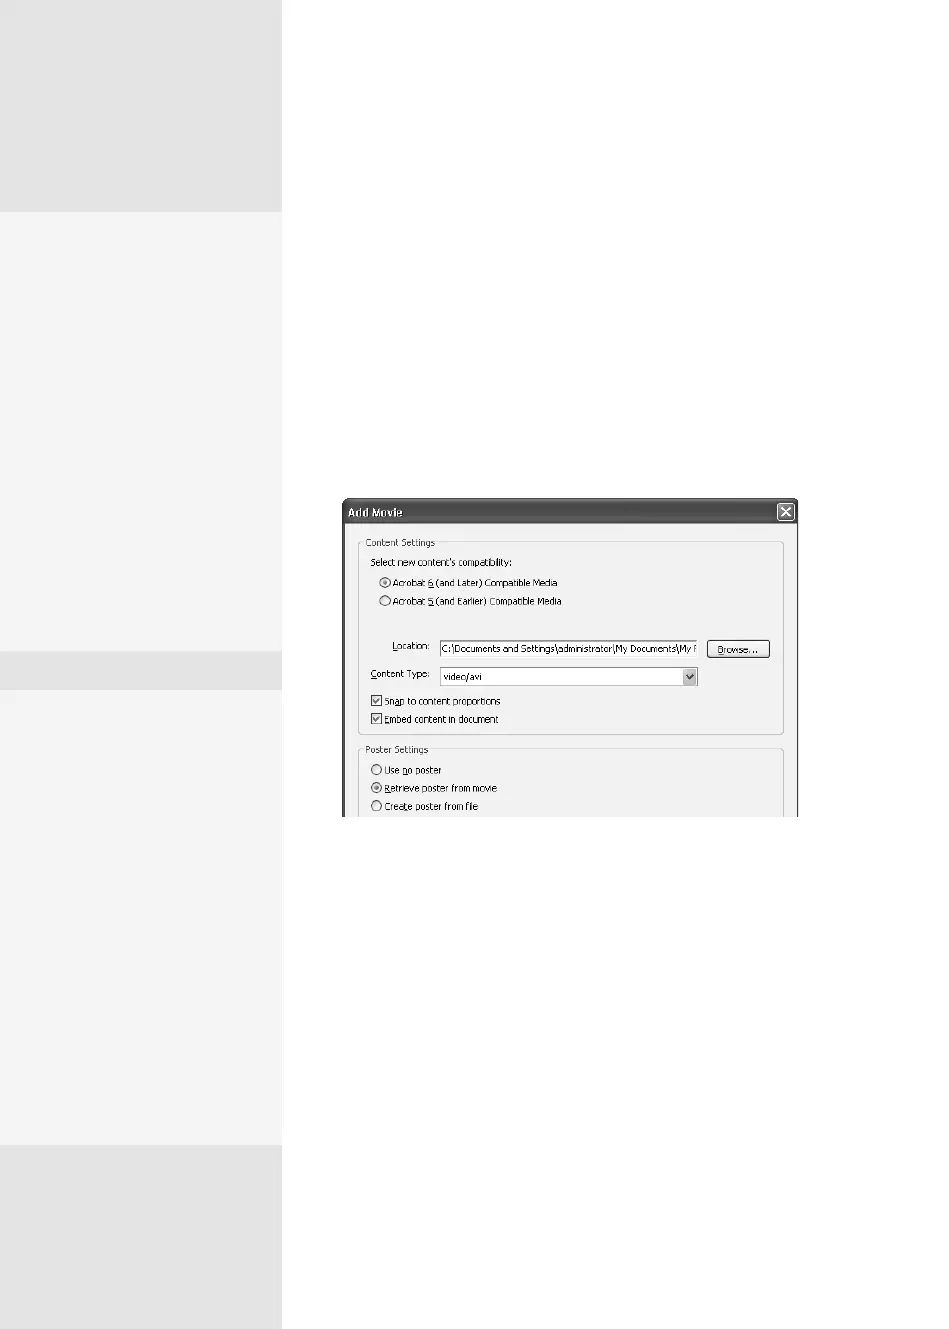
1. Click the “Create legacy multimedia content” link in the lower-right
corner of the Insert Video dialog to open the Add Movie dialog.
2. Choose either Acrobat 6 (and Later) Compatible Media or Acrobat 5
(and Earlier) Compatible Media.
Selecting the Acrobat 6 version oers more conguration options;
selecting the Acrobat 5 version works only with media that plays in
QuickTime Player (Figure 97b).
Figure 97b Configure a movie file to add to the document in various formats.
3. For Acrobat 6 (and Later) Compatible Media, choose further selections:
•
Specify a format from the Content Type pop-up menu.
•
Use or deselect the “Snap to content proportions” and “Embed
content in document” check boxes.
•
Choose a poster setting.
4. Click OK to close the dialog and insert the movie.
Considering
Accessibility
One of the cornerstones of
designing accessible content
is including alternate versions
of visual content. For users
working with screen readers
or other assistive devices,
you have to provide the text
equivalent of your visual
content and captioning
(if required). The media
you’re using determines your
ability to embed text, verbal
commentary, and captions,
and you can’t control this
ability from within Acrobat.
5.
Select a rendition from the
list and click Edit Rendition
(described in the sidebar
“Play It Again, Sam”).
6.
Add and edit as many
renditions as needed.
7.
Use the arrow keys on
the right side of the
pop-up menu to arrange
the renditions in the
appropriate order.
Renditions are played in
the order listed.
8.
When you finish adding
and editing renditions,
click Close.
Play It Again, Sam
You can modify the characteristics of any of the renditions you add to a movie.
Click a rendition in the Multimedia Properties dialog and then click Edit
Rendition to open the Rendition Settings dialog. Use this five-tab dialog to
tweak your movies as necessary:
•
In the Media Settings tab, make a rendition accessible to JavaScript,
choosing options similar to those in the basic Add Movie dialog.
•
In the Playback Settings tab, define looping, specify players and how long
the player remains open, and add controls.
•
In the Playback Location tab, choose to play your movie in a floating
window or full-screen.
•
In the Systems Requirements tab, specify languages and playback
requirements such as screen resolution and subtitles.
•
In the Playback Requirements tab, review the settings chosen in other tabs.
From the Library of Daniel Dadian