8210-00020 R1 119
Install the Cable and Clamps
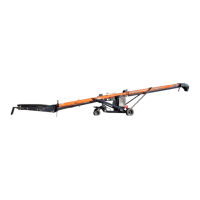
1. Point the hopper handle toward the hopper.
2. Secure the cable (1) to the handle with a cable clamp (2).
3. Route the cable through the cable rung (3) and around the cable sheaves.
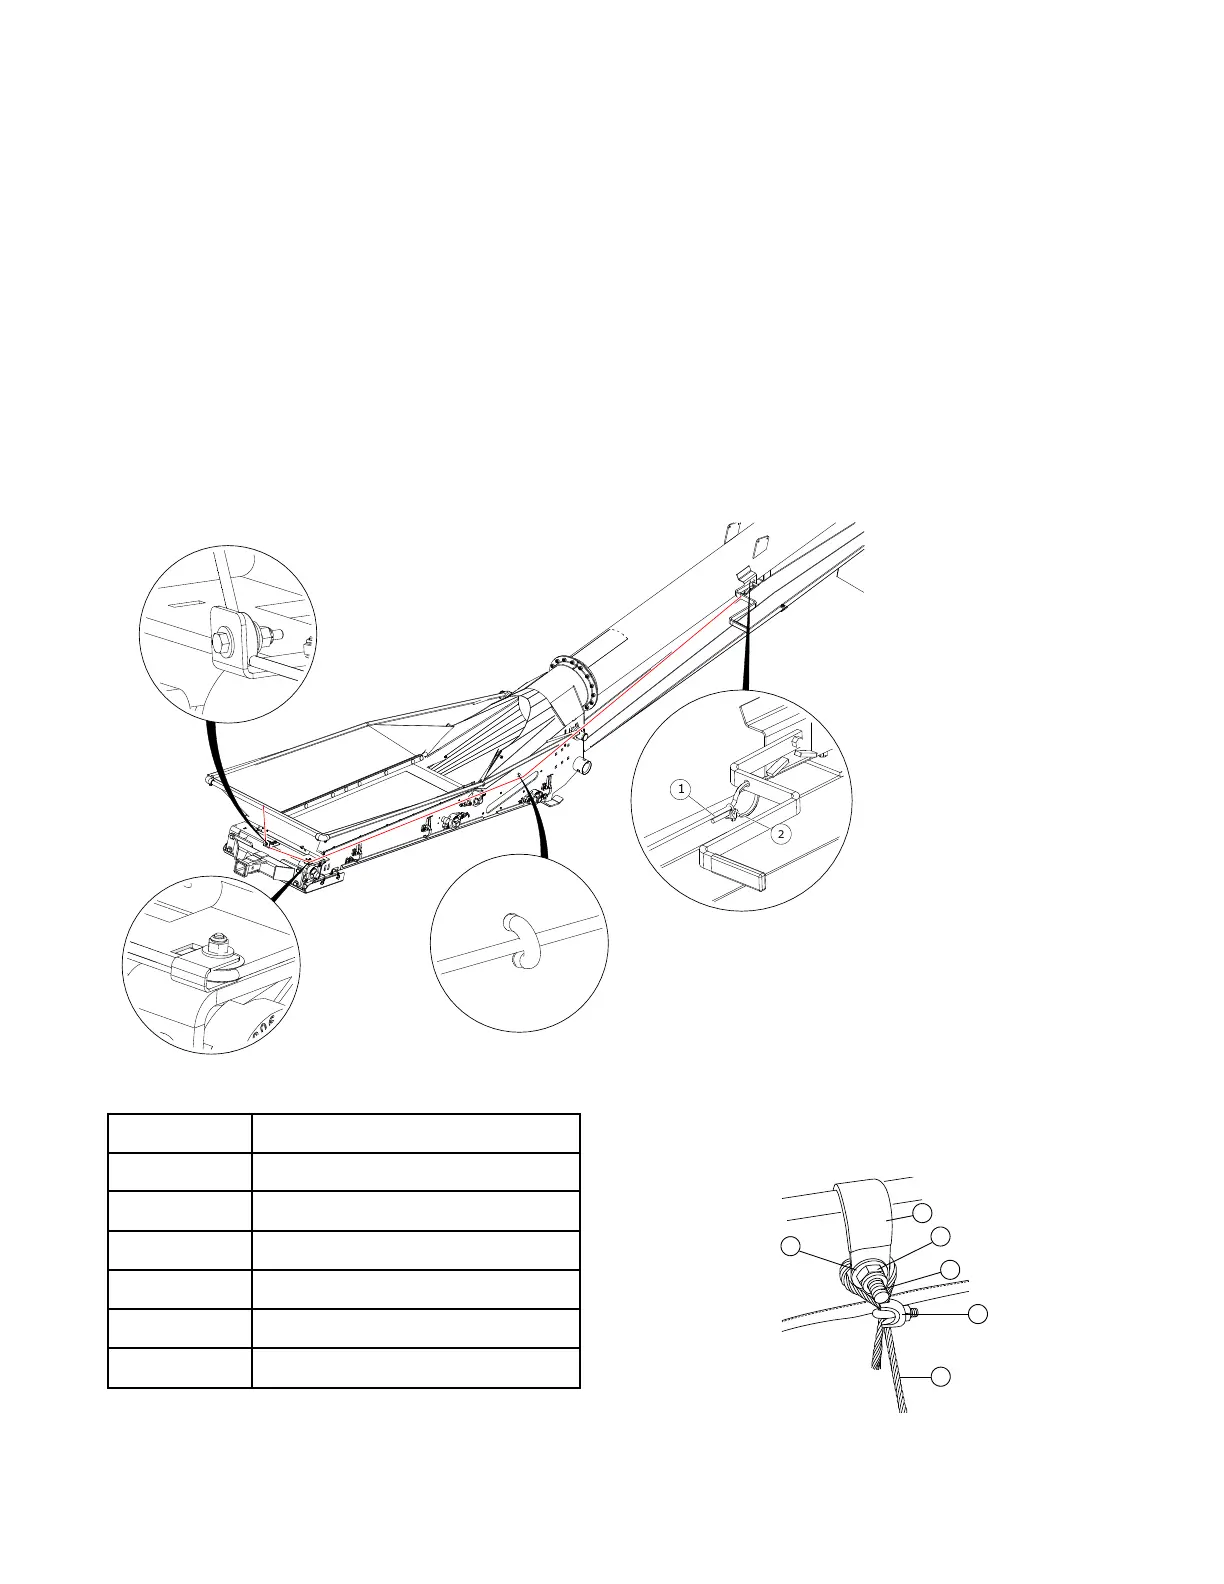
4. Attach a 7/8" P-clip (3) to the front upper frame using one 5/16" x 1" bolt (5), one 5/16" nut (6) and two
5/16" flat washers (4). Do not fully tighten. See Figure 53.
5. Loop the cable (1) around the 5/16" x 1" bolt (5) and secure with 1/8" cable clamp (2). Ensure trailing cable
end is kept short.
6. Tighten the bolt on the P-clip once the cable is in place.
7. Test the function of the collapsible hopper cloth controls by raising and lowering the handle. Adjust cable
tension as required.
Figure 52. Installing the Cable and the Clamps
Table 19. Cable and Clamp Components
Item
Description
Figure 53. Attaching the Cable to the Hopper Frame
1
2
3
4
5
6
(Put a 2nd washer
on the backside of
hopper cloth)
1
1/8" Cable 7x19 GAC
2
1/8" Cable Clamp
3
7/8" P-Clip
4
5/16" Flat Washer
5
5/16" x 1" Bolt (GR8)
6
5/16" Nylon Locknut (GR8)
Hardware Kit: HRDW-15-82
FIELD LOADER S-DRIVE – PORTABLE GRAIN BELT CONVEYOR 3. ASSEMBLY
 Loading...