d.
Package the sample block and heated cover assemblies in a clean, dust-free
container.
Move the QuantStudio
™
6 or 7 Flex System according to the following guidelines:
•
Ensure that the surface on which you will place the QuantStudio
™
6 or 7 Flex
System can support at least 77.9 ± 0.6 kg (171.5 ± 0.13 lbs).
• Ensure that the path to transport the QuantStudio
™
6 or 7 Flex System is clear of
obstructions.
• At least two people are needed to lift and carry the QuantStudio
™
6 or 7 Flex
System.
• Keep your spine in a good neutral position.
• Bend at the knees and lift with your legs.
• Do not lift an object and twist your torso at the same time.
• Coordinate your intentions with your assistant before lifting and carrying.
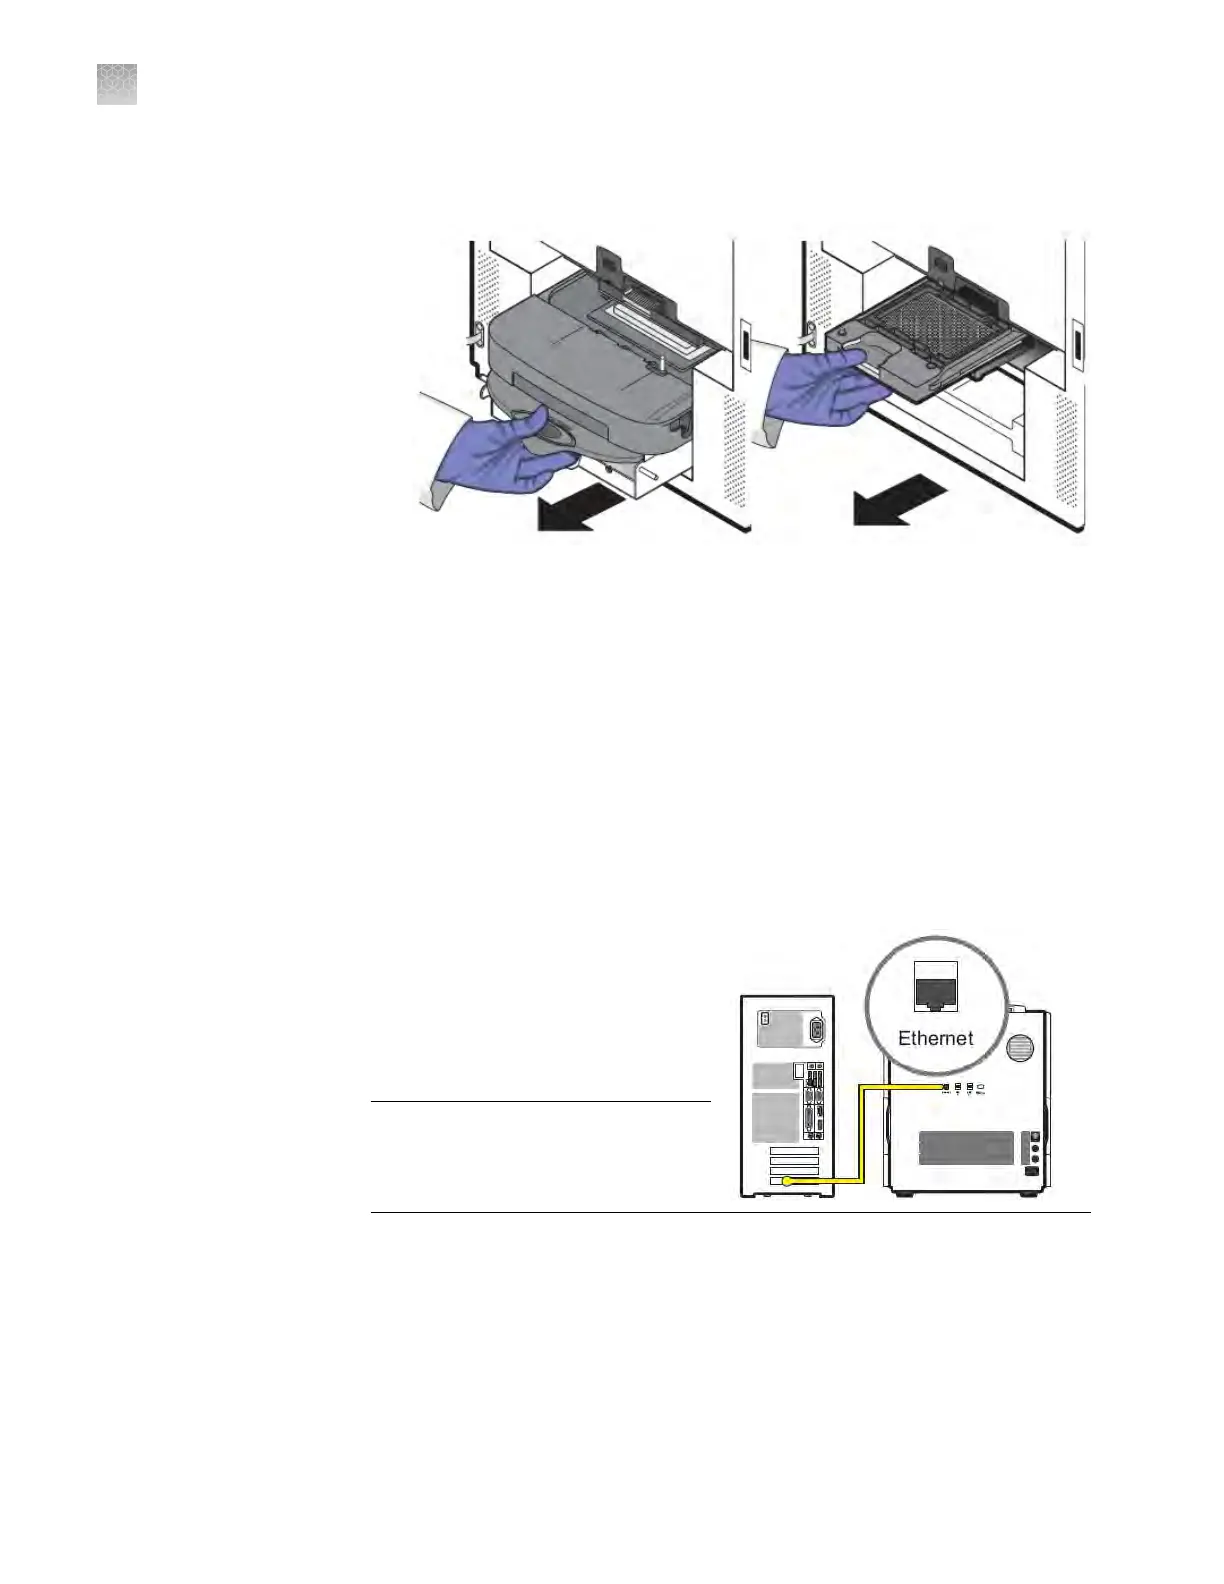
1.
Reconnect the components of the
QuantStudio
™
6 or 7 Flex System.
Use the Ethernet cable supplied with
the instrument to connect the
QuantStudio
™
6 or 7 Flex System to
the network interface card in the
computer.
IMPORTANT! Do not use a standard
Ethernet cable to connect the
QuantStudio
™
6 or 7 Flex System to
the computer
.
2.
Install the sample block and heated cov
er assemblies.
3.
Perform an RNase P instrument verication run. If the run:
Passes – Do not recalibrate the QuantStudio
™
6 or 7 Flex System. No further
action is necessary.
Fails – Perform the following calibrations in the specied order:
a.
ROI
Move the
QuantStudio
™
6 or
7 Fl
ex System
Reinstall the
QuantStudio
™
6 or
7 Fl
ex System
Appendix D Power on or off, store, and move
Move the QuantStudio
™
6 or 7 Flex System
D
128
QuantStudio
™
6 and 7 Flex Real-Time PCR Systems v1.6 Maintenance and Administration Guide