d.
Download the rmware to a USB drive.
2.
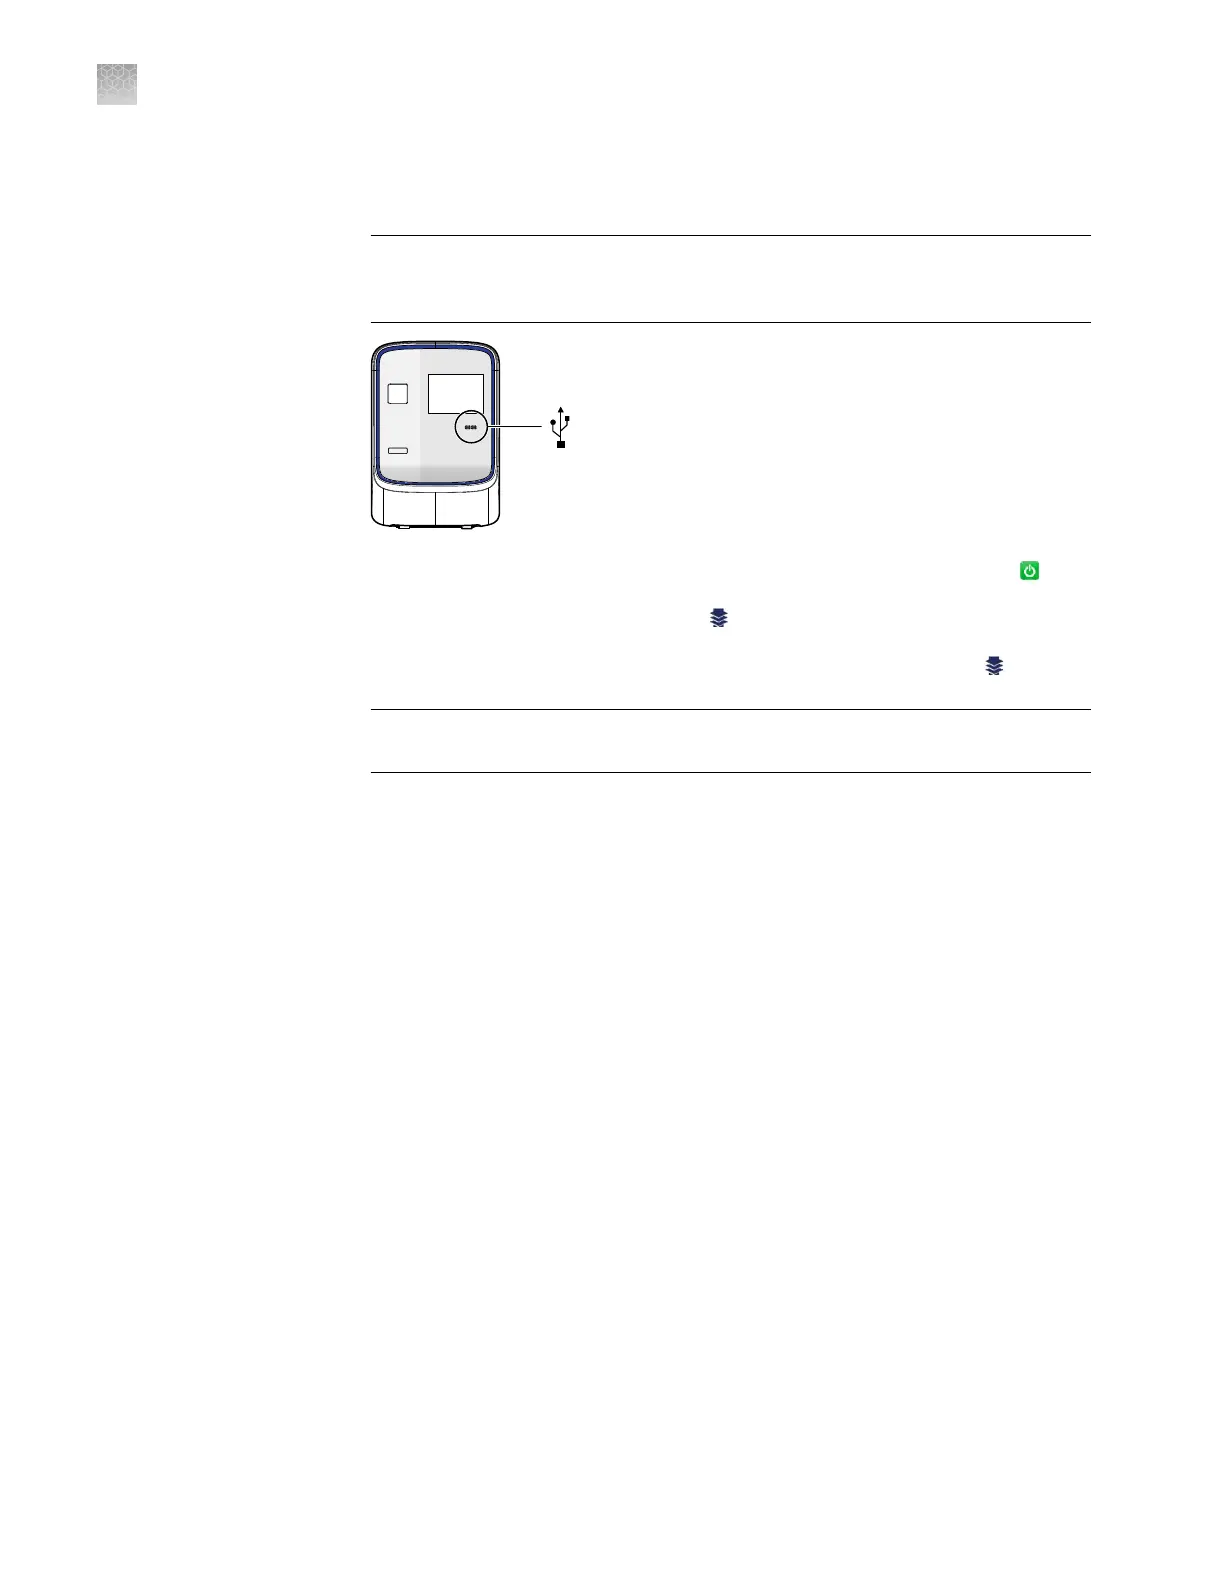
Plug a USB drive into the USB port below the touchscreen.
IMPORTANT! Do not use the USB ports on the rear panel of the QuantStudio
™
6
and 7 Flex Systems. The rear USB ports are for use by Thermo Fisher Scientic
personnel to service the instrument.
3.
If the instrument is in standby
, tap the touchscreen to activate it, then tap
.
4.
In the main menu, tap T
ools, then tap
Upgrade Firmware.
5.
In the Upgrade Firmware screen, select the update package, then tap Upgrade
Firmware. Allow the system to complete the upgrade.
IMPORTANT! Do not remov
e the USB drive from the system until you are
instructed to do so.
6.
After the upgrade is complete and the system reboots, conrm the upgrade
success:
a.
Unplug the USB driv
e.
b.
Tap Seings, then tap About this instrument to view the software version
number to conrm that the rmware has been upgraded.
Administrate the instrument from the touchscreen
The touchscreen provides access to several administrative functions that you can use
to integrate the QuantStudio
™
6 and 7 Flex Systems into a laboratory workow. The
following functions are available from the touchscreen and can be used after
installation to customize the instrument seings and congure it for network use.
• Dene the date and the time (page 91)
• Dene the instrument seings (page 91)
• Dene the maintenance reminders (page 93)
• Dene the network seings (page 93)
• Dene the system shortcuts (page 94)
• Review the instrument statistics (page 94)
• Review the instrument version information (page 95)
• Enable or disable the instrument security (page 95)
• View the instrument log (page 96)
Appendix A Manual ins
trument operation
Administrate the instrument from the touchscreen
A
90
QuantStudio
™
6 and 7 Flex Real-Time PCR Systems v1.6 Maintenance and Administration Guide