IMPORTANT! The software guides you through the calibration of each dye
separately. You must set up, run, and analyze each dye independently.
1.
In the QuantStudio
™
Real-Time PCR Softw
are Home tab, click Instrument
Console.
2.
In the Instrument Console, select the icon for your instrument, then click
Manage Instrument.
Note: If the Manage Instrument buon is inactive, add your system to the My
Instruments group.
3.
In the Instrument Manager, start the calibration:
a.
Click
Maintenance, then click Dye.
b.
In the Dye Calibration screen, select System Dye Calibration, then click
Start Calibration.
4.
In the Dye Calibration screen, select the dy
e to calibrate from the Dye Name
drop-down list, then perform the calibration as instructed.
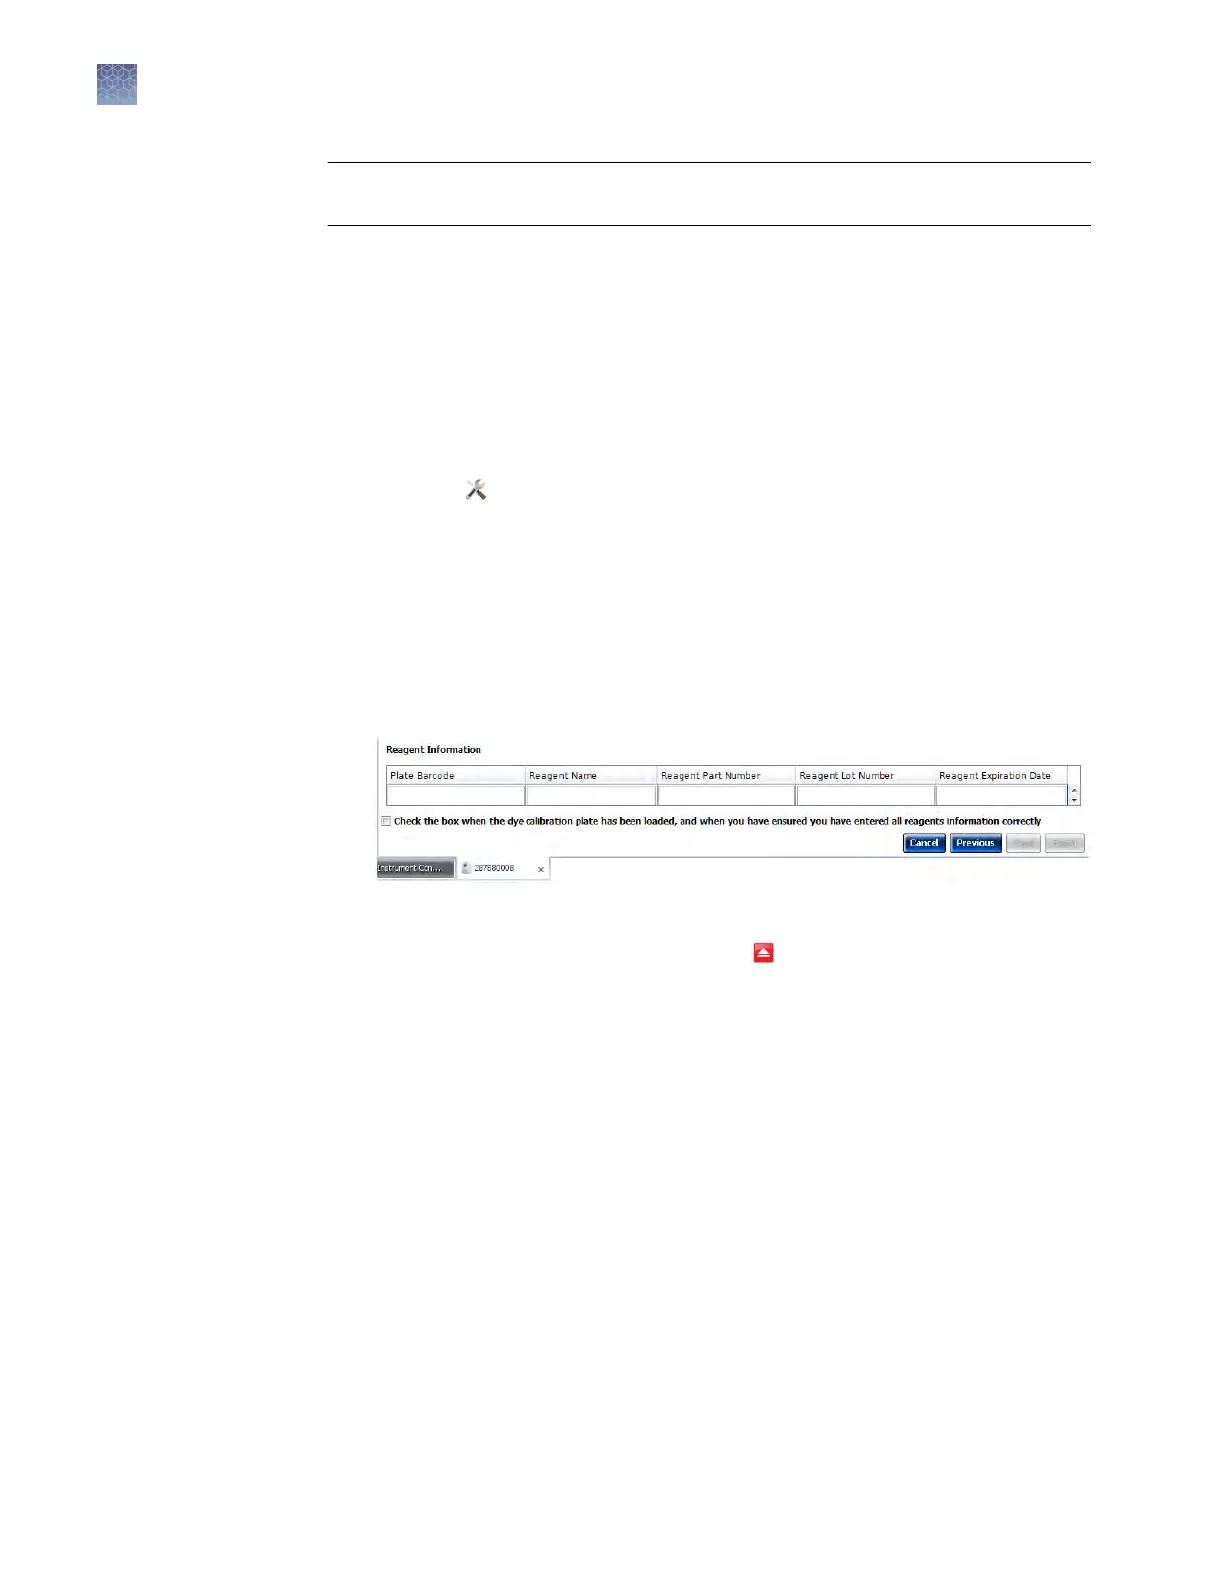
5.
At the boom of the Setup tab, enter the reagent information for the dye plate or
array card that you are using.
6.
Load the dy
e plate or array card into the instrument:
a.
From the instrument touchscreen, tap
to eject the instrument tray.
P
erform the dye
calibration
Chapter 2 Calibr
ate the instrument
Dye calibration
2
56
QuantStudio
™
6 and 7 Flex Real-Time PCR Systems v1.6 Maintenance and Administration Guide