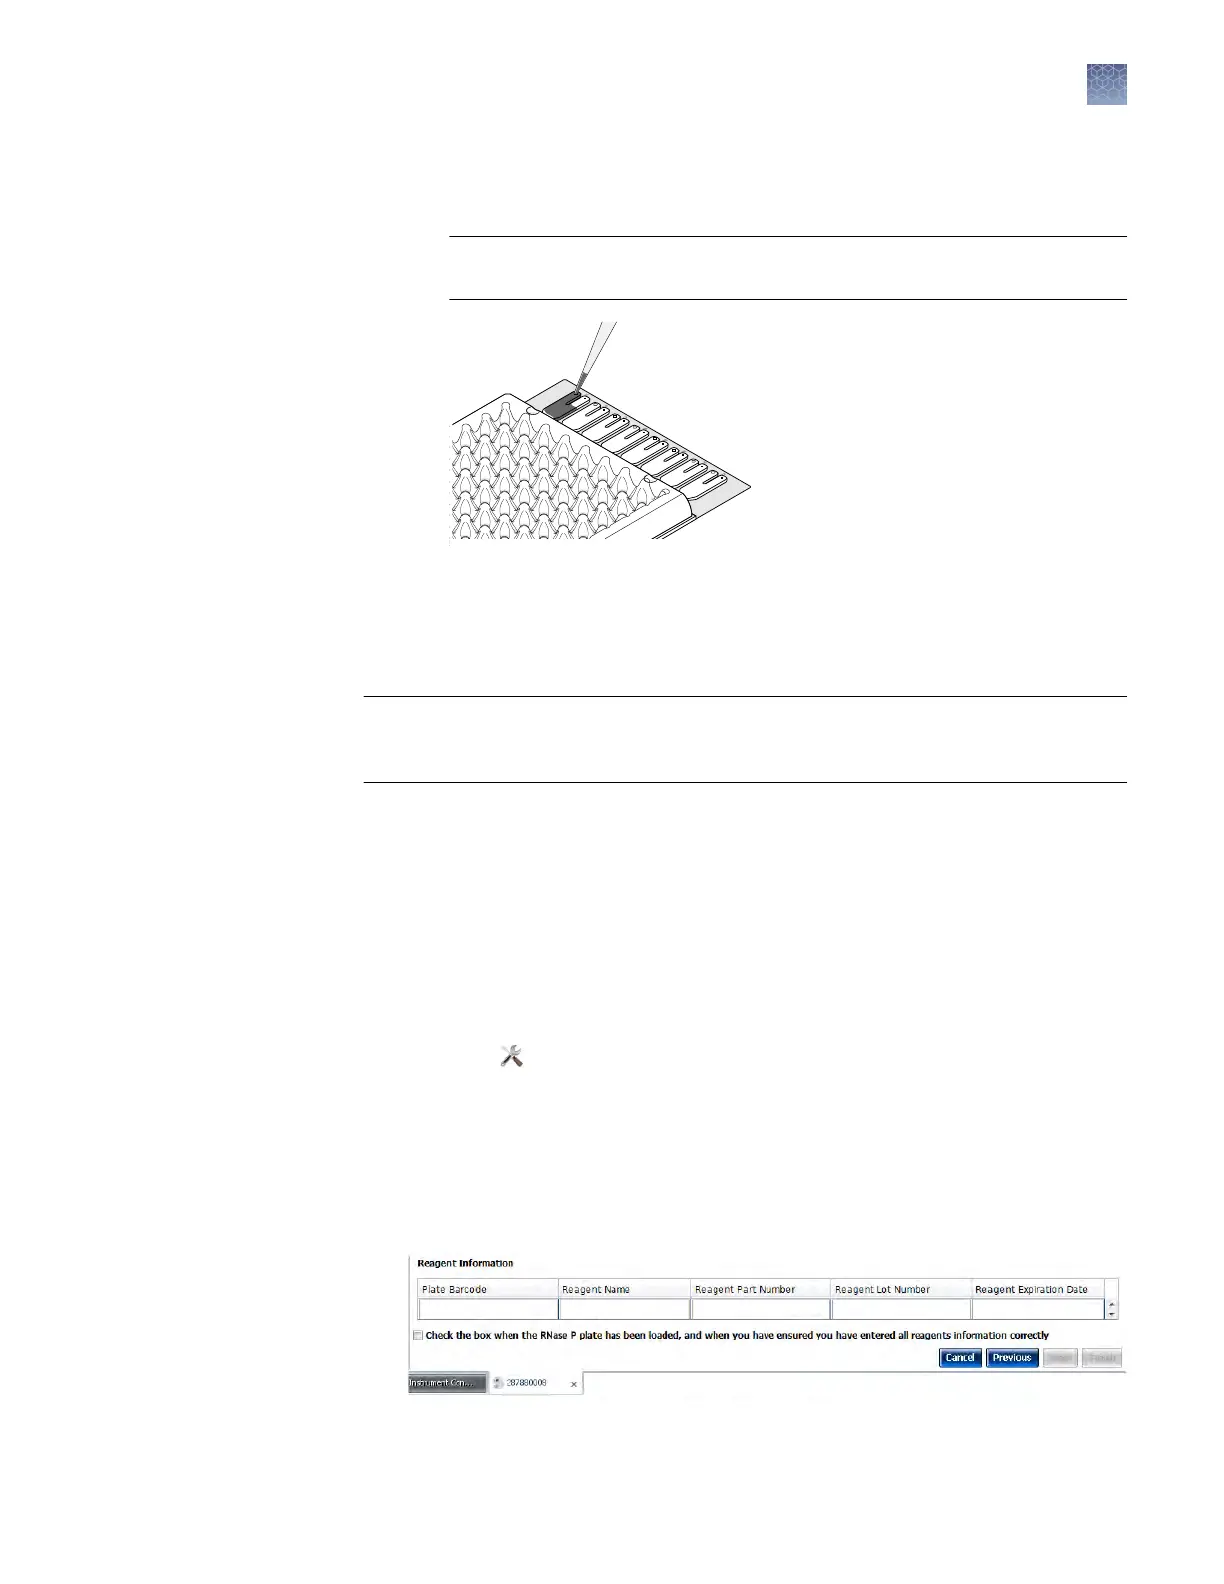
d.
Dispense the uid so that it sweeps in and around the ll reservoir toward
the vent port. Pipet the entire 100 µL into the reservoir, but do not go past the
rst stop of pipeor plunger or you may blow the solution out of the port.
IMPORTANT! Do not allow the tip to contact and possibly damage the
coated foil beneath the ll port.
GR2159
Microfluidic Card
Filling the card
5.
Centrifuge and seal the array card as explained in step 6 through step 8
in “Fill
the calibration TaqMan
®
Array Cards“ on page 37.
6.
Run the prepared array card as soon as possible after lling it.
IMPORTANT! Store the array card in a dark place until y
ou are ready to run it. The
uorescent dyes in the array card are photosensitive. Prolonged exposure to light can
diminish the uorescence of the dye.
1.
In the QuantStudio
™
Real-Time PCR Softw
are Home tab, click Instrument
Console.
2.
In the Instrument Console, select the icon for your instrument, then click
Manage Instrument.
Note: If the Manage Instrument buon is inactive, add your system to the My
Instruments group.
3.
In the Instrument Manager, start the RNase P run:
a.
Click
Maintenance, then click RNase P Run.
b.
In the RNase P Run screen, click Start RNase P Run.
4.
Click Next, then prepare for the instrument v
erication test as instructed.
5.
At the boom of the Setup tab, enter the reagent information for the RNase P
plate or array card that you are using.
Run the RNase P
plat
e or array card
Chapter 2 Calibr
ate the instrument
Verify the instrument performance
2
QuantStudio
™
6 and 7 Flex Real-Time PCR Systems v1.6 Maintenance and Administration Guide
67