3.
Mark the side of the empty array
cards with: Background, FAM
™
, ROI,
ROX
™
, VIC
™
, FAM
™
/ROX
™
, and
VIC
™
/ROX
™
.
4.
For each array card, pipet 100 µL of
the appropriate calibration solution
into each of the eight reservoirs in
the array card:
a.
Place the array card on a lab bench, with the foil side down.
b.
Load 100 µL of the calibration solution into a pipee.
c.
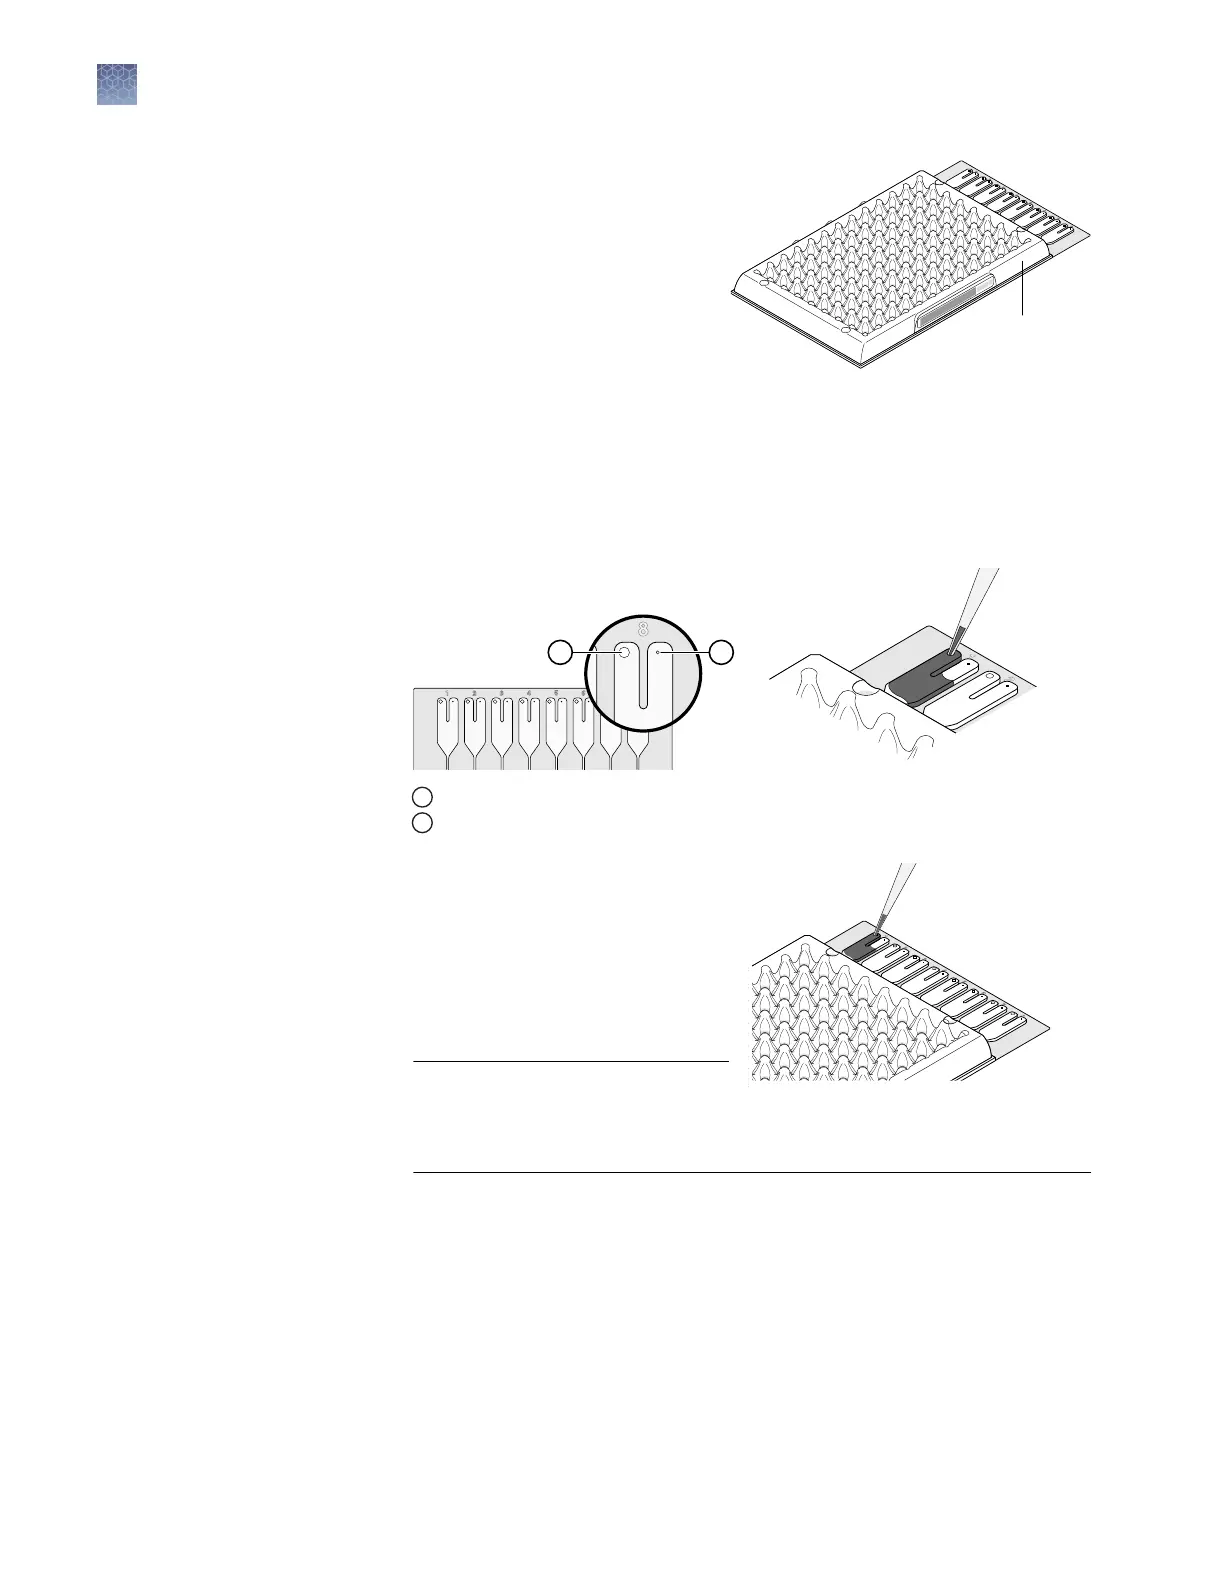
Hold the pipee in an angled position (approximately 45 degrees) and place
the tip into the ll port. The ll port is the larger of the two holes on the left
side of the ll reservoir.
GR2158
Microfluidic Card
Card Ports detail
21
1
Fill port
2
Vent port
d.
Dispense the uid so that it
sw
eeps in and around the ll
reservoir toward the vent port.
Pipet the entire 100 µL into the ll
reservoir, but do not go past the
rst stop of pipeor plunger or
you may blow the solution out of
the port.
IMPORTANT! Do not allow the
tip to contact and possibly
damage the coated foil beneath
the ll port.
5.
Repeat step 4 to ll the remaining array card with the appropriate calibration
reagents.
6.
Centrifuge the array card(s):
a.
Place the lled array card(s) into a centrifuge array card carrier clip and
place empty array cards in the remaining slots. Conrm that the labels on
the buckets and clips are oriented in the same direction.
GR2159
Microfluidic Card
Filling the card
Chapter 2 Calibrate the instrument
Preparing array cards for instrument calibration
2
38
QuantStudio
™
6 and 7 Flex Real-Time PCR Systems v1.6 Maintenance and Administration Guide