b.
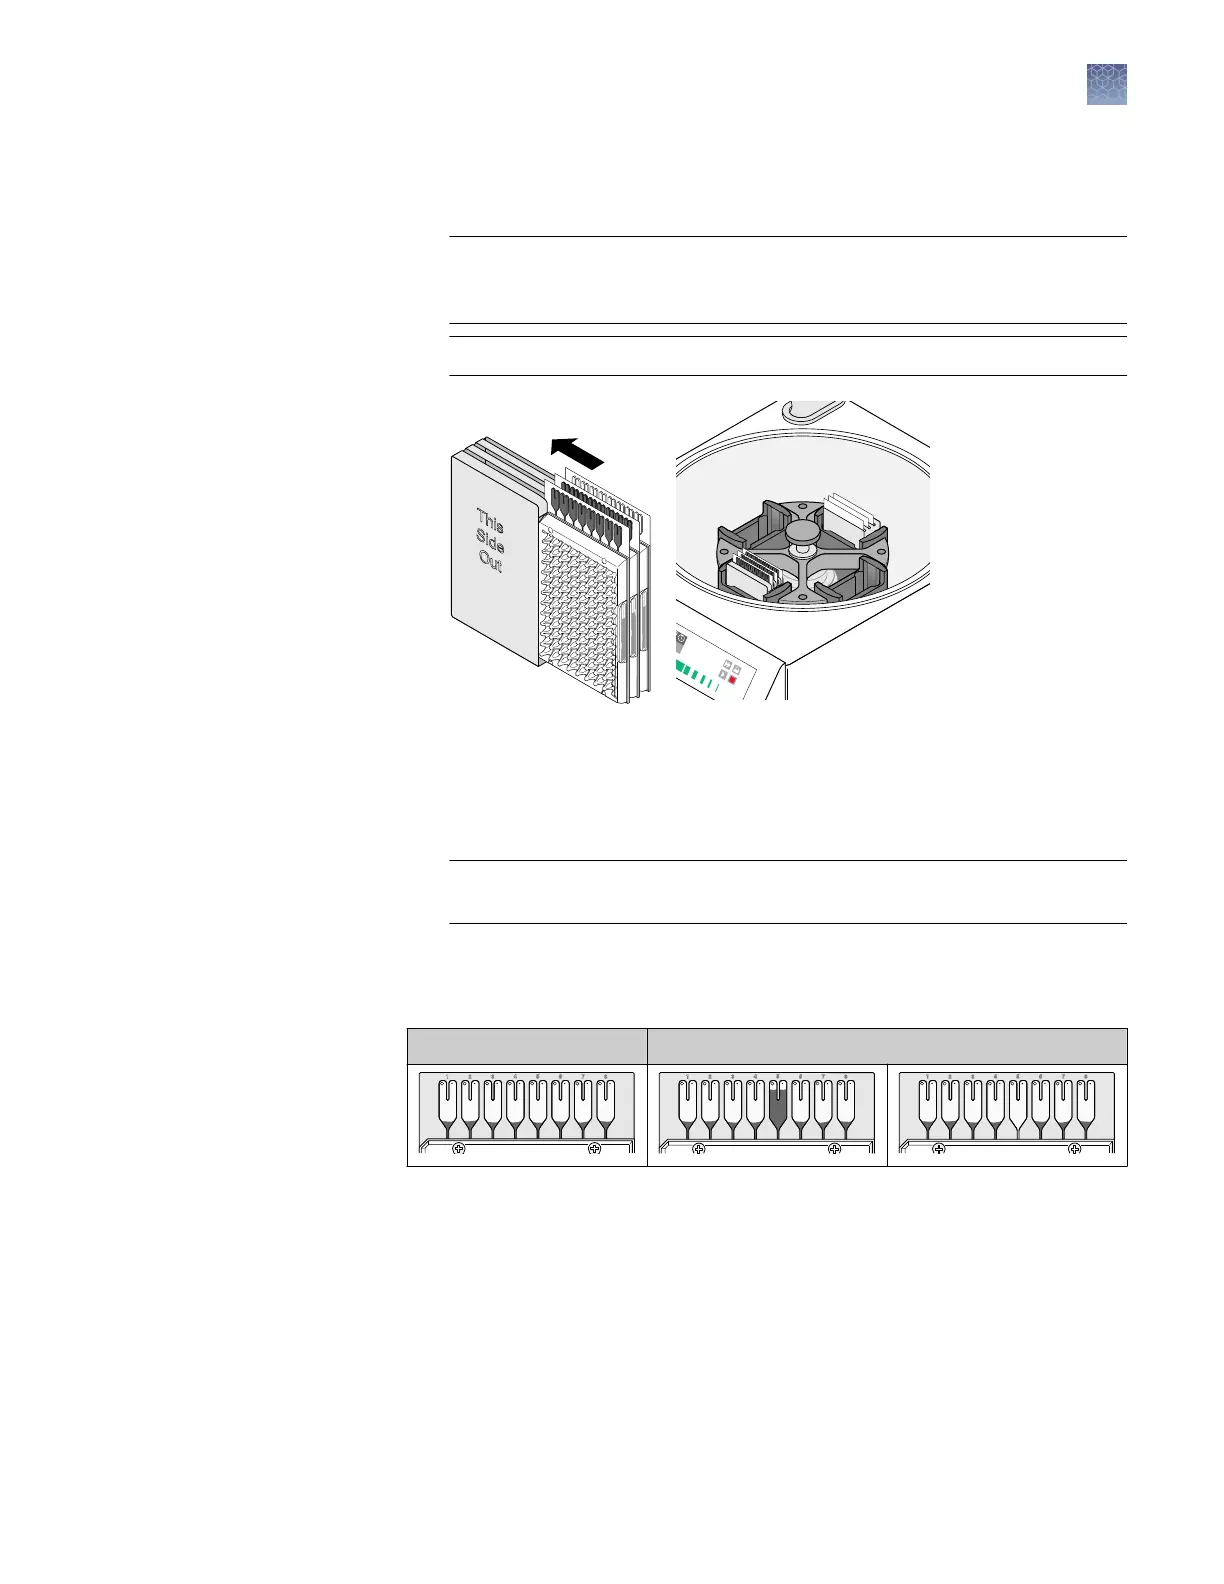
Place the lled carrier clips into the centrifuge buckets. Make sure that the
array card ll reservoirs and bucket and clip labels face outward when
loaded into the centrifuge.
IMPORTANT! You must run the centrifuge with all four buckets in place
and each of the two carriers lled with array cards. Place empty array cards
into unlled slots.
IMPORTANT! Balance the loads in opposite buckets in the centrifuge.
GR2155
Microfluidic Card
Plates into clip
GR2161
Microfluidic Card
Centrifuge half full
c.
Close the centrifuge cover, then spin the array card(s) for 1 minute at
1200 rpm.
d.
When the run is nished, stop the centrifuge, then spin the array card(s)
again for 1 minute at 1200 rpm.
IMPORTANT! Do not try to sav
e time by doing one spin for 2 minutes. The
two sets of ramps are important for a good ll into the array card.
7.
When the second run is nished, open the centrifuge and check that the uid
lev
els in the reservoirs of each array card have decreased by the same amount.
Also, check all wells for bubbles and note the locations as possible problems.
Correct fill Incorrect/partial fill
GR2157
Microfluidic Card
Card structure
GR2162
Microfluidic Card
Bad fill 1
GR2163
Microfluidic Card
Bad fill 2
If necessary, centrifuge the array cards for an additional minute to ll any
unlled wells. Do not exceed three 1-minute runs or centrifuge the array card for
longer than 1 minute at a time.
Chapter 2 Calibrate the instrument
Preparing array cards for instrument calibration
2
QuantStudio
™
6 and 7 Flex Real-Time PCR Systems v1.6 Maintenance and Administration Guide
39