13. Click on the Connect button, this will open the serial or network port.
(Note that if successful the Connect button changes to Disconnect)
14. Click the cursor into the main text box where Communication Off is usually displayed.
15. Select one of the following procedures depending on your hardware...
8-bit Control PCB
a. Make sure Caps Lock is Off.
b. Click on the Clear button to clear the screen below.
c. Hold down the X key on the PC keyboard and set the On/Off switch on the 8-bit Control
PCB to On.
d. The following information should appear within a couple of seconds
MAC address 00204A802CA8
Software version 01.2 (030210) XPT
Press Enter to go into Setup Mode
e. Press Enter quickly to go into the Set-up mode.
f. Now refer to the Configuration section further below.
g. When complete, close the Diagnostics window in Traka32.
h. Disconnect the RS232 cable.
i. Set the jumper settings on the 8-bit Control PCB to Ethernet. Please refer to the
Communications section for details of the jumper settings.
j. Finally, close the Control Panel carefully and lock with the Master Key.
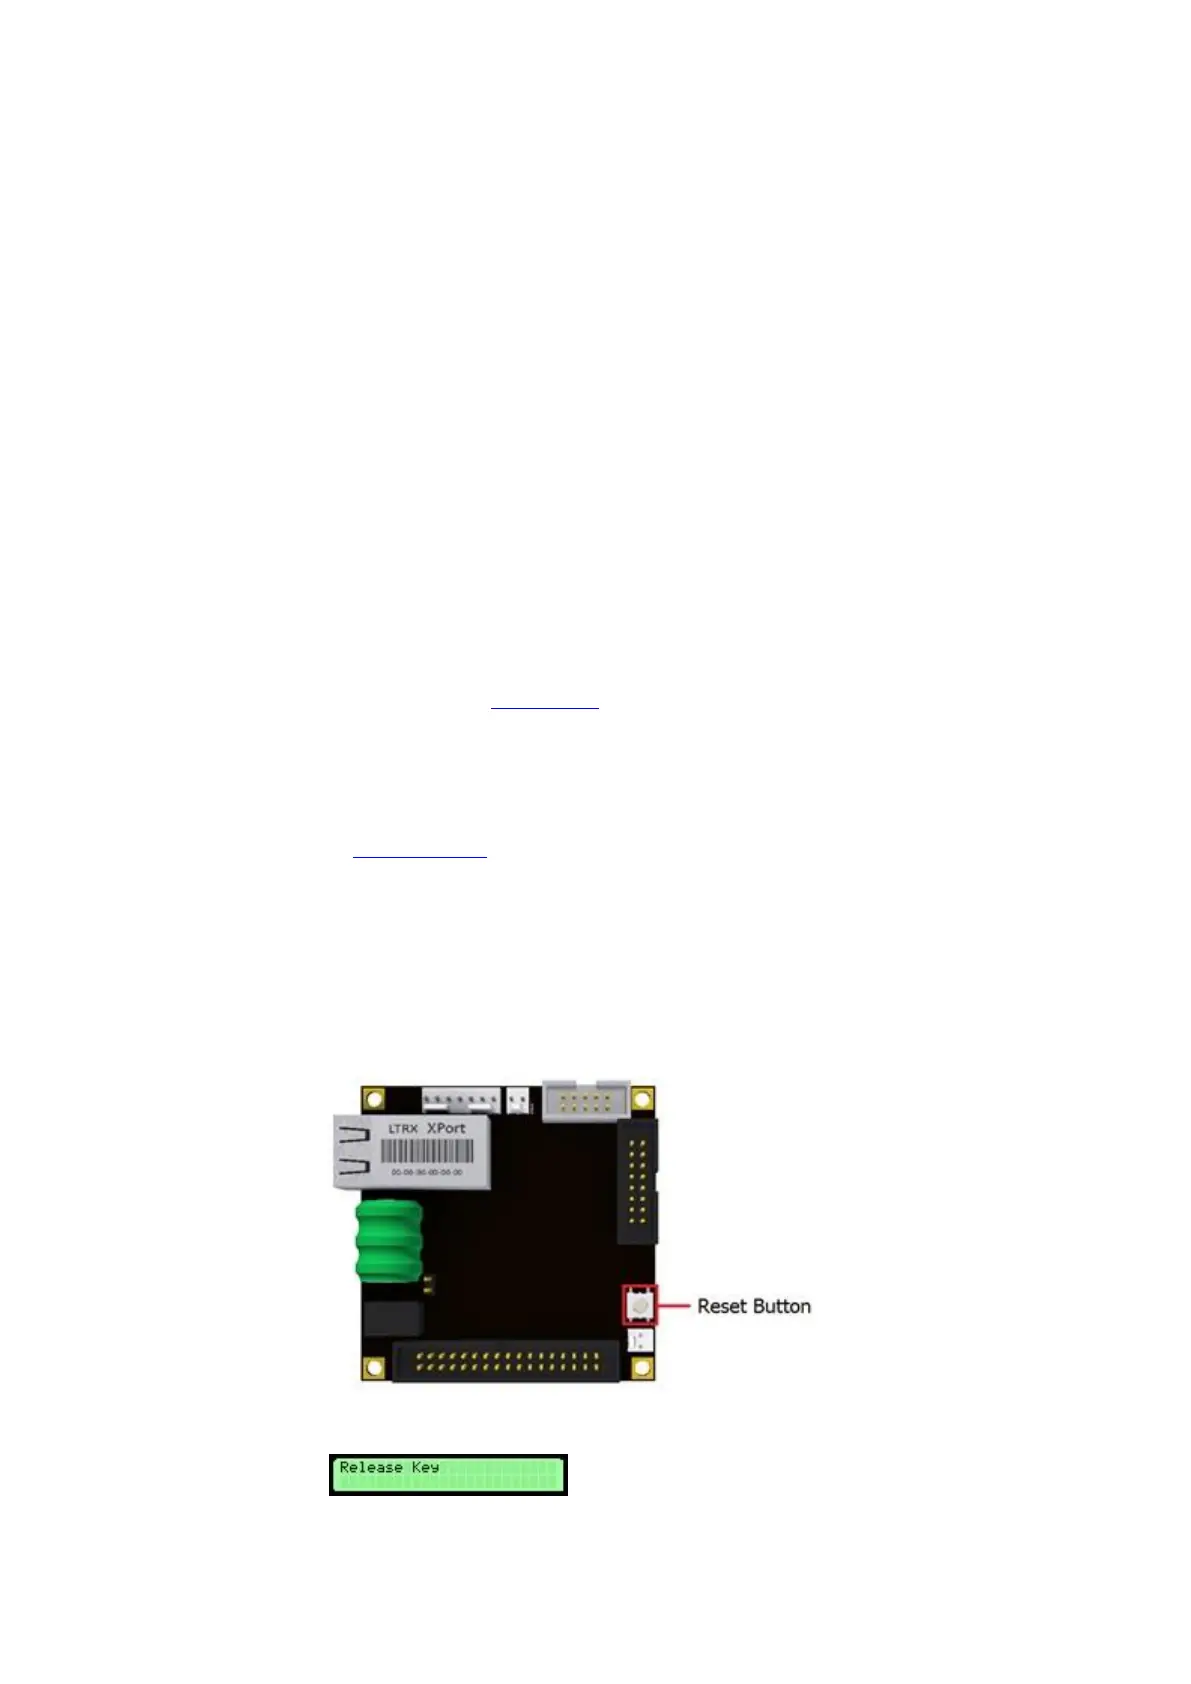
16-bit Control PCB
The 16-bit Control PCB needs to be placed in XPort mode from the Setup Menu. To do this...
a. Press and hold the Reset Button on the 16bit Control PCB, then press and hold the '#' key
on the Keypad.
b. Keeping hold the '#' key, release the Reset Button and the following message will appear...