10. On the Bioassay Results screen, the Isotopes section on the lower left allows the user to
select full spectrum or any other isotope that has been made available for this staff
member. Making an isotope selection changes the results and the screen ROI to reflect the
data for the specific isotope selected.
11. The results show which Isotopes pass or fail and allow the user to change the results units
to dpm, µCI or Cnts. Select <Analysis> if a spectrum analysis is desired. Select <Staff> to
change the staff member performing the test, or select <Accept> to save this Bioassay
result and return to the Bioassay Test screen to select another person and perform the next
Bioassay test. Select <Cancel> to return to Bioassay Test screen without saving.
NOTE: Full spectrum results will only be displayed in counts. All other isotopes can be
displayed in dpm, µCi/Bq or counts.
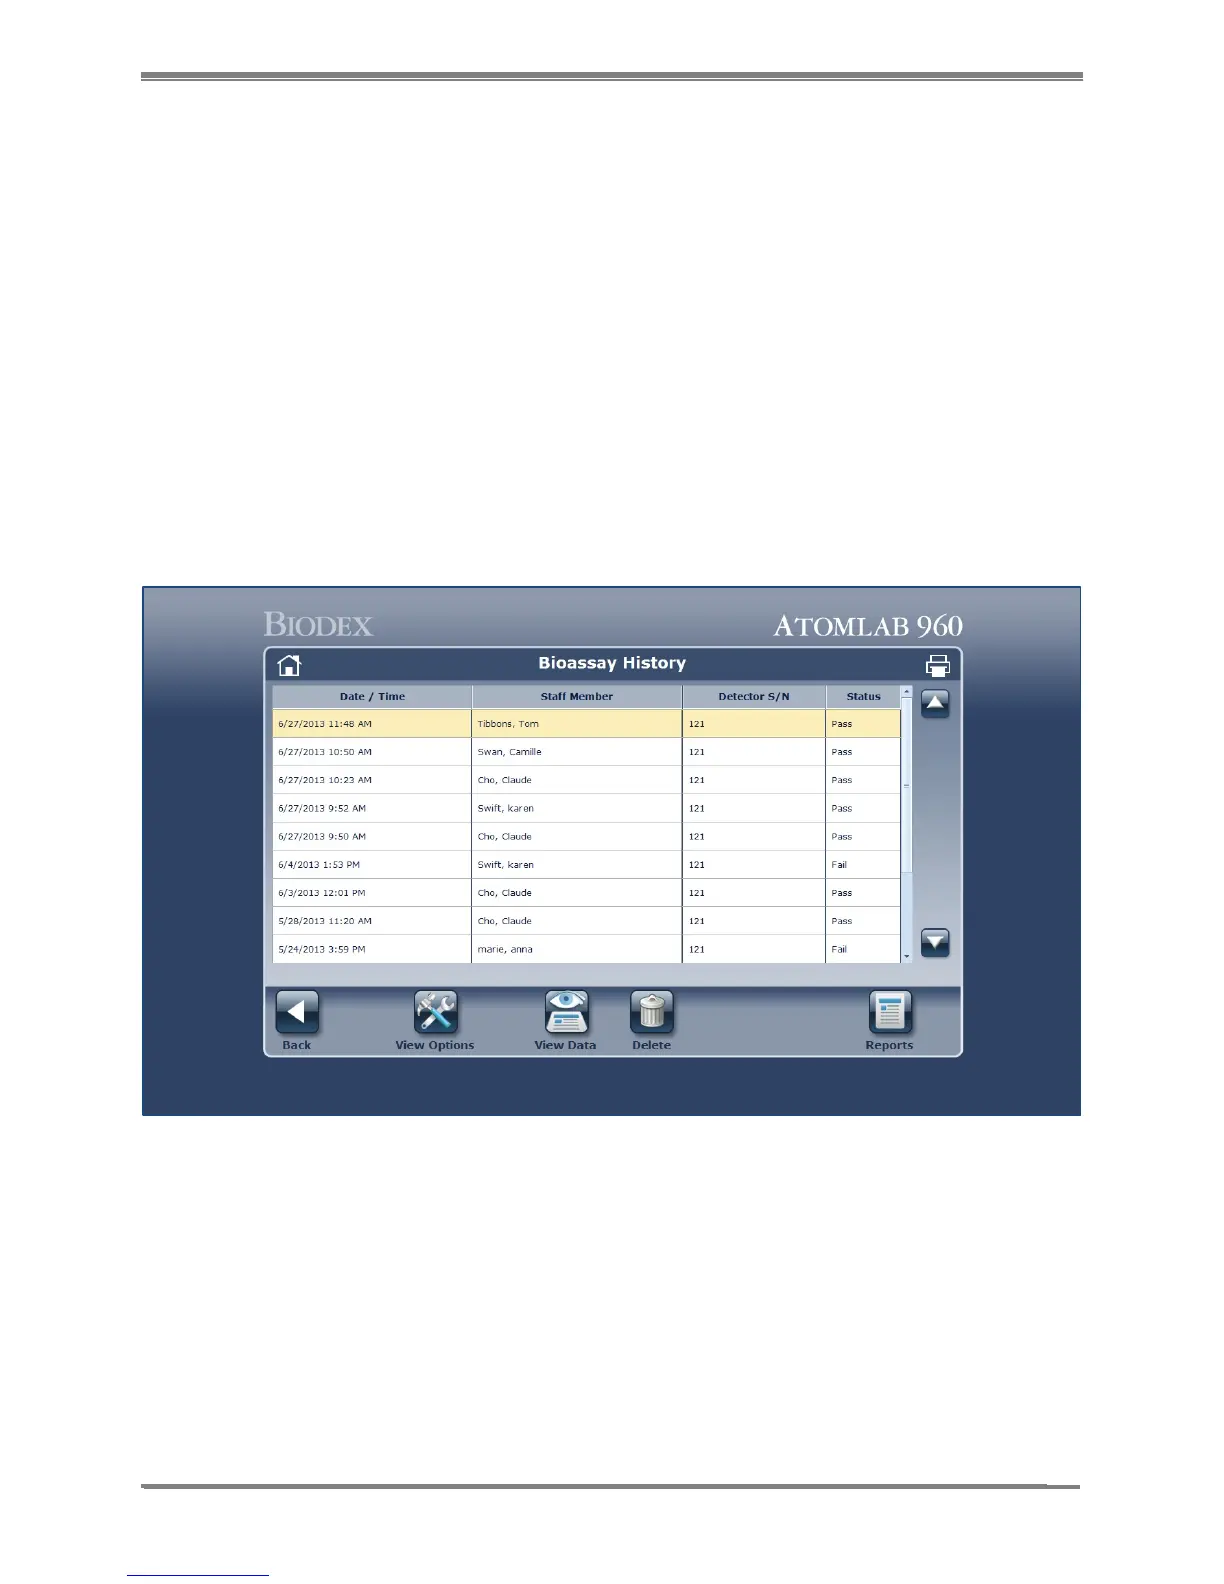
12. Once the desired Bioassay tests are completed, select <History> to display the Bioassay
History screen. Select a specific Bioassay performed and select <View Data> to show the
specific Bioassay results for the selected Bioassay.
13. From the Bioassay History screen, see Bioassay Facility Summary Report.
Figure 9.5. Bioassay History screen.