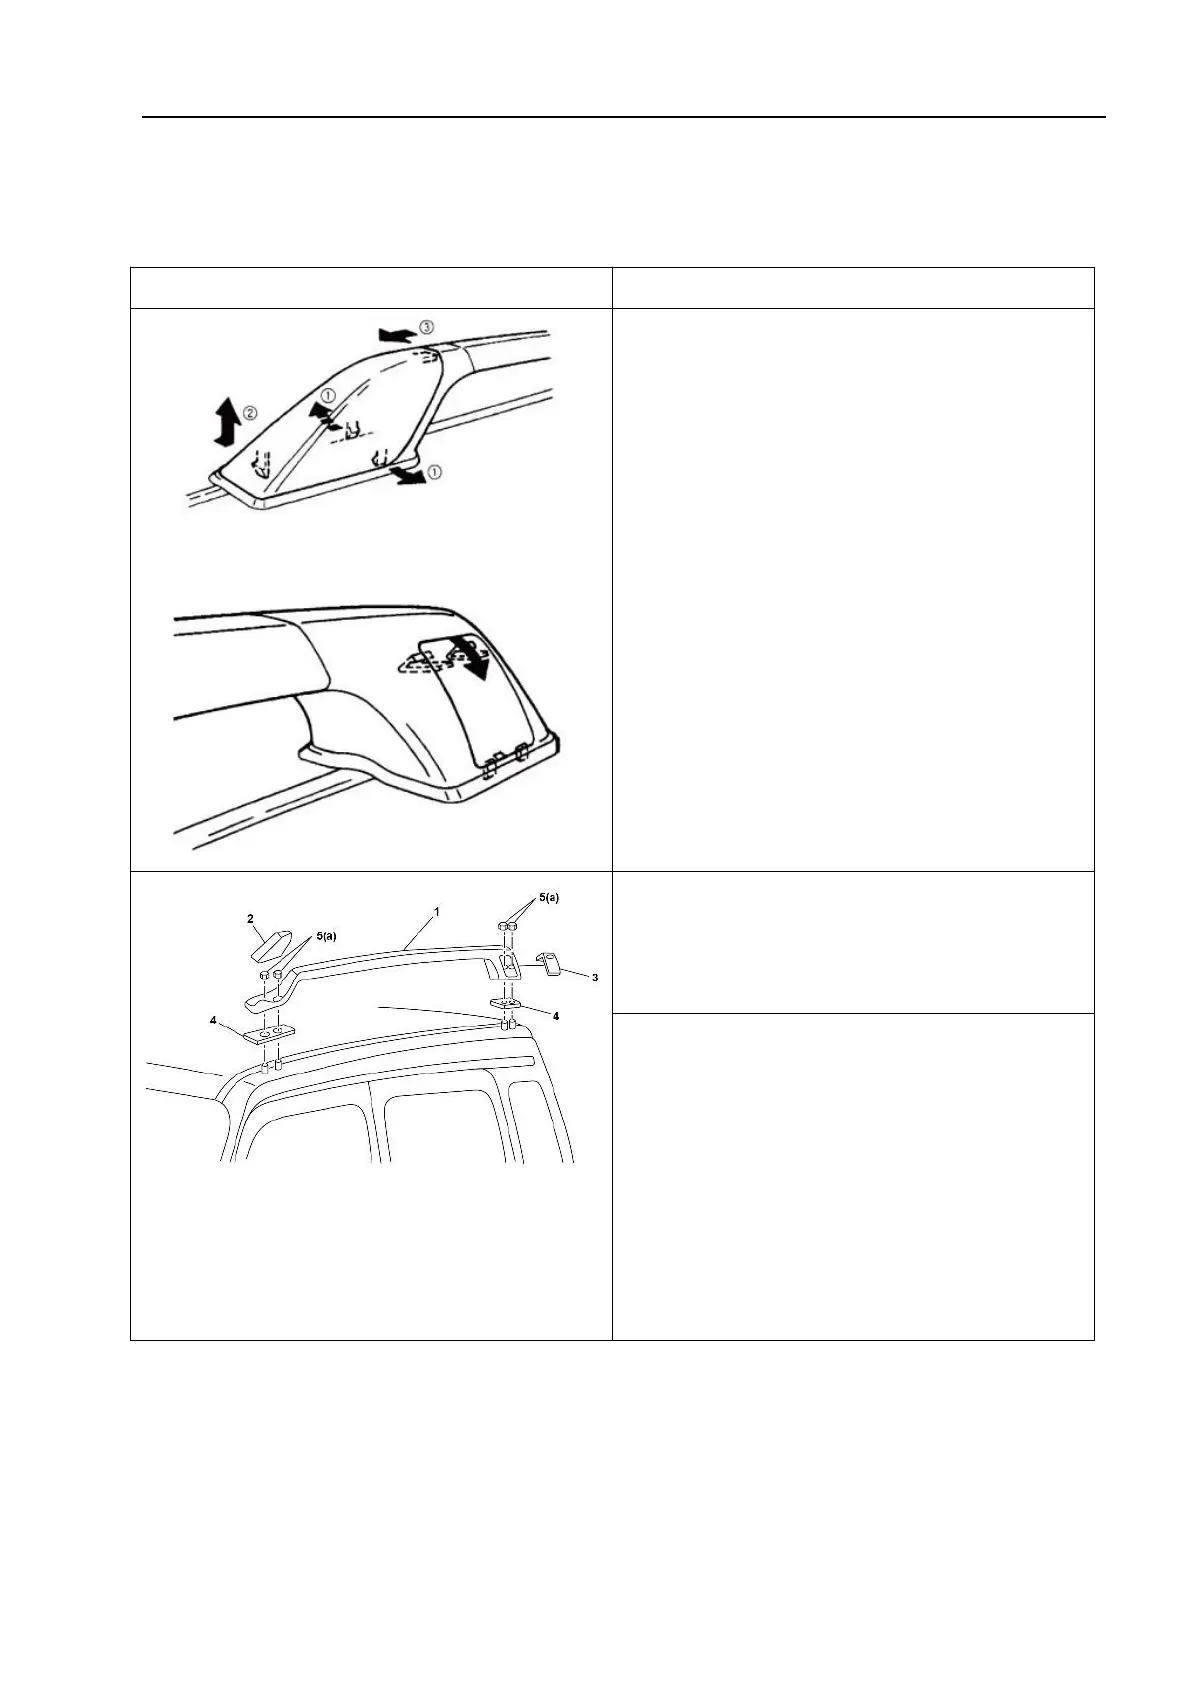
Exterior trims
3.6.2 Roof rack (if equipped)
Removal
1. Remove the front and rear caps of the
roof rack as shown in the figure.
1 - Roof rack support rod assembly; 2-Front
cover of roof rack brace; 3 - Rear cover of roof
rack brace; 4-Base sealing gasket of roof rack
brace; 5-Hexagon flange face and conical elastic
washer assembly
3. Remove the roof rack assembly.
Installation
Install the roof rack assembly in the reverse order of removal.
Confirm that the mounting nuts for each roof rack are securely tightened. Tightening
torque: (a):10N·m(1.0kg·m, 7.5ft-lbs)