1-19
Catalyst 3750-X and 3560-X Switch Software Configuration Guide
OL-25303-03
Appendix 1 Working with the Cisco IOS File System, Configuration Files, and Software Images
Working with Configuration Files
This example shows how to specify a remote username of netadmin1. Then it copies the configuration
file host2-confg from the netadmin1 directory on the remote server with an IP address of 172.16.101.101
to the startup configuration:
Switch# configure terminal
Switch(config)# ip rcmd remote-username netadmin1
Switch(config)# end
Switch# copy rcp: nvram:startup-config
Address of remote host [255.255.255.255]? 172.16.101.101
Name of configuration file[rtr2-confg]? host2-confg
Configure using host2-confg from 172.16.101.101?[confirm]
Connected to 172.16.101.101
Loading 1112 byte file host2-confg:![OK]
[OK]
Switch#
%SYS-5-CONFIG_NV:Non-volatile store configured from host2-config by rcp from
172.16.101.101
Uploading a Configuration File By Using RCP
Beginning in privileged EXEC mode, follow these steps to upload a configuration file by using RCP:
This example shows how to copy the running configuration file named switch2-confg to the netadmin1
directory on the remote host with an IP address of 172.16.101.101:
Switch# copy system:running-config rcp://netadmin1@172.16.101.101/switch2-confg
Write file switch-confg on host 172.16.101.101?[confirm]
Building configuration...[OK]
Connected to 172.16.101.101
Switch#
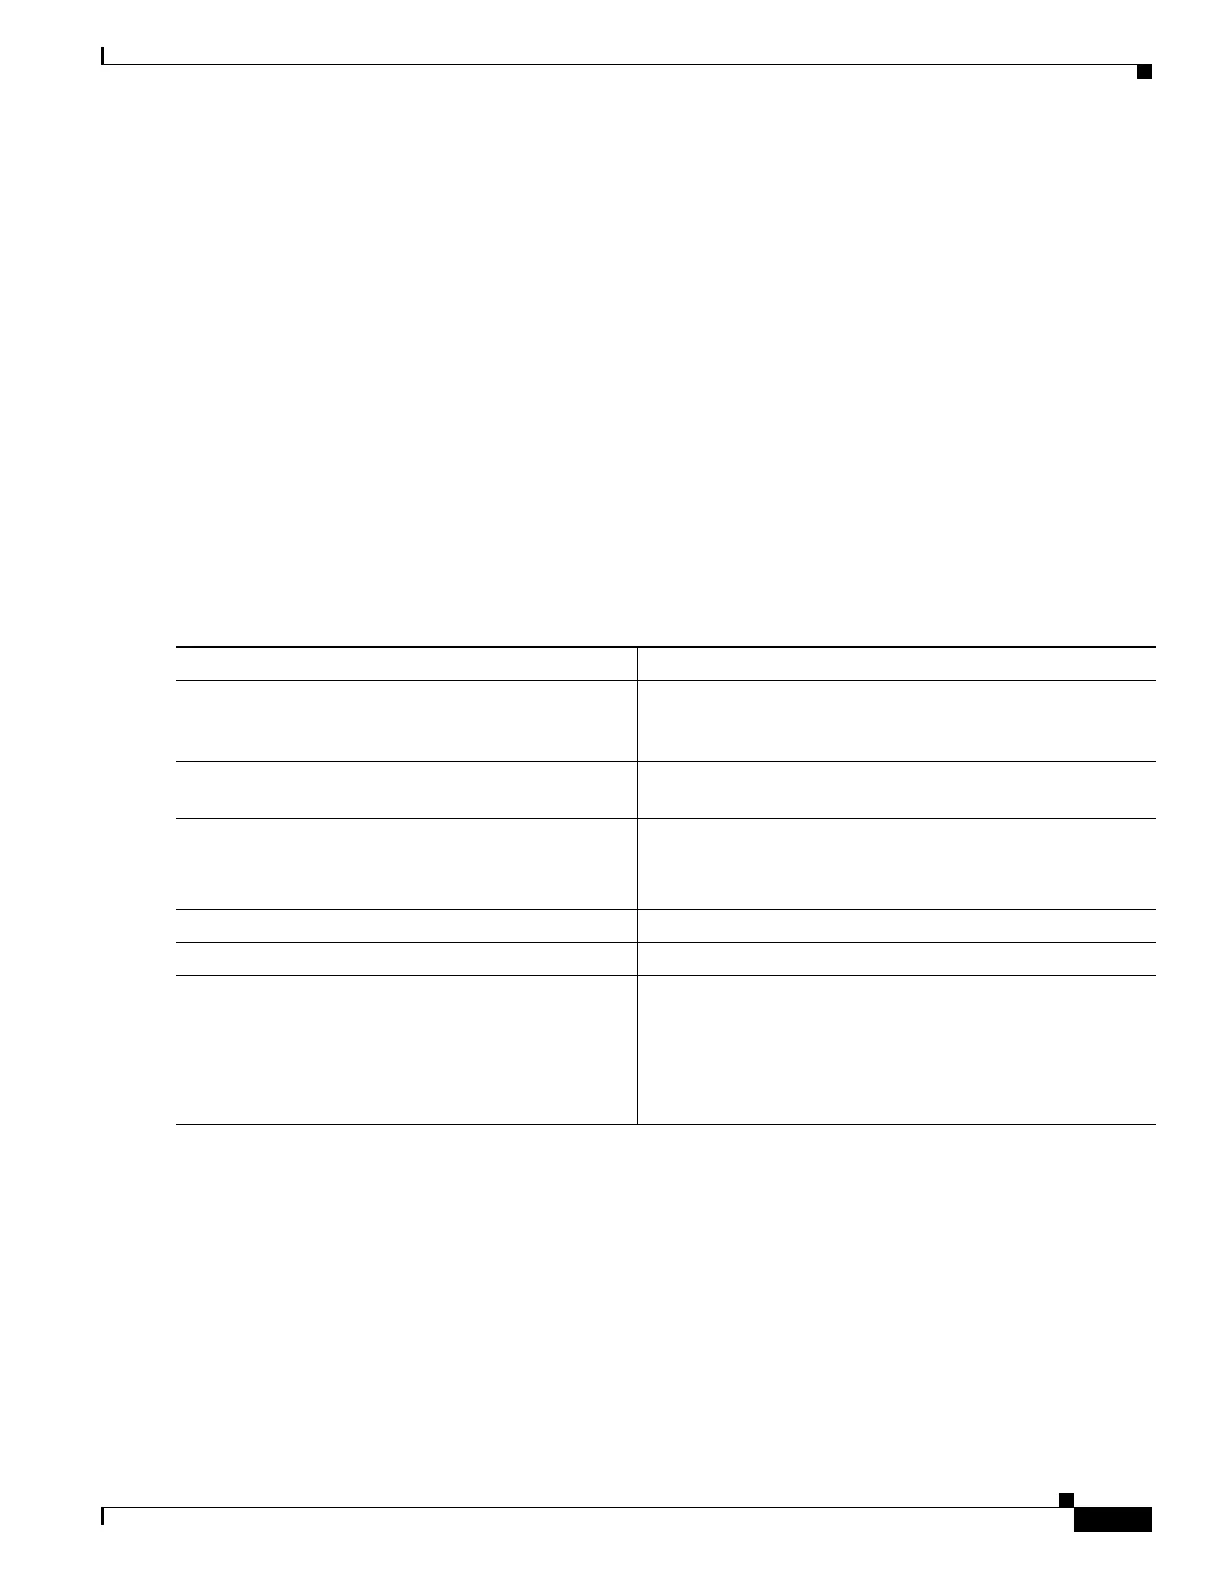
Command Purpose
Step 1
Verify that the RCP server is properly configured by
referring to the “Preparing to Download or Upload a
Configuration File By Using RCP” section on page 1-17.
Step 2
Log into the switch through the console port, the Ethernet
management port, or a Telnet session.
Step 3
configure terminal Enter global configuration mode.
This step is required only if you override the default remote
username (see Steps 4 and 5).
Step 4
ip rcmd remote-username username (Optional) Specify the remote username.
Step 5
end Return to privileged EXEC mode.
Step 6
copy system:running-config
rcp:[[[//[username@]location]/directory]/filename]
or
copy nvram:startup-config
rcp:[[[//[username@]location]/directory]/filename]
Using RCP, copy the configuration file from a switch running
or startup configuration file to a network server.