1-18
Catalyst 3750-X and 3560-X Switch Software Configuration Guide
OL-25303-03
Chapter 1 Configuring Interface Characteristics
Using the Switch USB Ports
Note The configured inactivity timeout applies to all switches in a stack. However, a timeout on one switch
does not cause a timeout on other switches in the stack.
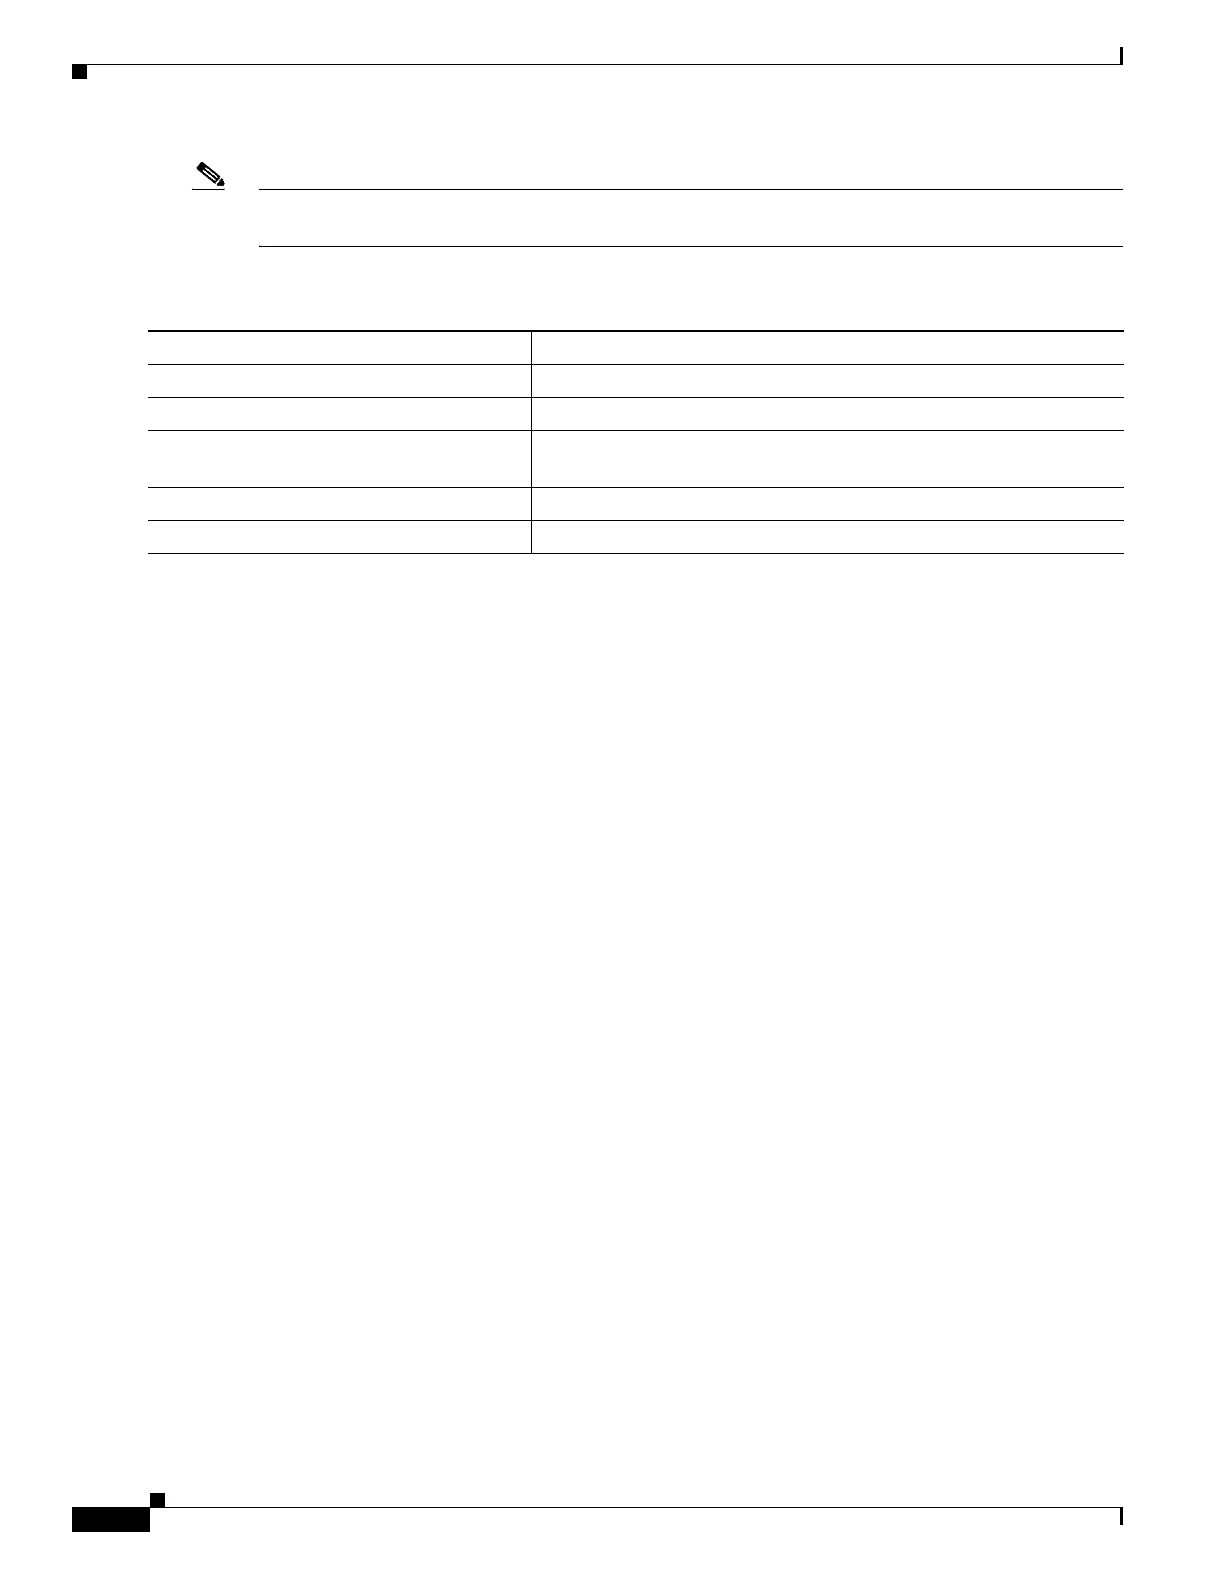
To configure an inactivity timeout, follow these steps beginning in privileged EXEC mode:
This example configures the inactivity timeout to 30 minutes:
Switch# configure terminal
Switch(config)# line console 0
Switch(config-line)# usb-inactivity-timeout 30
To disable the configuration, use these commands:
Switch(config)# line console 0
Switch(config-line)# no usb-inactivity-timeout
If there is no (input) activity on a USB console for the configured number of minutes, the console reverts
to RJ-45, and a log shows this occurrence:
*Mar 1 00:47:25.625: %USB_CONSOLE-6-INACTIVITY_DISABLE: Console media-type USB disabled
due to inactivity, media-type reverted to RJ45.
At this point, the only way to reactivate the USB console is to disconnect and reconnect the cable.
When the USB cable on the switch has been disconnected and reconnected, a log similar to this appears:
*Mar 1 00:48:28.640: %USB_CONSOLE-6-MEDIA_USB: Console media-type is USB.
USB Type A Port
The USB Type A port provides access to external Cisco USB flash devices, also known as thumb drives
or USB keys. The switch supports Cisco 64 MB, 256 MB, 512 MB, and 1 GB flash drives. You can use
standard Cisco IOS command- line interface (CLI) commands to read, write, erase, and copy to or from
the flash device. You can also configure the switch to boot from the USB flash drive.
Command Purpose
Step 1
configure terminal Enter global configuration mode.
Step 2
line console 0 Configure the console port. Enter console line configuration mode.
Step 3
usb-inactivity-timeout timeout-minutes Specify an inactivity timeout for the console port. The range is 1 to
240 minutes. The default is no timeout.
Step 4
show running-configuration Verify your setting.
Step 5
copy running-config startup-config (Optional) Save your entries in the configuration file.