To do this, go to „File->Import settings" and
select the file "HighZ_LengthProbe.ini" in
the "Addons" subdirectory under "Default
parameters". This will both install the
required macros and assign the input for the
probe with the standard pin-assignment.
Test ing b e fore us e
It is very important that you check the correct function of the probe
before first use. To do this, please switch to the Diagnostic page.
For the inputs (top right), a "tool length
sensor" entry should be visible with a box
to the left. In the normal state, no check
mark may be displayed. Now press the
button with your hand. Now a tick must be
visible. If nothing changes, the probe is
either not connected correctly or the signal
is assigned to the wrong pin.
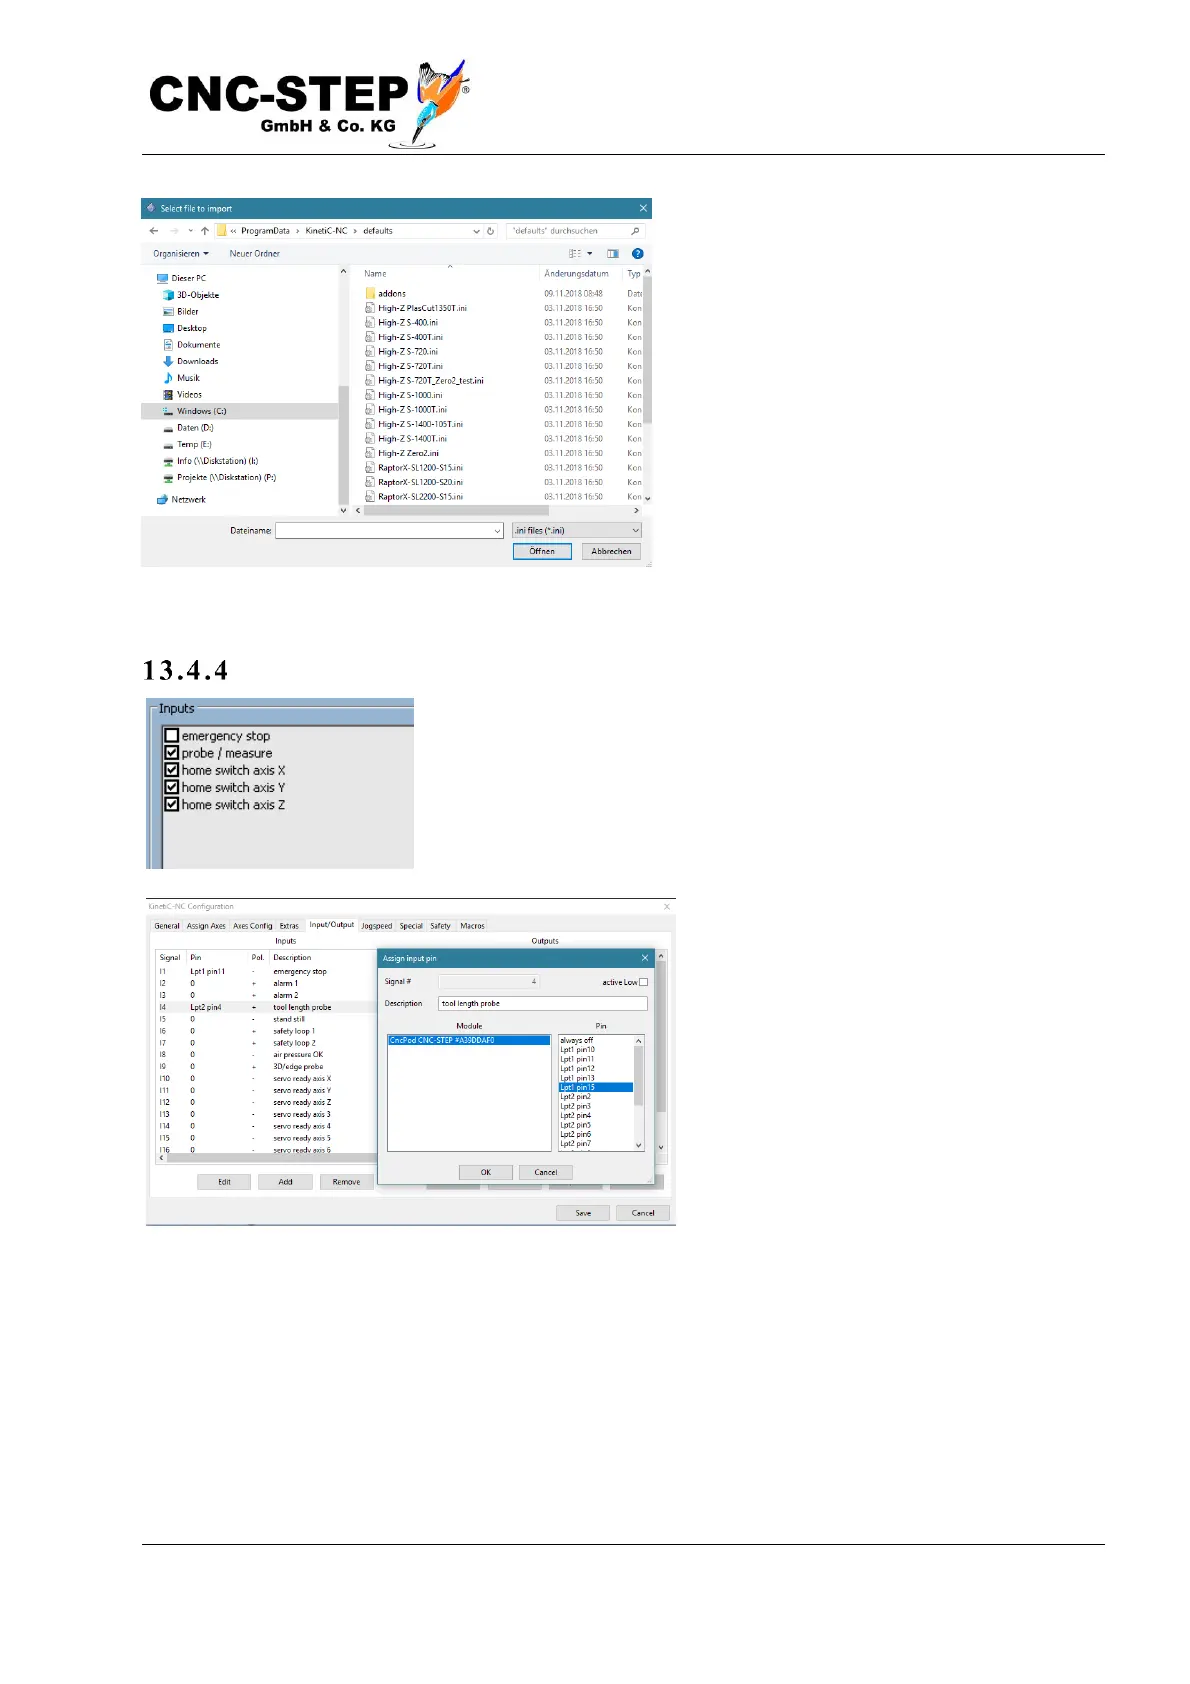
If the behavior is exactly the opposite (tick visible if button is not pressed), then you must invert the
signal. You can do this under „Configuration->Machine->Inputs/Outputs" by clicking on the
input "Tool length sensor" and then "Change". To invert the signal, change the state of the option
"low-active", top right.